It will be easier for you to oversee bandwidth and workflow for your shop by using the calendar to manage customer appointments scheduled for the day. This will help you dictate when you can take in walk-in customers, and how long the potential wait could be. You can also gauge the number of walk-ins each day by adjusting the colors and checking the create appointment with each new RO setting in advance settings.
This article reviews best practices when utilizing our appointment calendar.
Table of Contents:
Types of Appointments
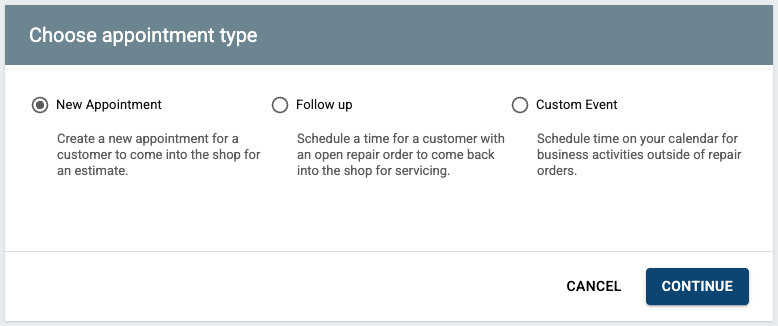
New Appointment
New appointments are the basic and most widely used type of appointments. These allow you to set the time and date of the appointment, add a customer and vehicle, appointment or waiter options, and add customer concerns that will be transferred to the RO.
Follow Up
Follow up events are used when you already have an RO open for a customer. They're the fastest way to set a following day, or following week appointment for a customer with an existing RO. These are helpful to block time on your calendar for when the customer is anticipated to return with their vehicle, or if you're keeping their vehicle for additional time to show that time on your calendar and keep the RO connected to the appointment.
Custom Event
Custom events are perfect for things like meetings, birthdays, or other activities that should be shown on your calendar but aren't tied to a specific vehicle or customer.
Within a custom event you can set a color, or assign an employee. Once created, you can add a customer, at which time the event will turn into a regular appointment.
Note that custom events are ignored by Tekmetric Online Booking. If you intend to block time from your scheduling with your online booking, use the Block Time button, detailed here.
Appointment Settings
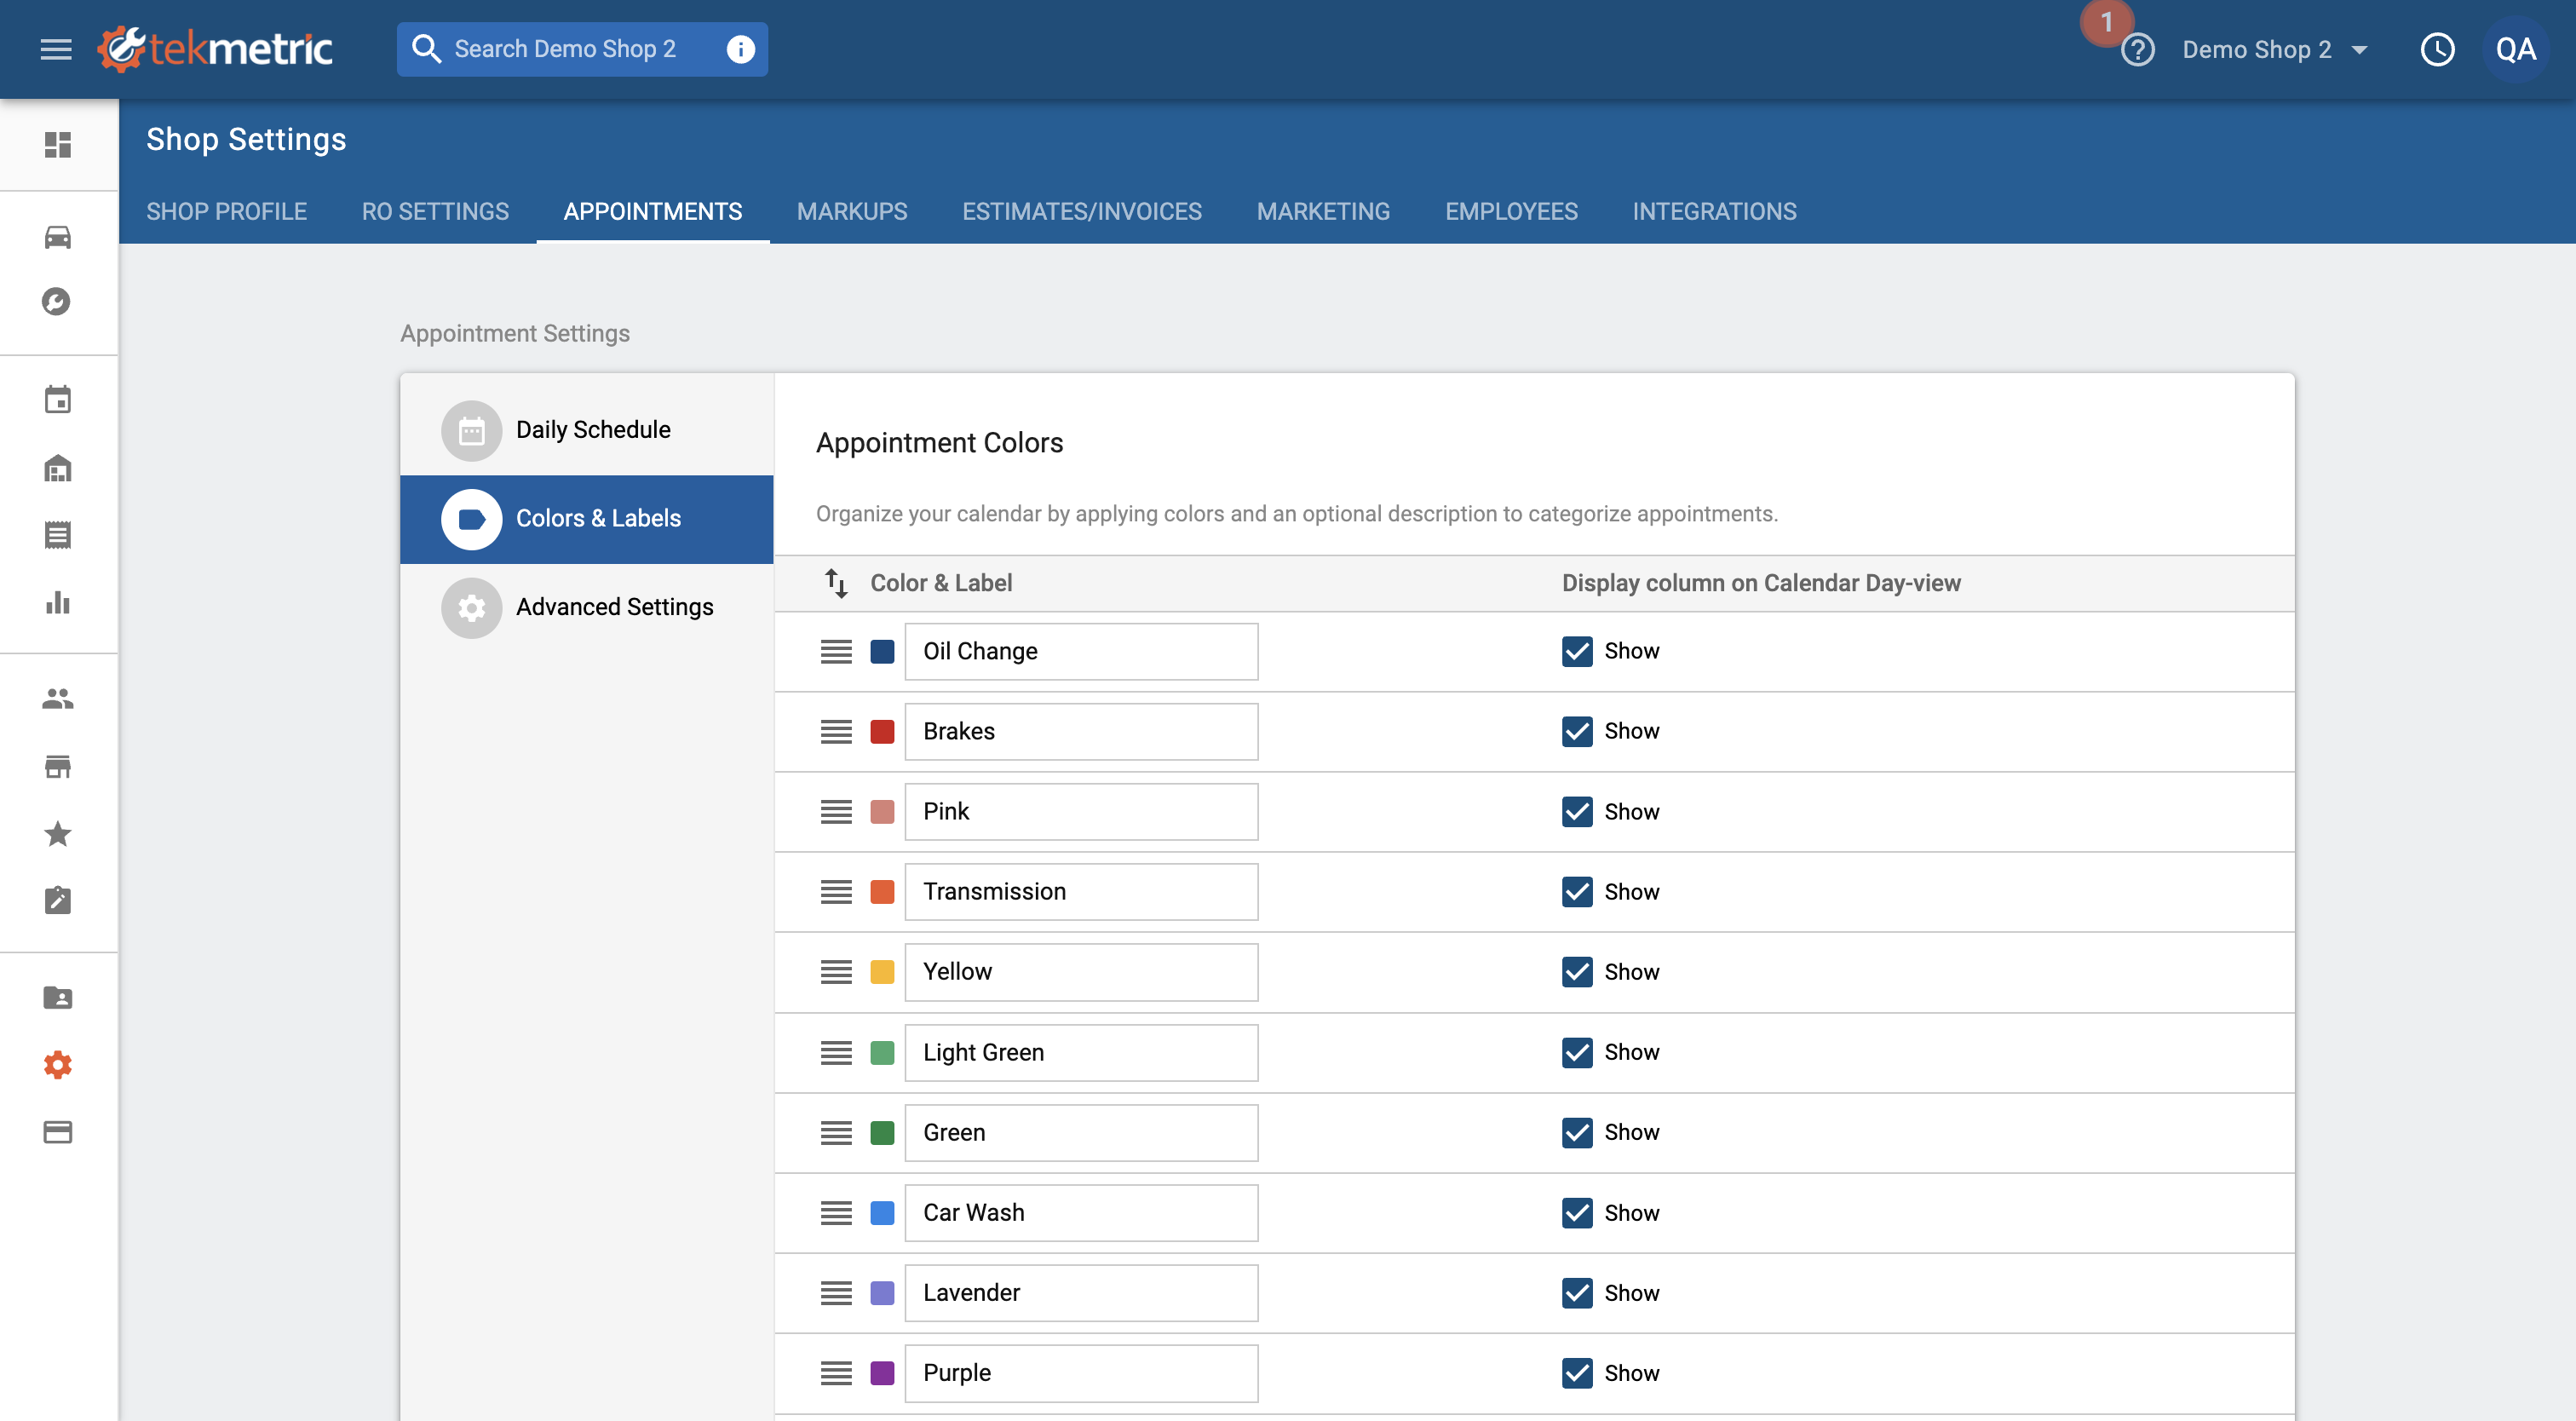
Colors & Label
You can organize your calendar by applying colors and an optional description to categorize appointments. To do so, navigate to Shop Settings > Appointments > Colors & Labels. You can re-arrange the colors and labels as well as configure the columns that you want to show on the appointment calendar.
By default, all appointments created will be dark blue. You can change the color during initial appointment creation or afterward by editing the appointment or dragging and dropping using the View by Day-Color configuration on the calendar.
Ideas and recommendations on what to label colors as:
- Bays
- Common Jobs that appointments get scheduled for
- If a certain tool or equipment needs to be used
Daily Schedule
You can control the hours which the appointment calendar displays for the week and day views. We recommend to show your working hours.
You can also set the default appointment duration.

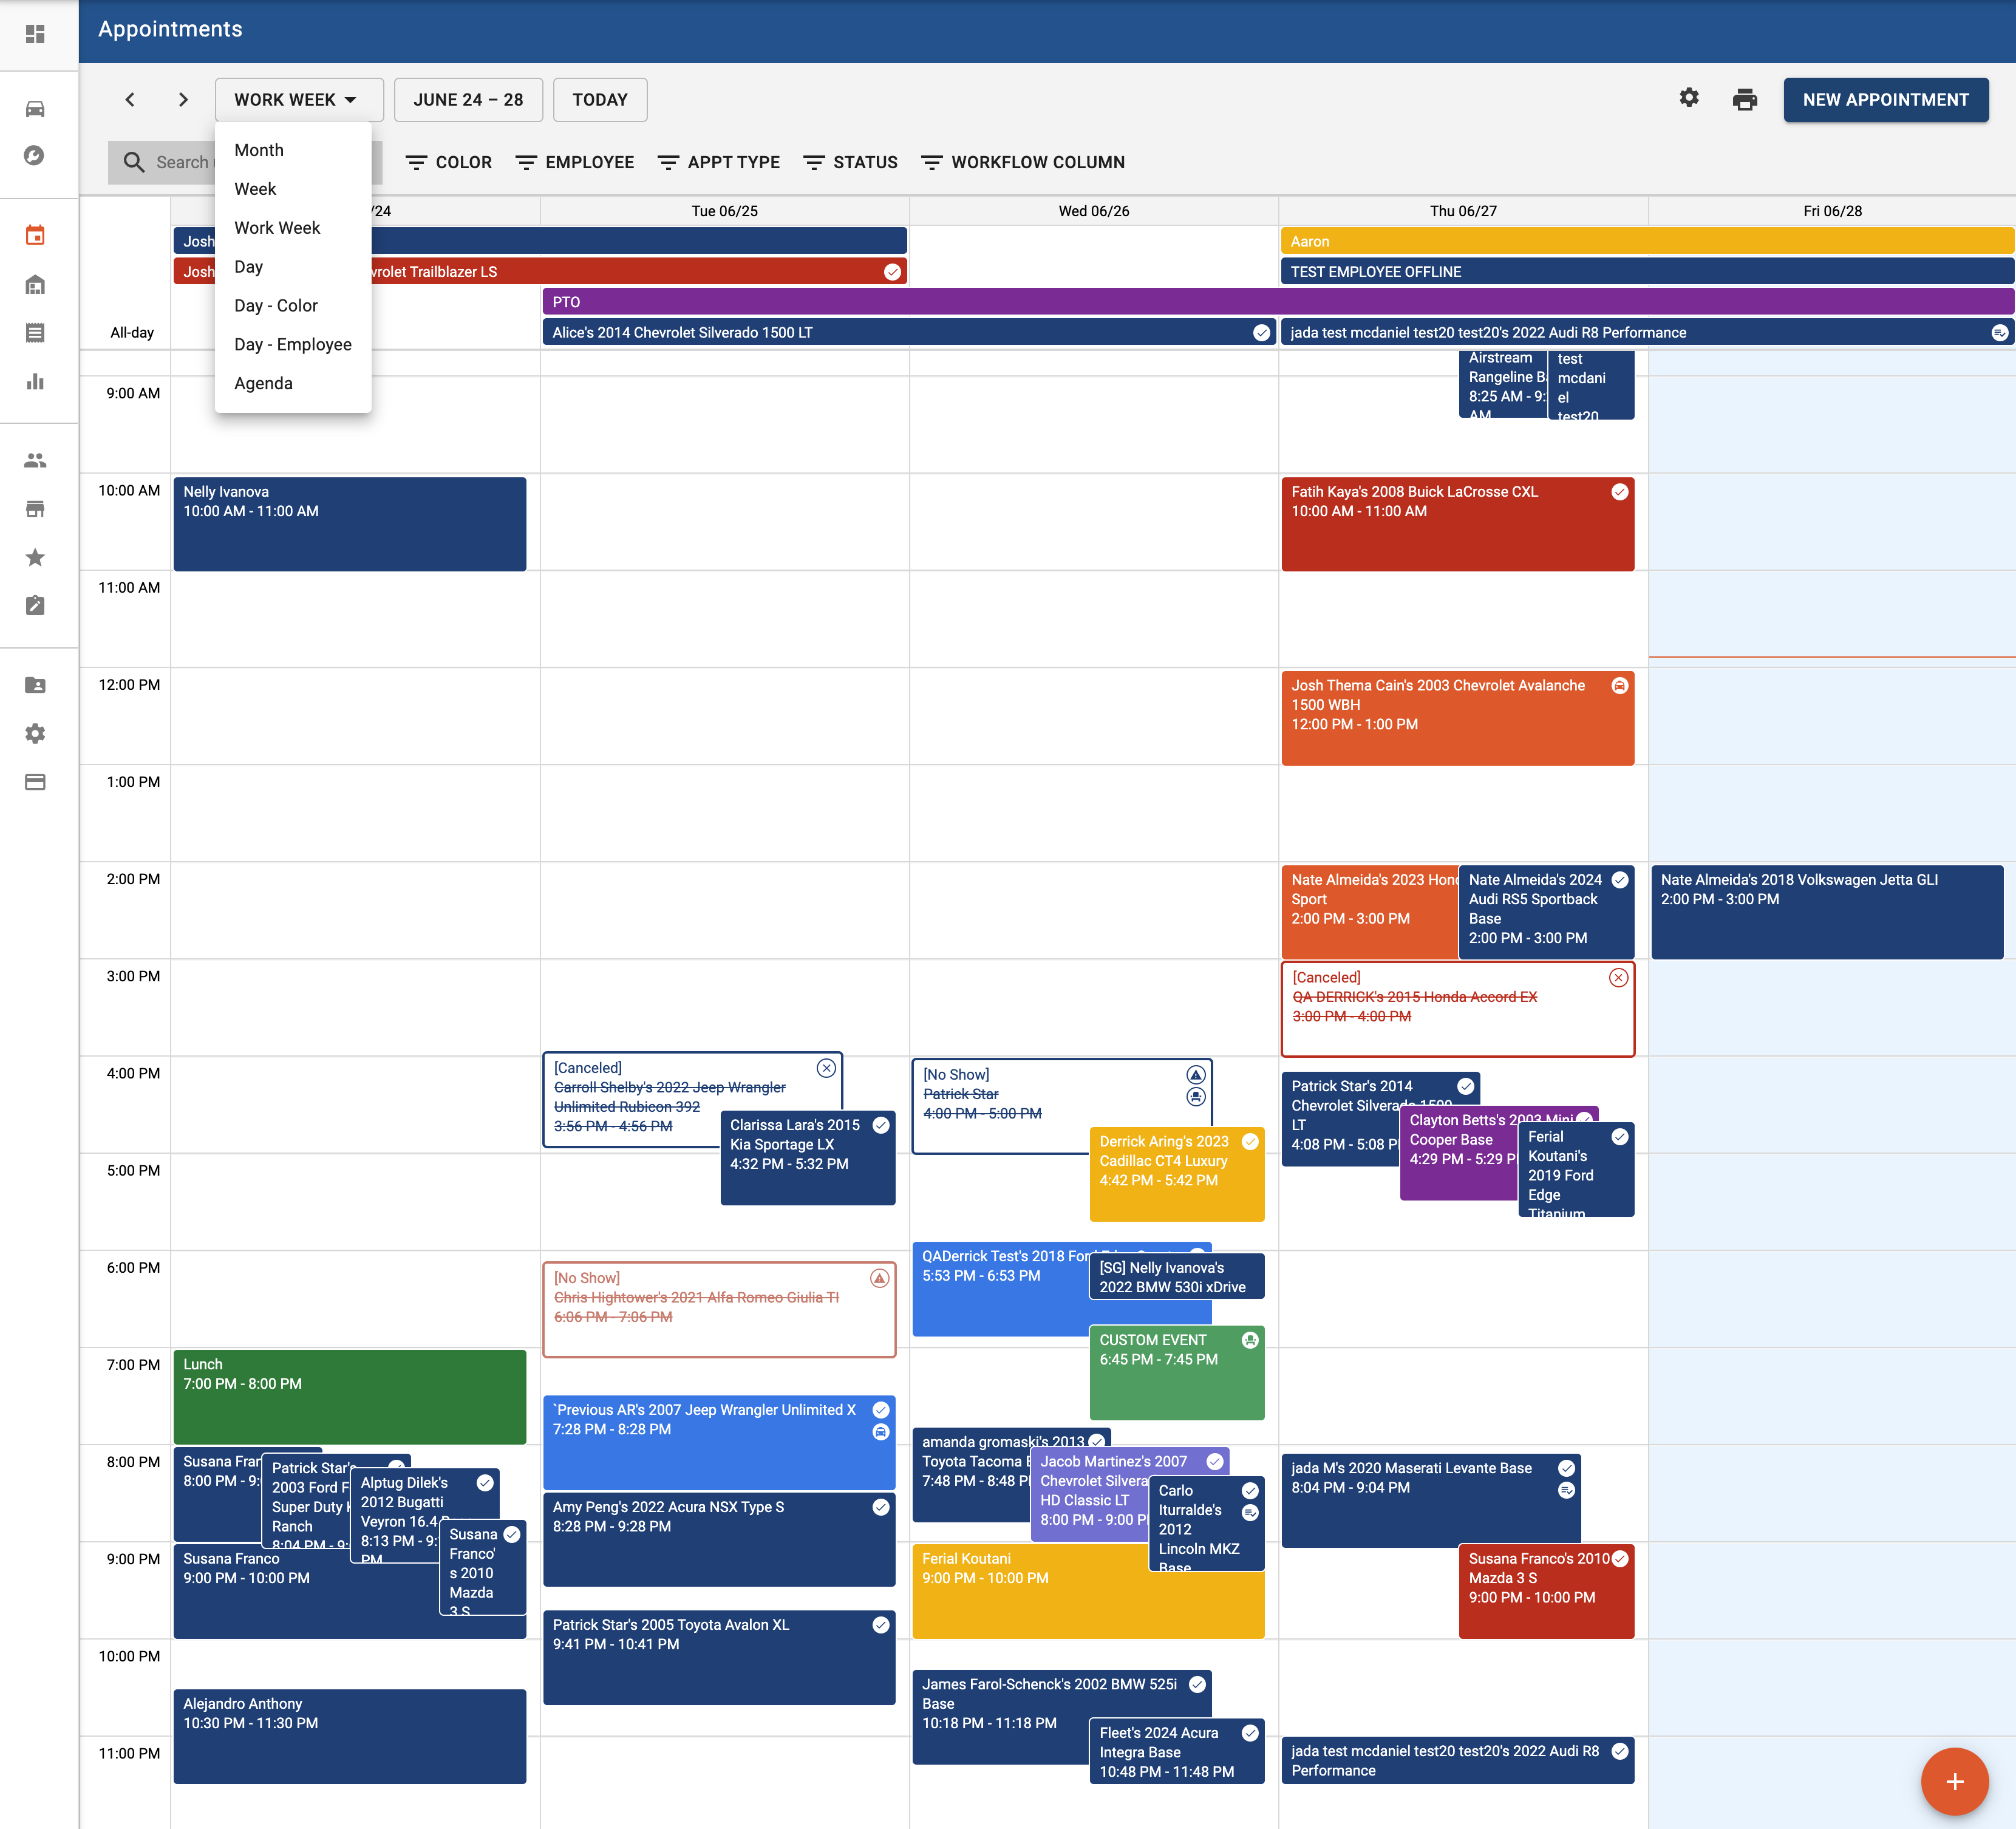
Appointment Views and Filters
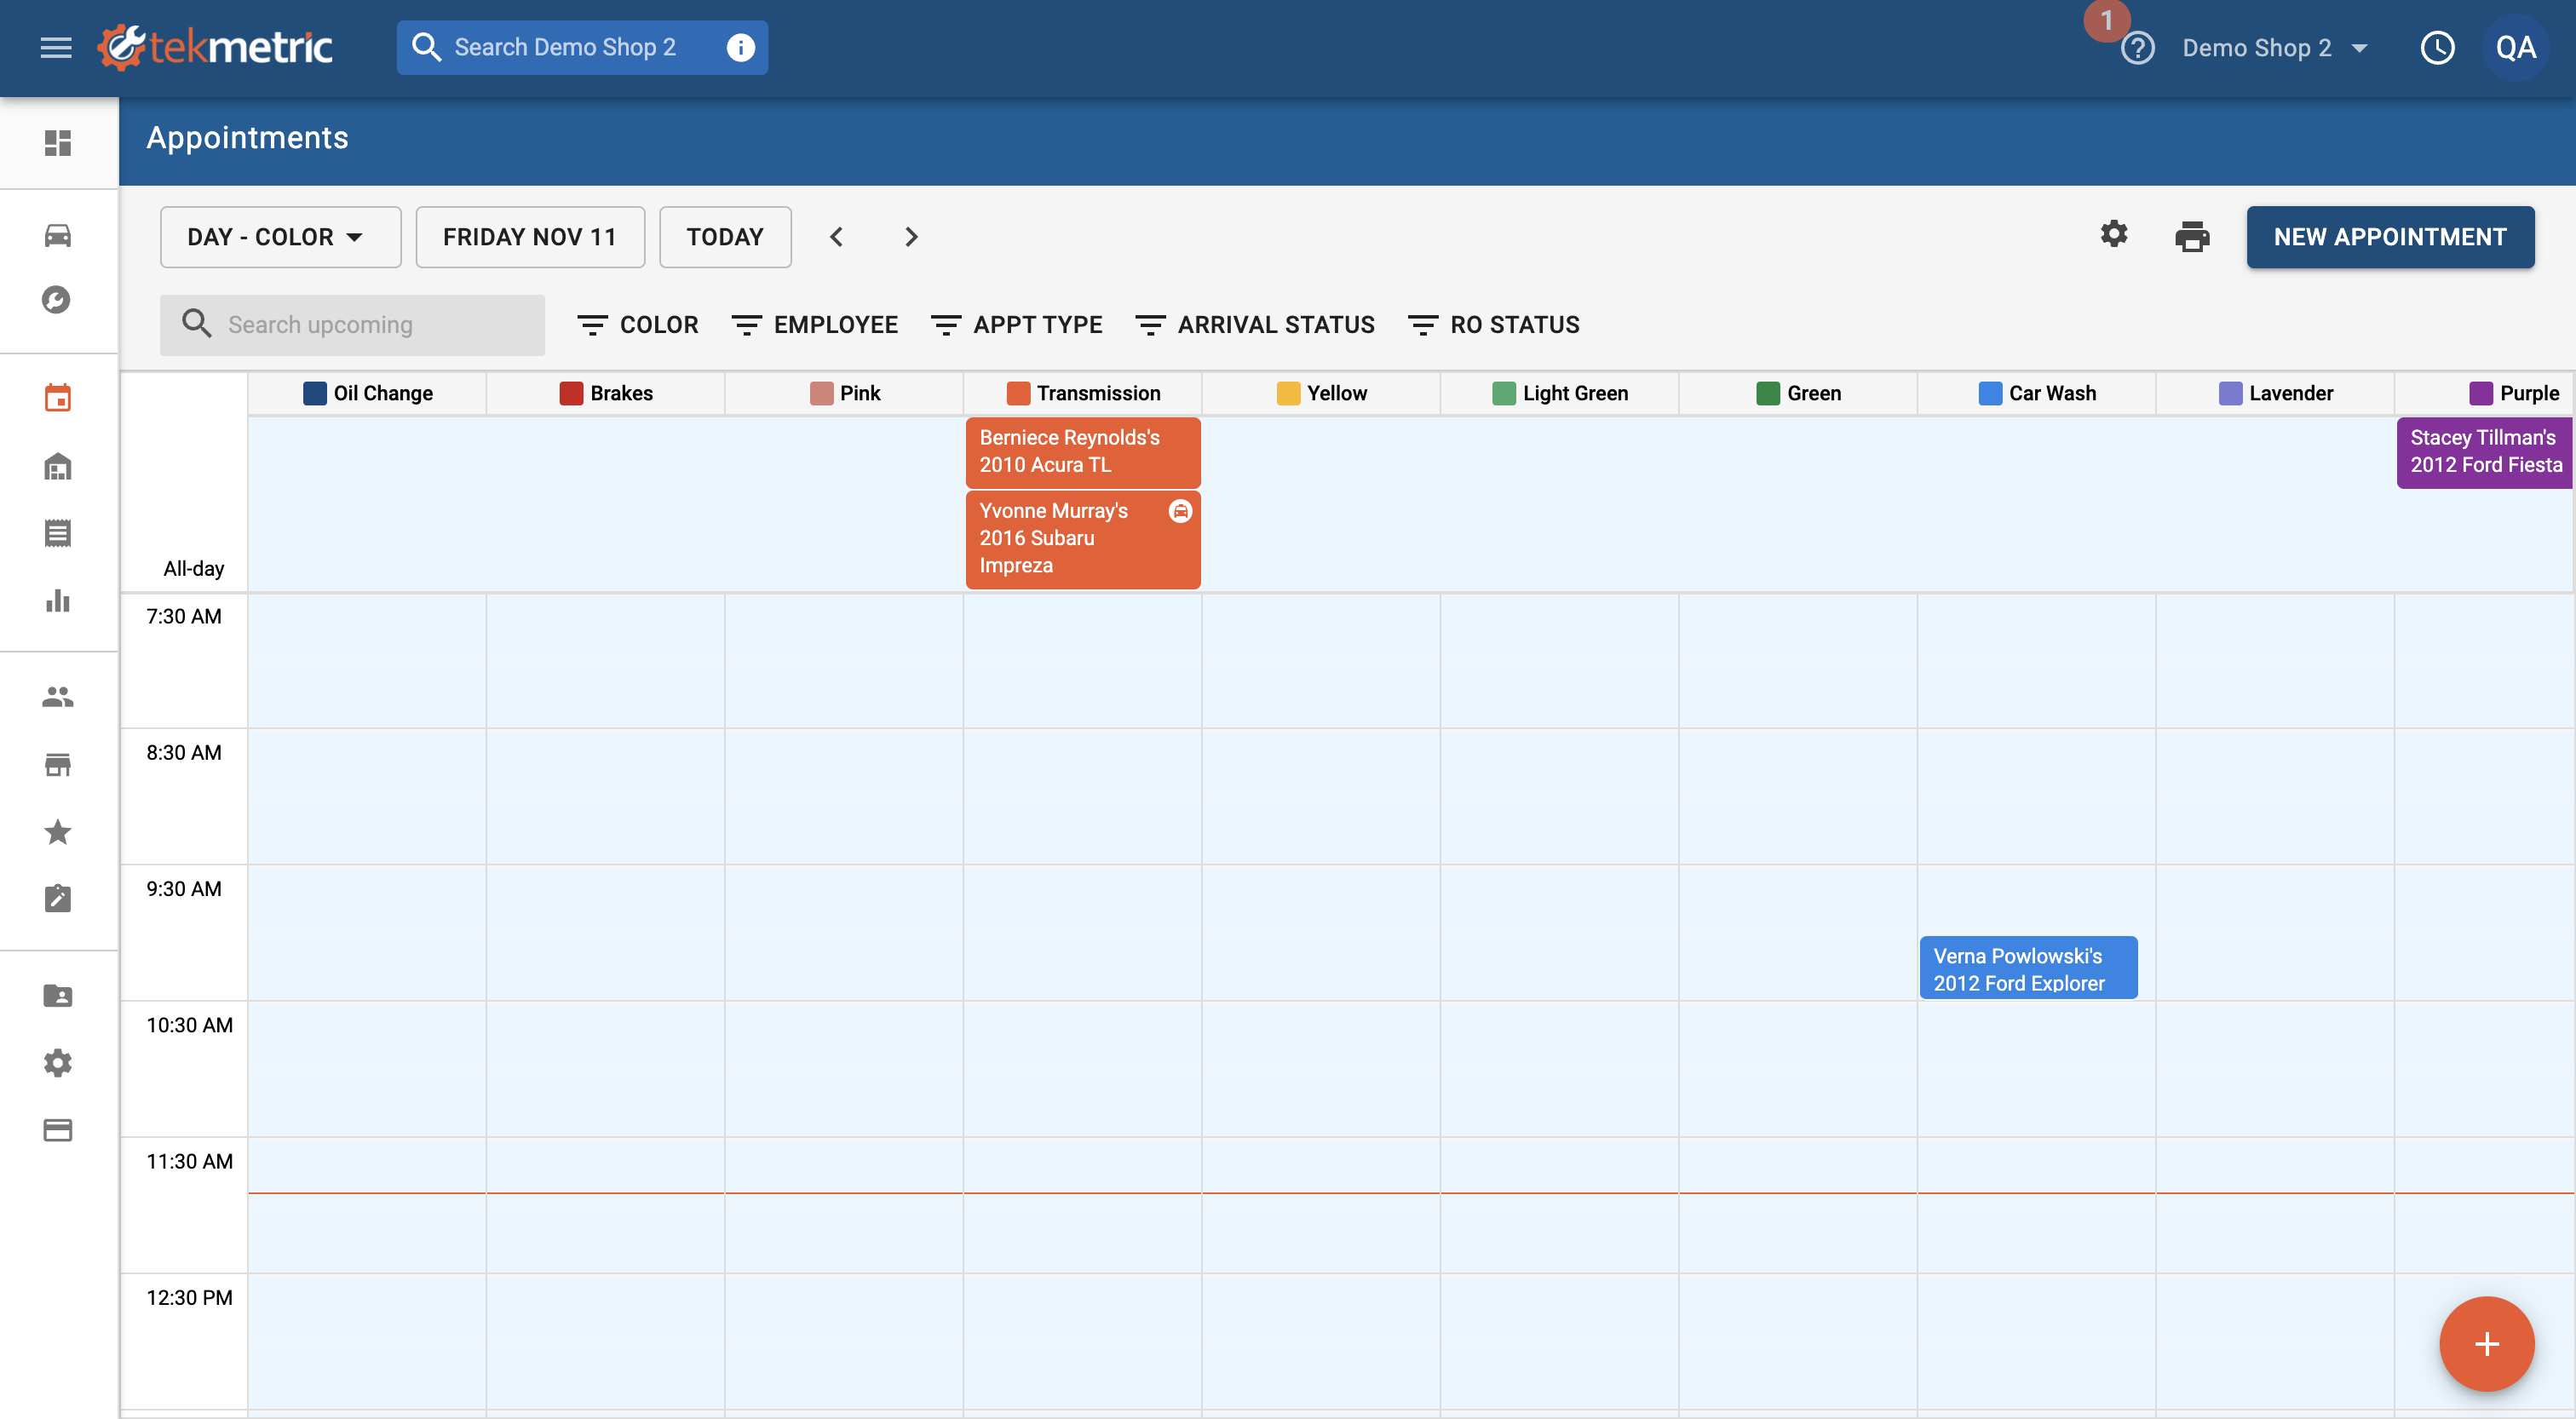
You are able to see multiple column views such as by date (month, week, work week, day, and agenda view), by color category, or by employee.
With each view you are able to see different information and combine the column view with additional filters for color category, employee, appointment type, appointment status, and RO status. You can also drag and drop appointments to update the time and date.
Note: You are able to print information out based on the selected filters.
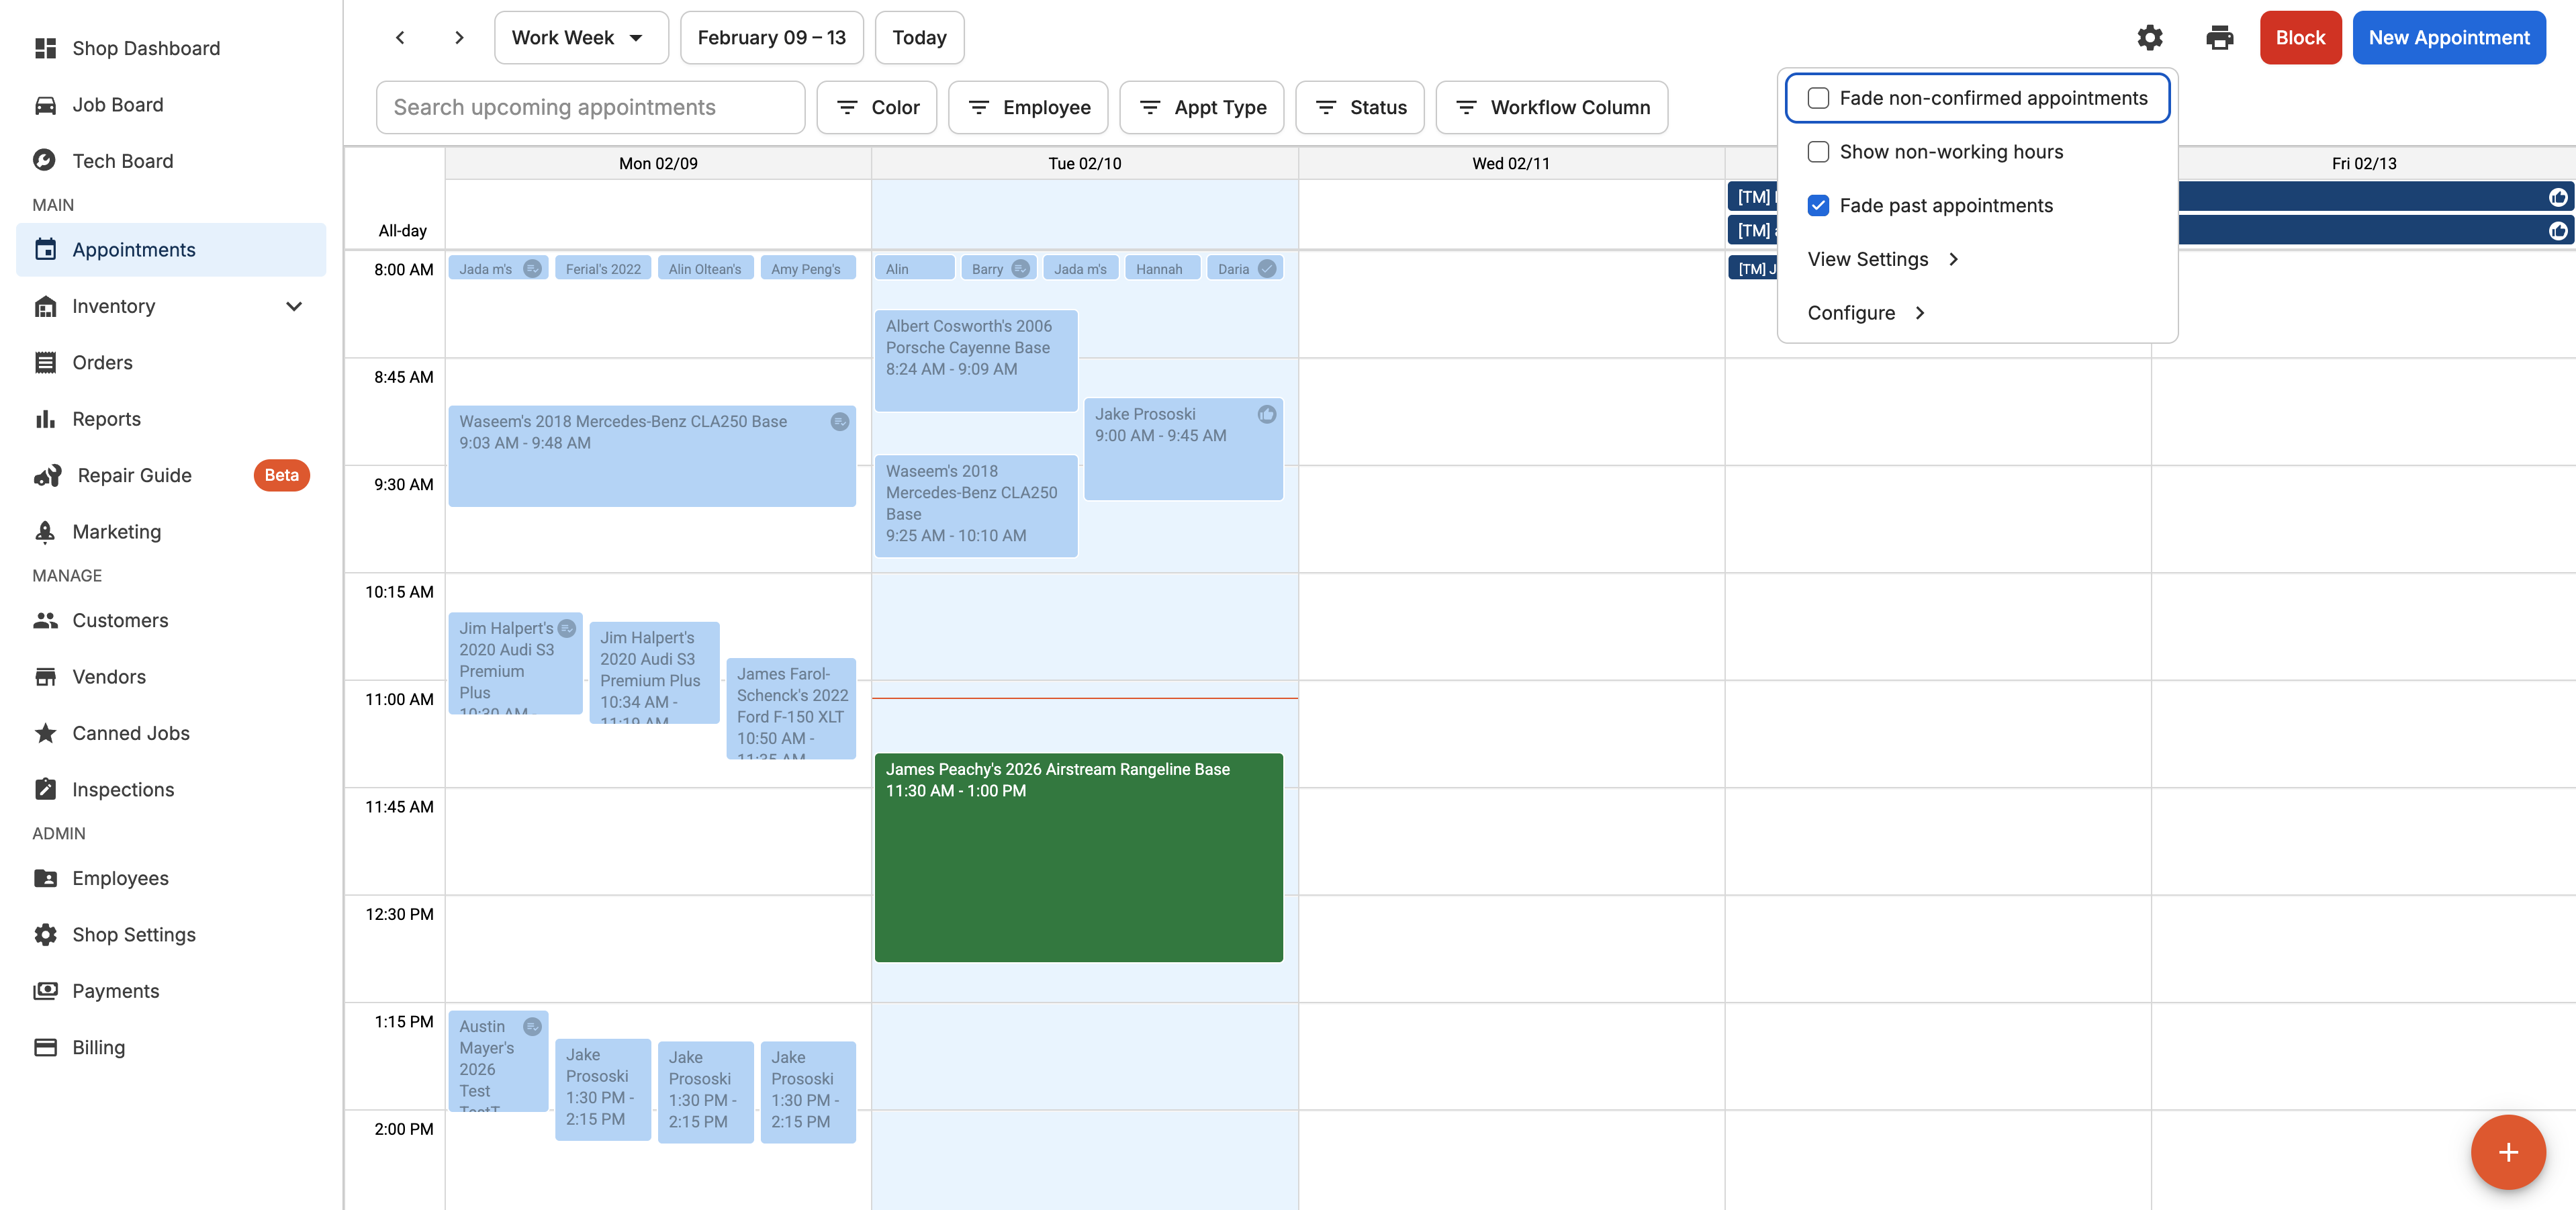
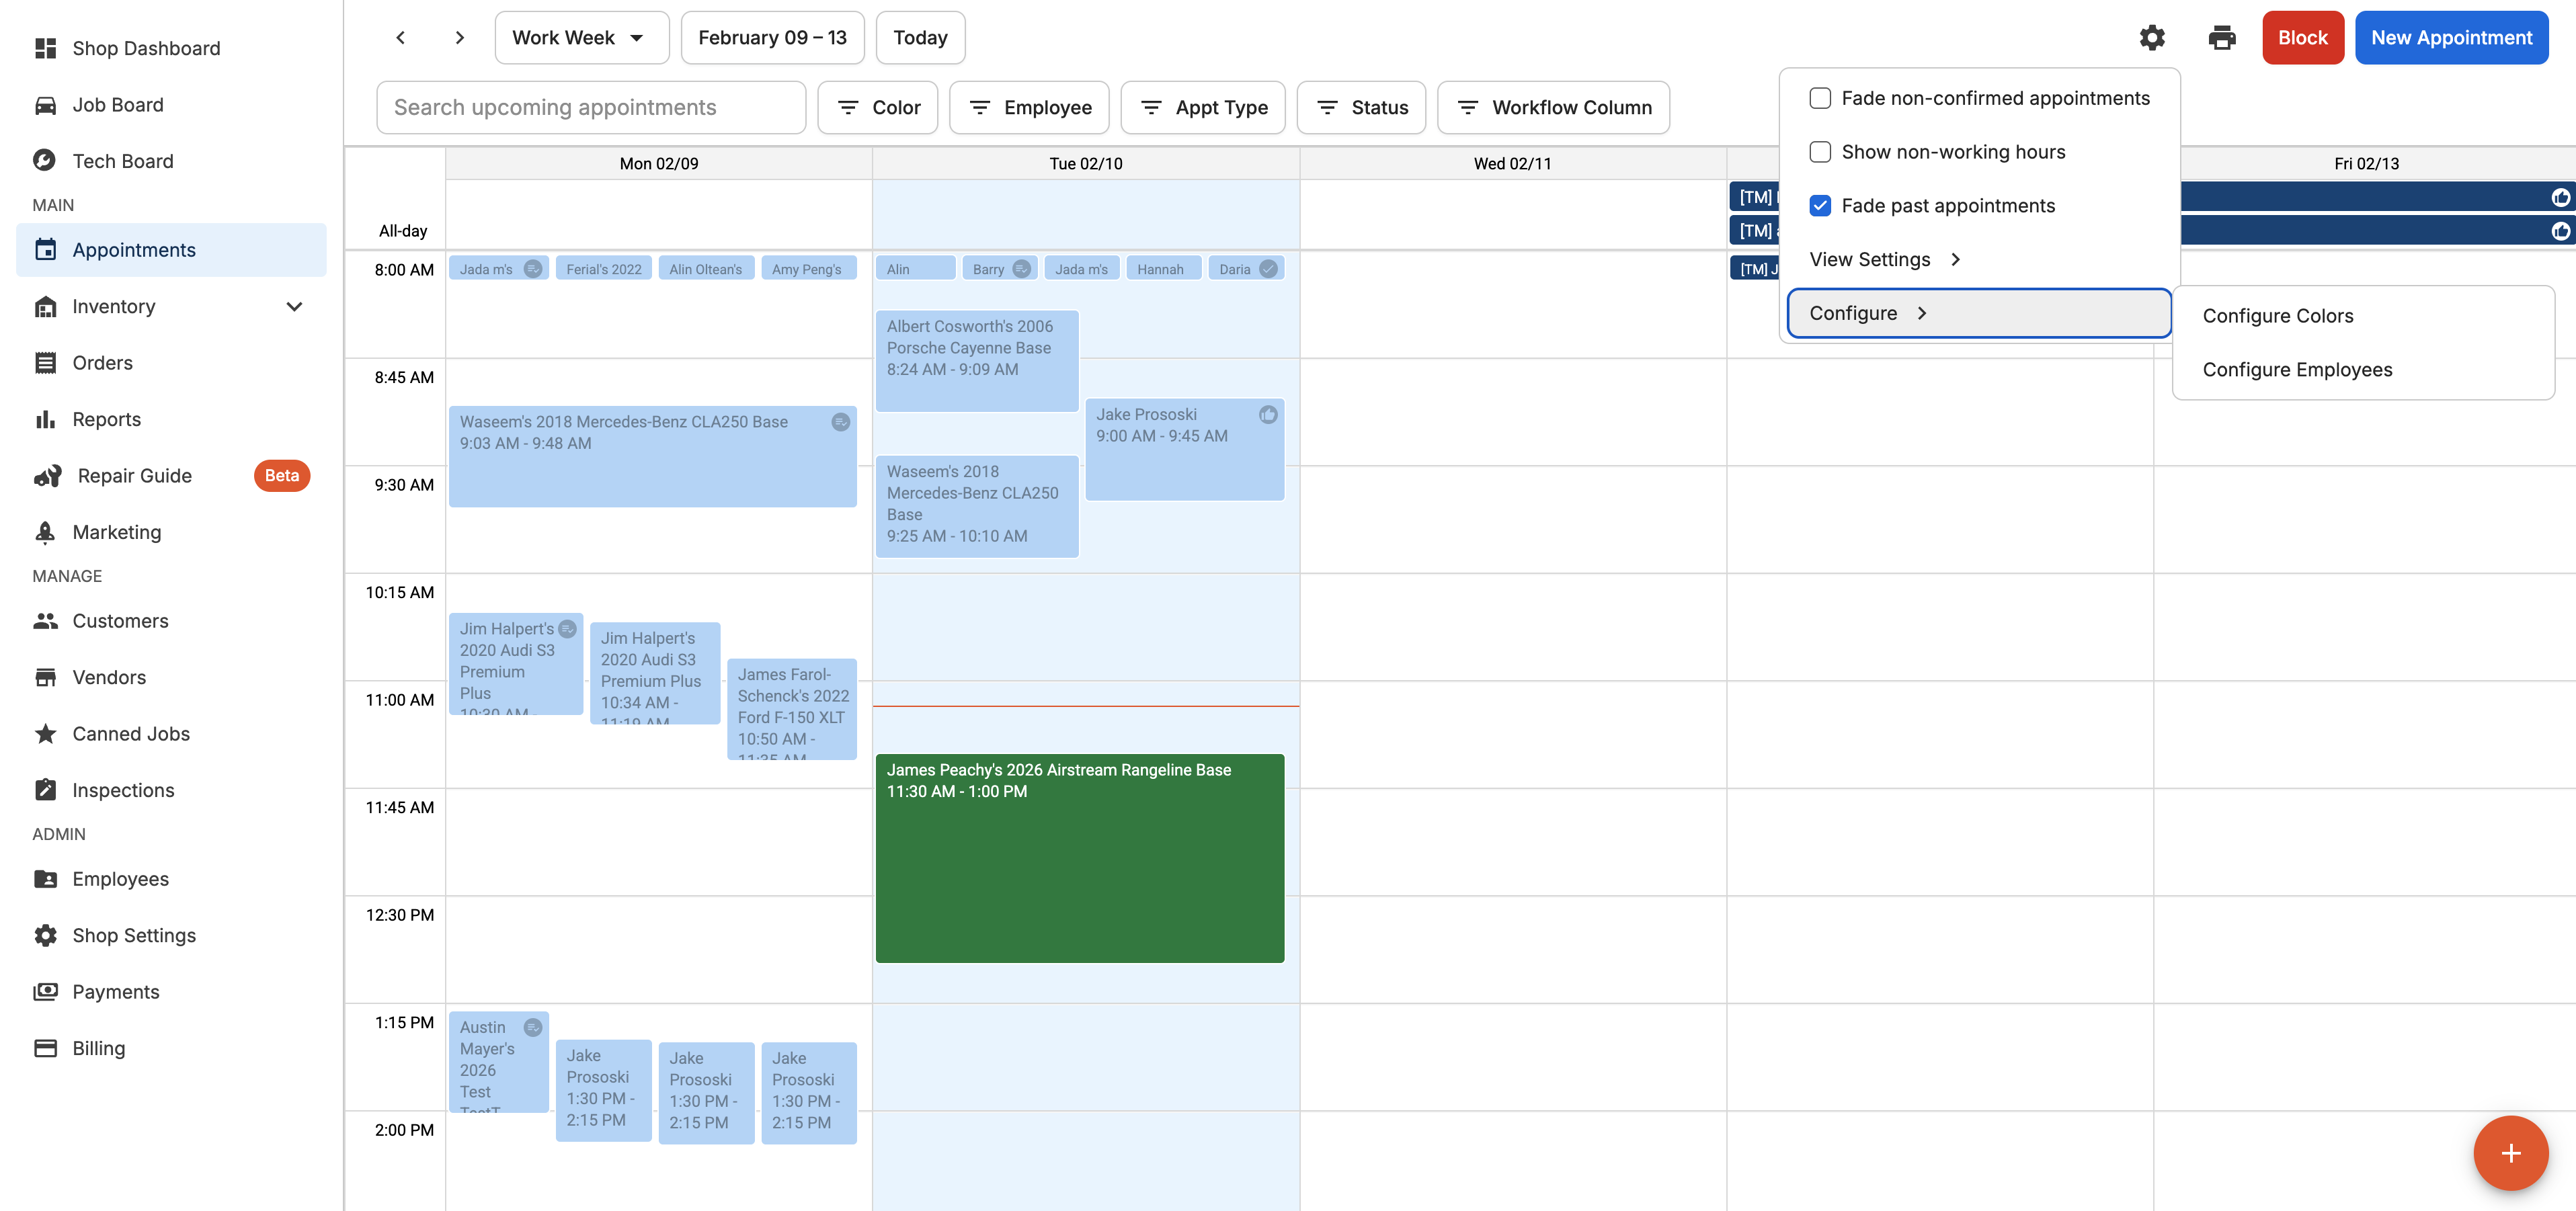
Customize Appointment View
Using the gear icon, you can toggle between Default and Compact views, toggle non-working hours, and toggle the brightness of past appointments to adapt to your shop's needs and efficiently view your calendar.

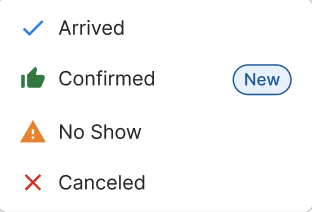
Appointment Icons
You can quickly and easily review the status of your appointments by referencing the icons used on the appointment card.
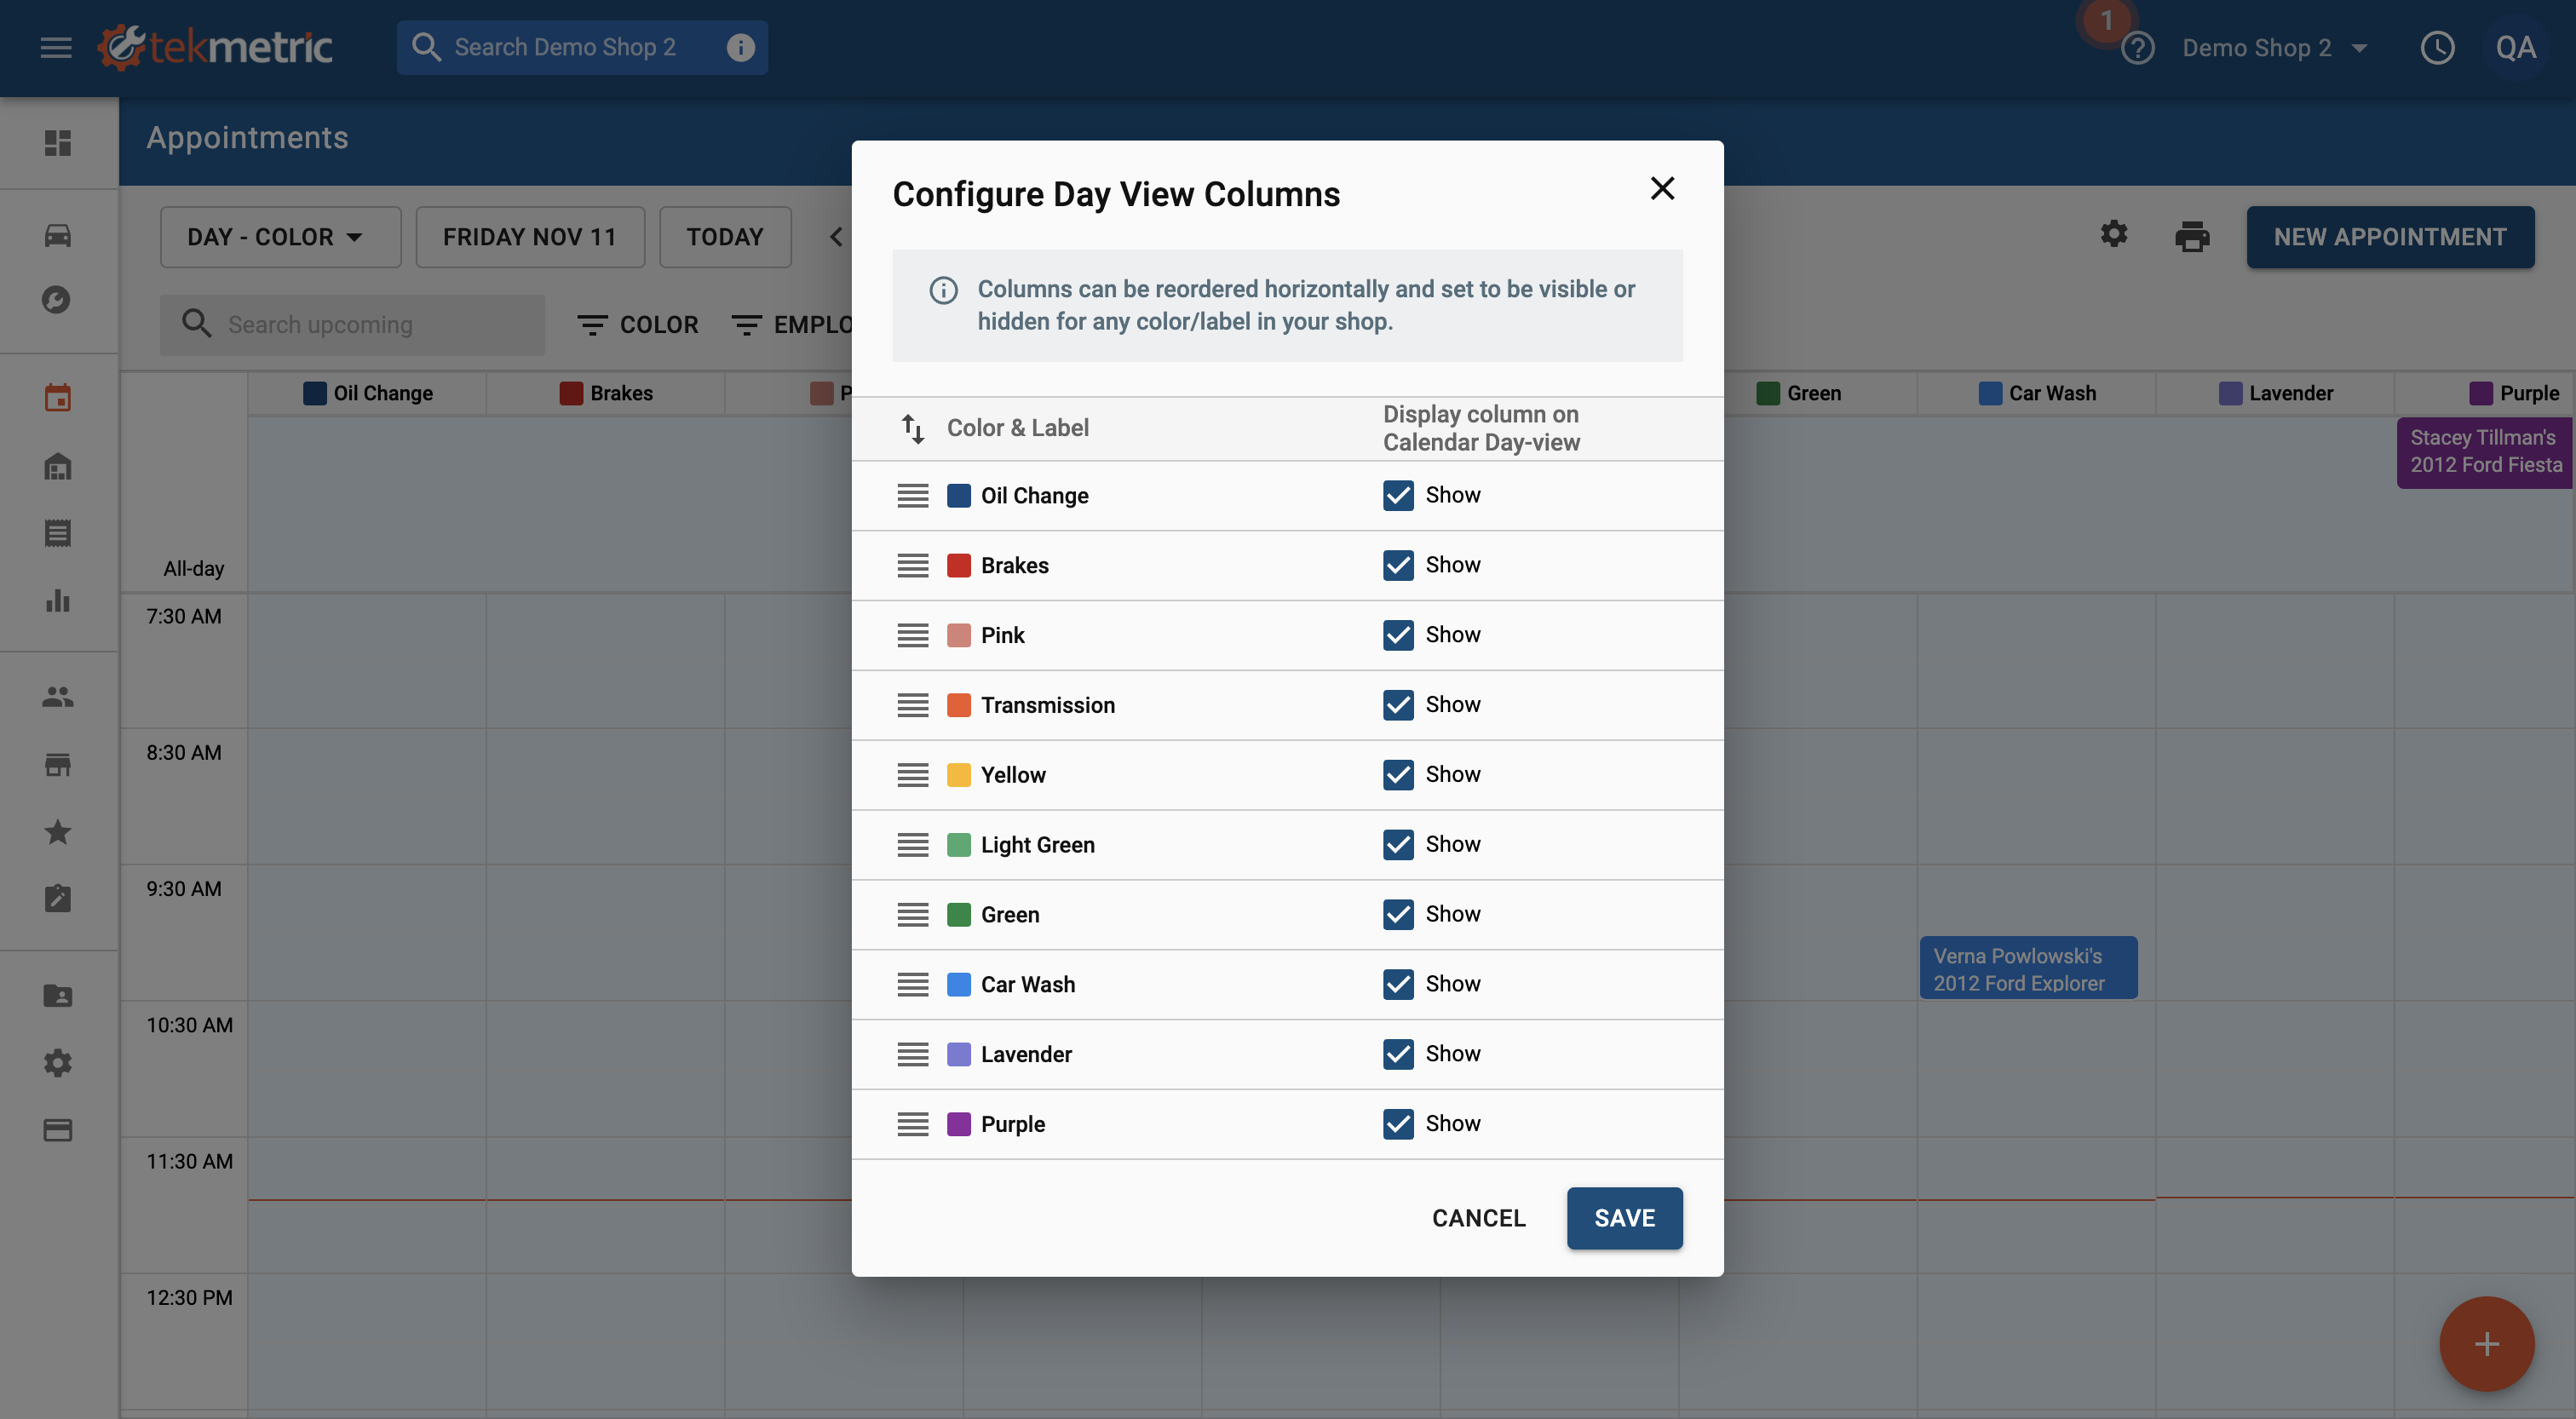
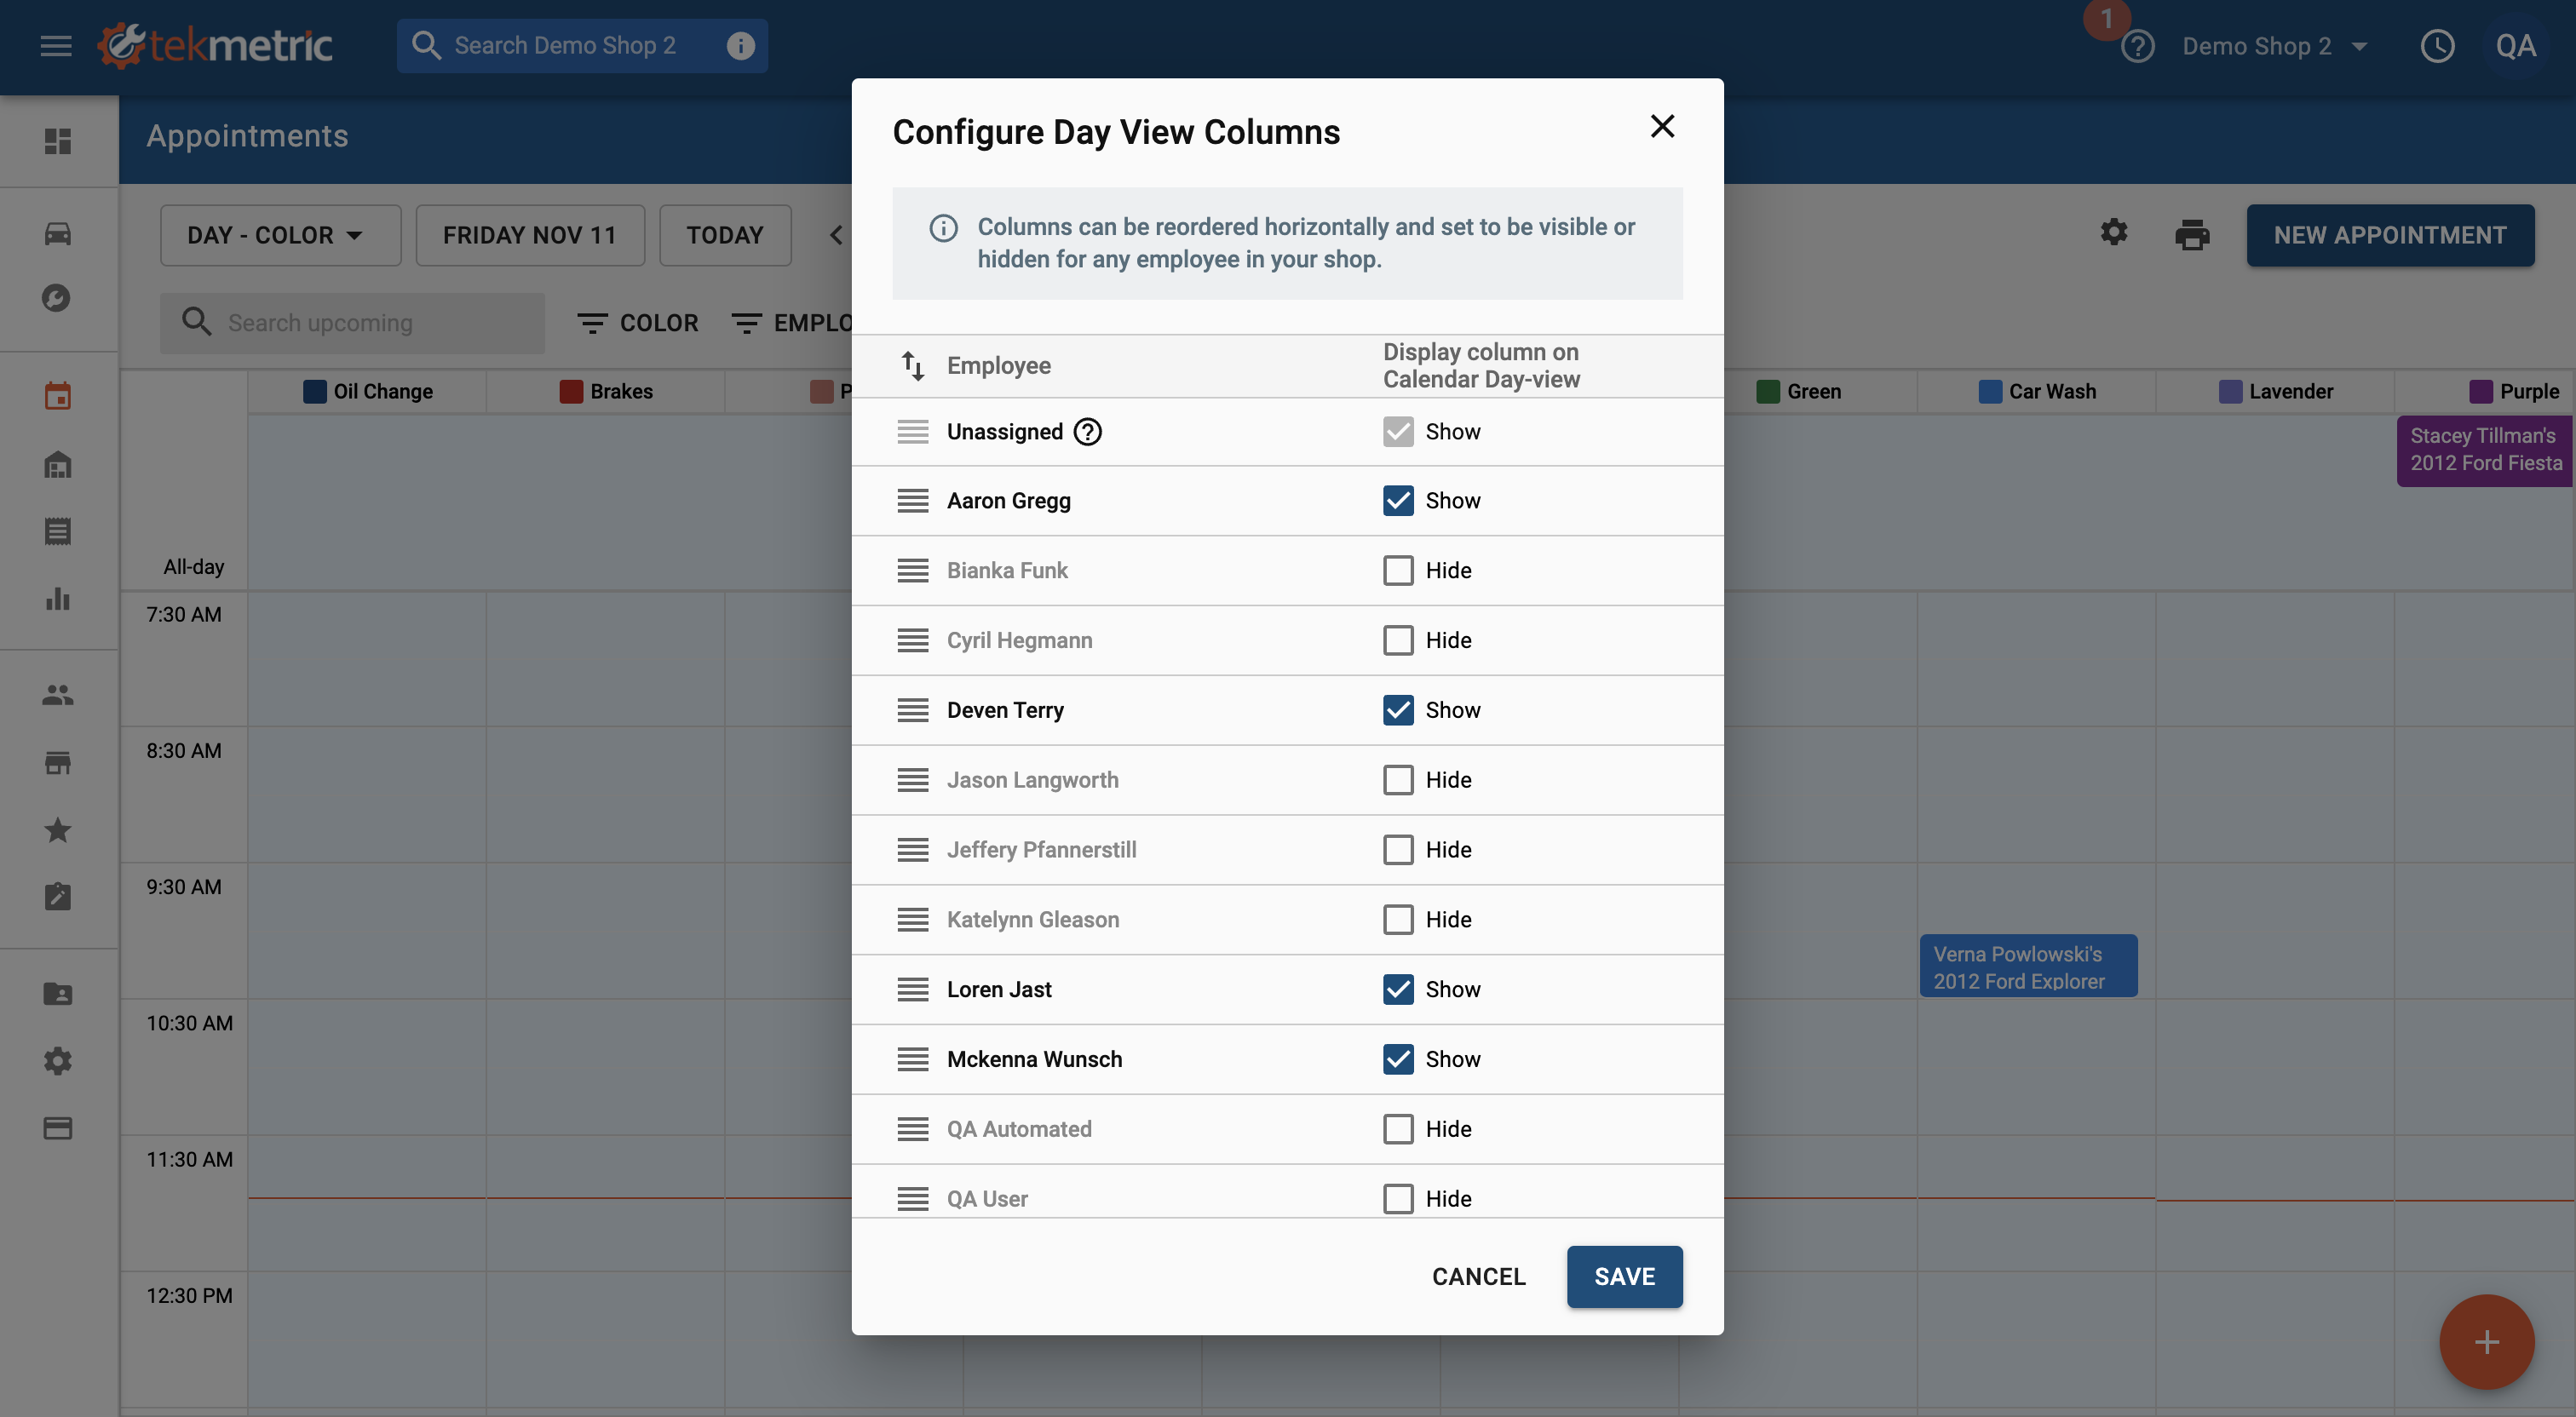
Configurations Day View Columns
You now have the ability to configure the color and employee columns that are shown. You can reorder horizontally and set each option to be visible or hidden for any color/label or employee in your shop. You can do this by selecting the gear icon, then Configure.
View by Day - Color
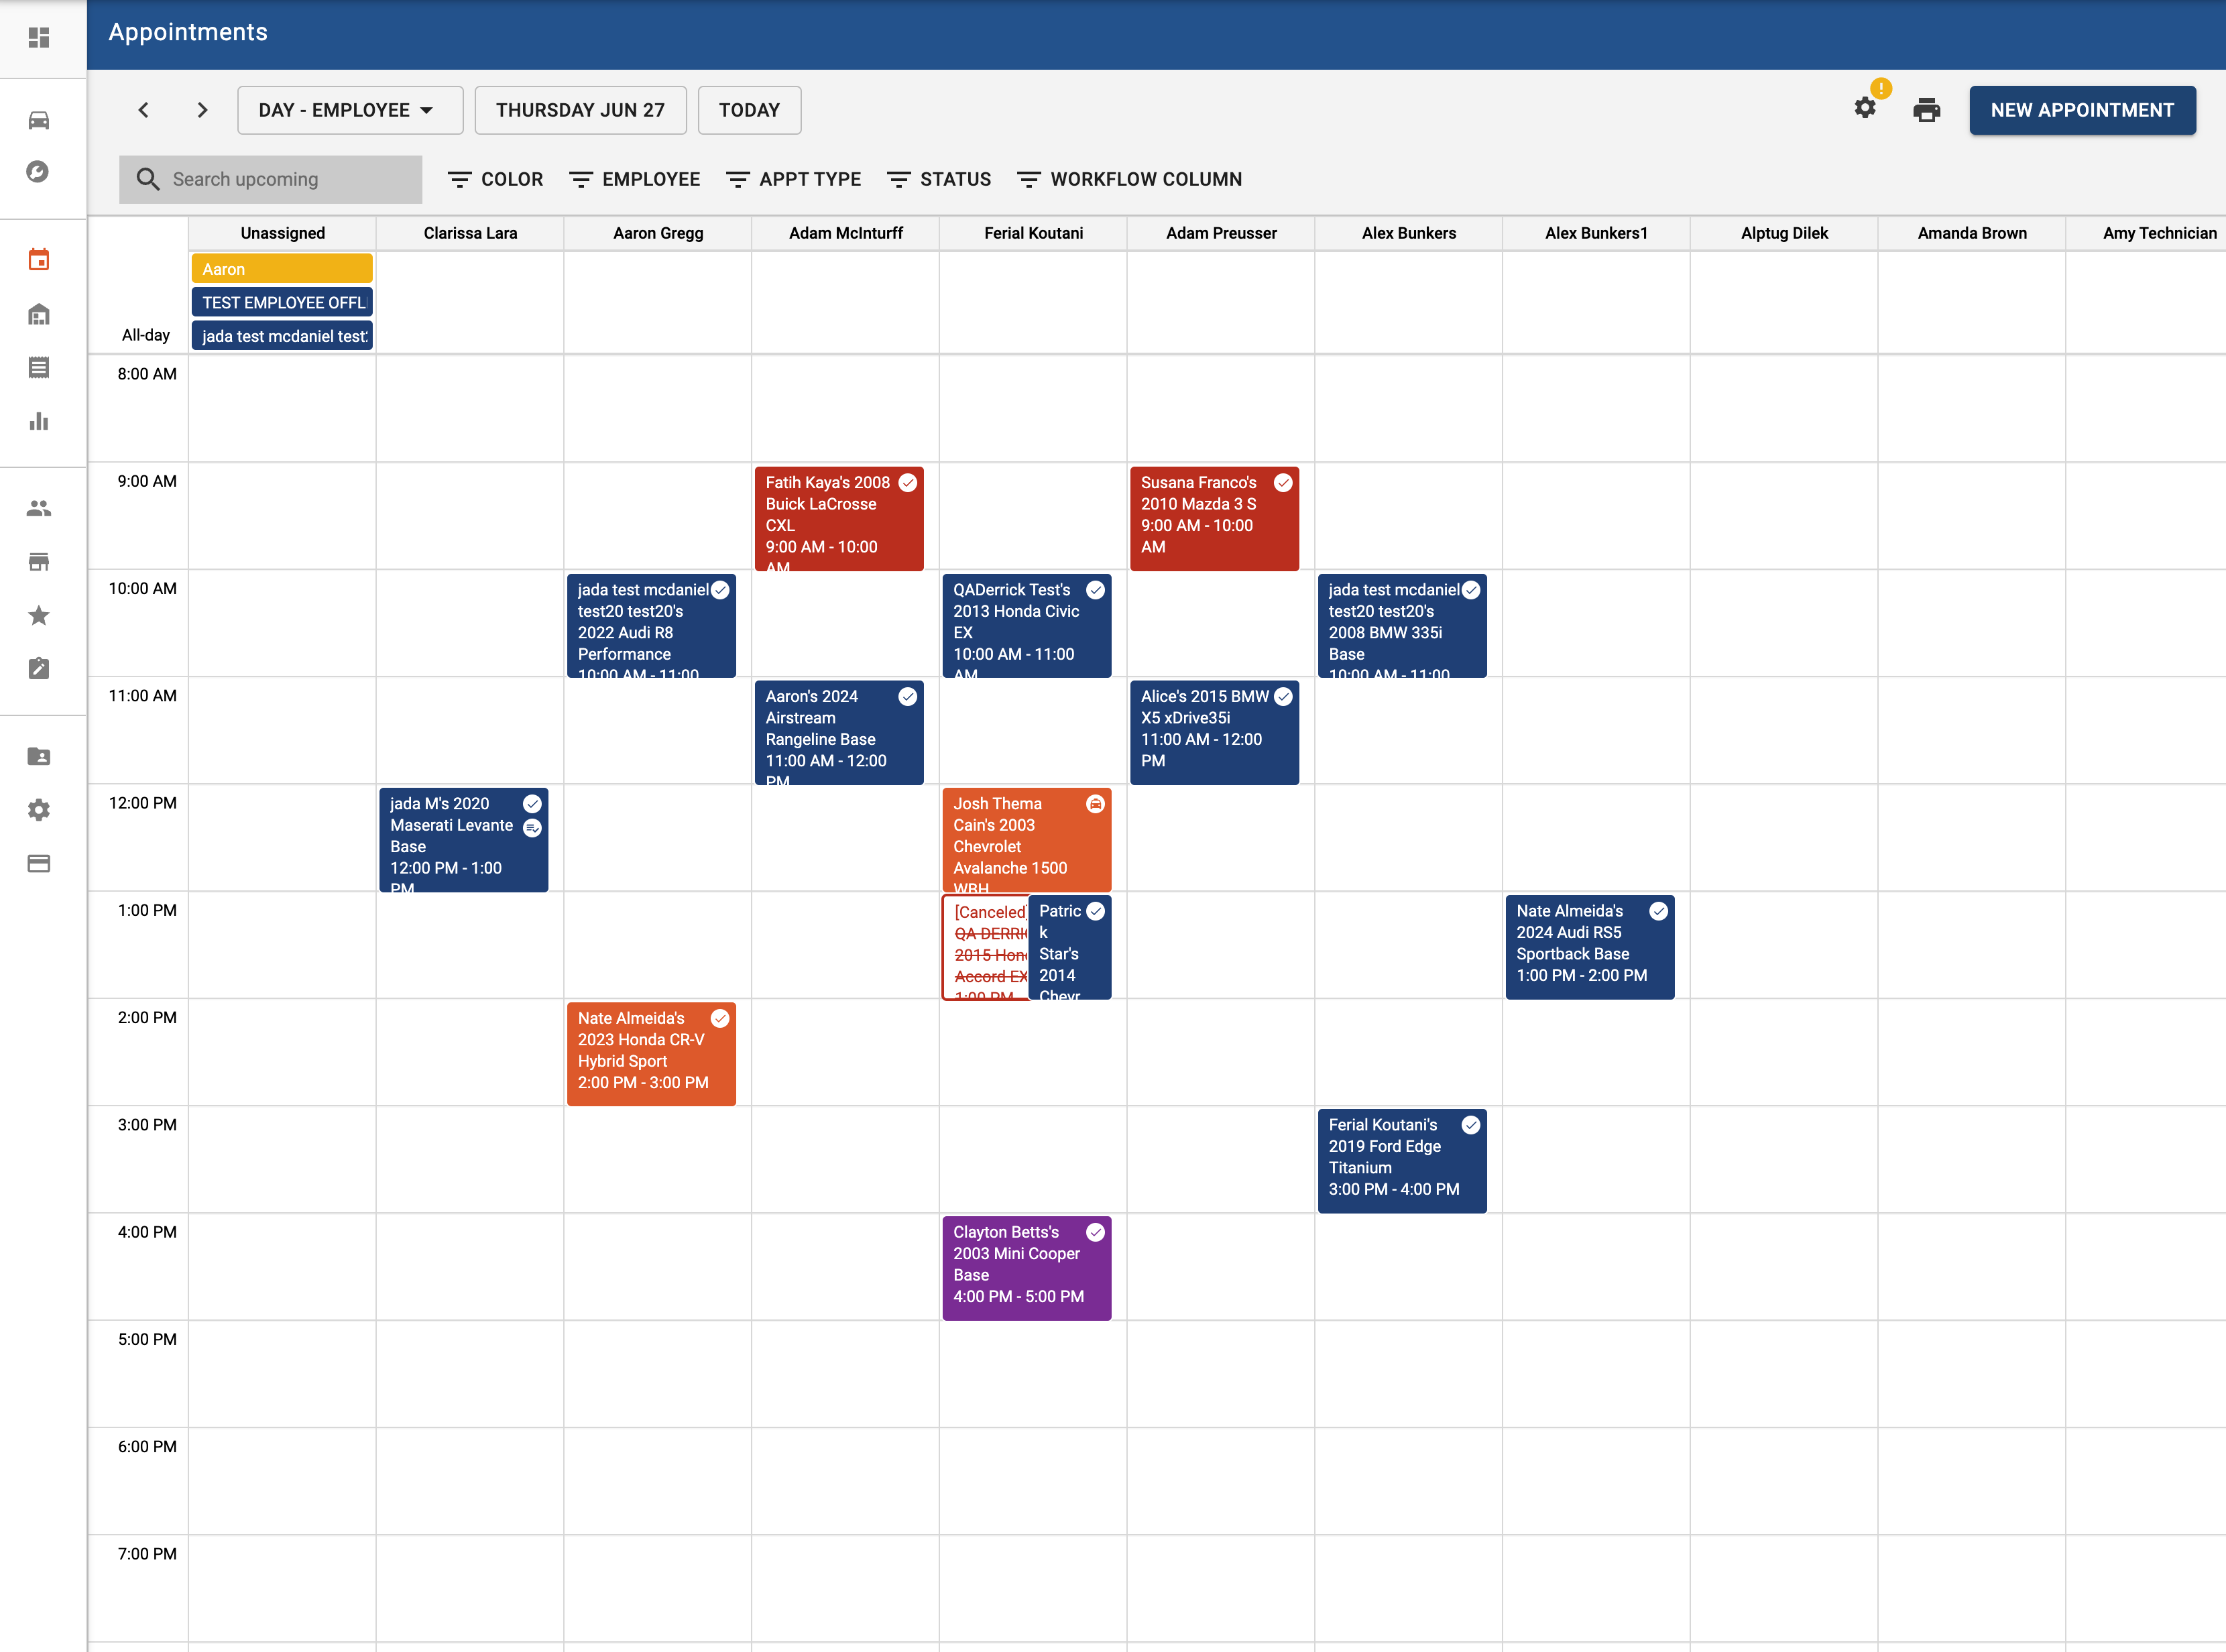
View by Day - Employee
By associating an employee to an appointment, the ability to visualize the schedule becomes more streamlined than ever. With this feature, you are able to filter appointments, view by employee and color, and seamlessly orchestrate your schedule.
Appointment Details & Statuses
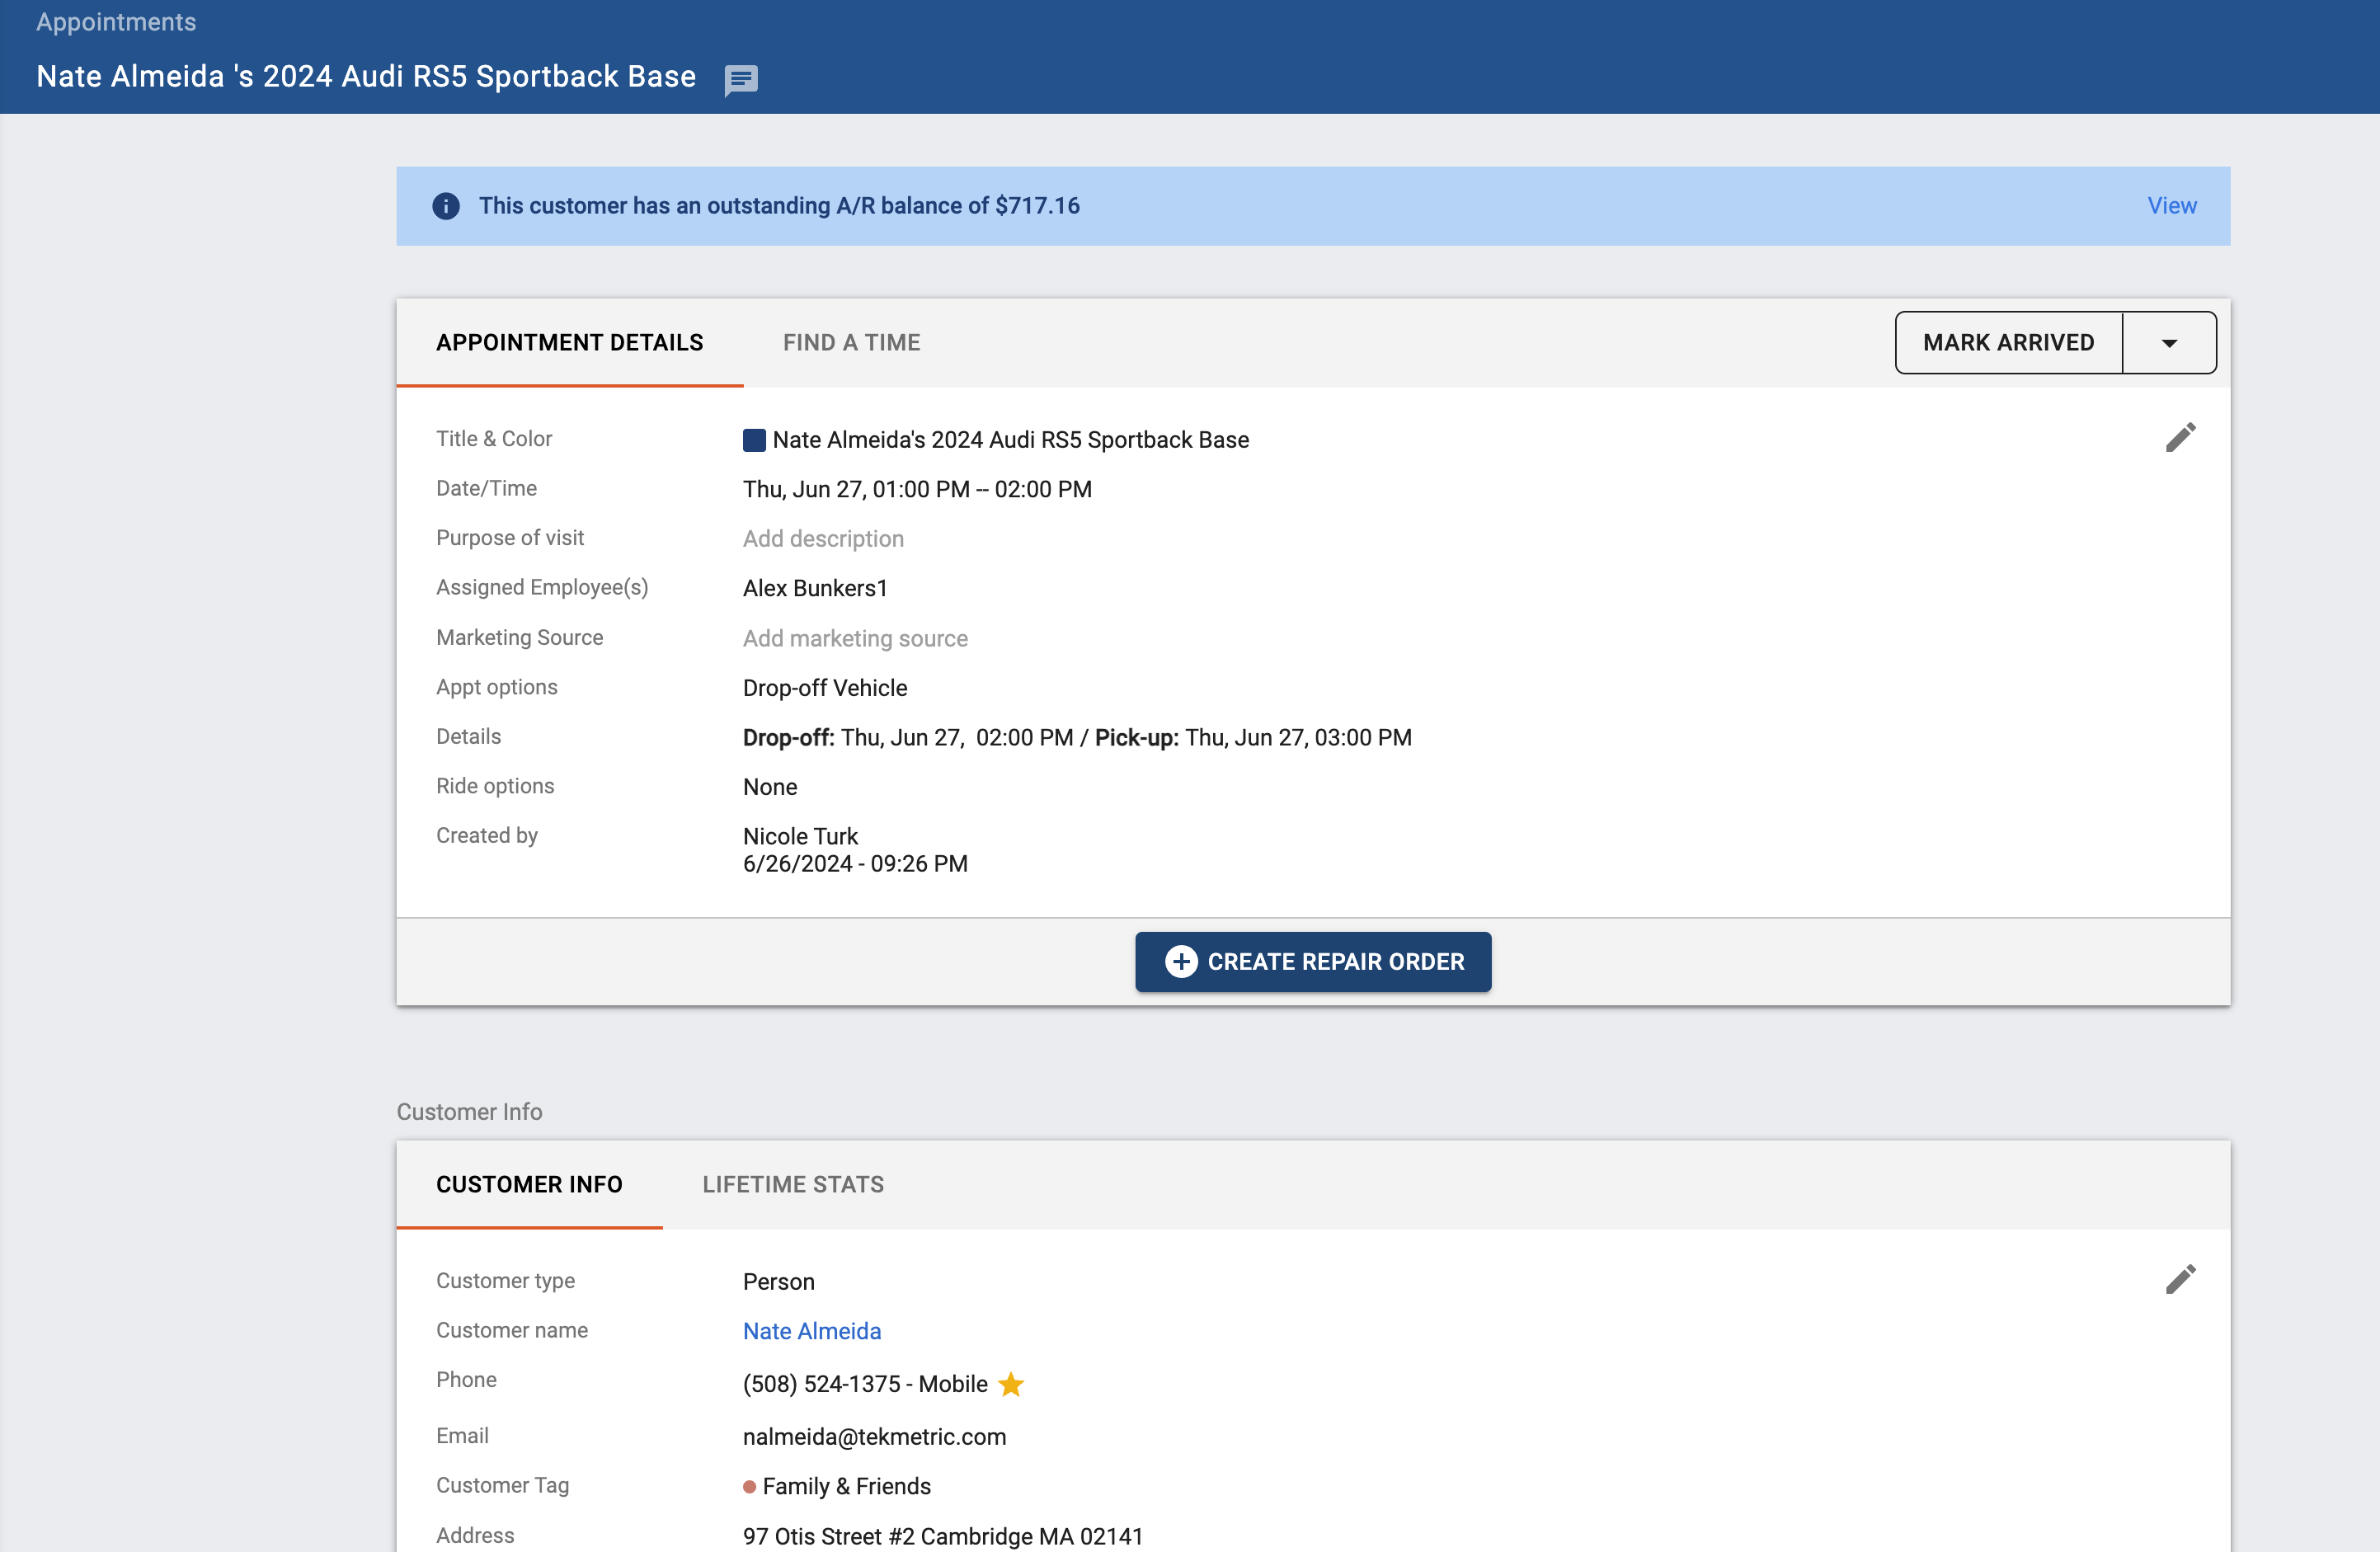
When you select an appointment event, you will be able to quickly see the appointment information at a glance.
On the bottom left, you will be able to mark the appointment as Canceled, Confirmed, Arrived, or No Show.

If you have Tekmetric Marketing and you send out appointment reminder automations, then customers can confirm / cancel their appointment themselves via text - making management of your calendar more efficient.
Video on Appointment Statuses
Editing the Appointment Details
By selecting the edit icon, you are able to view the details of the appointment, the customer info, lifetime stats, and vehicle info.
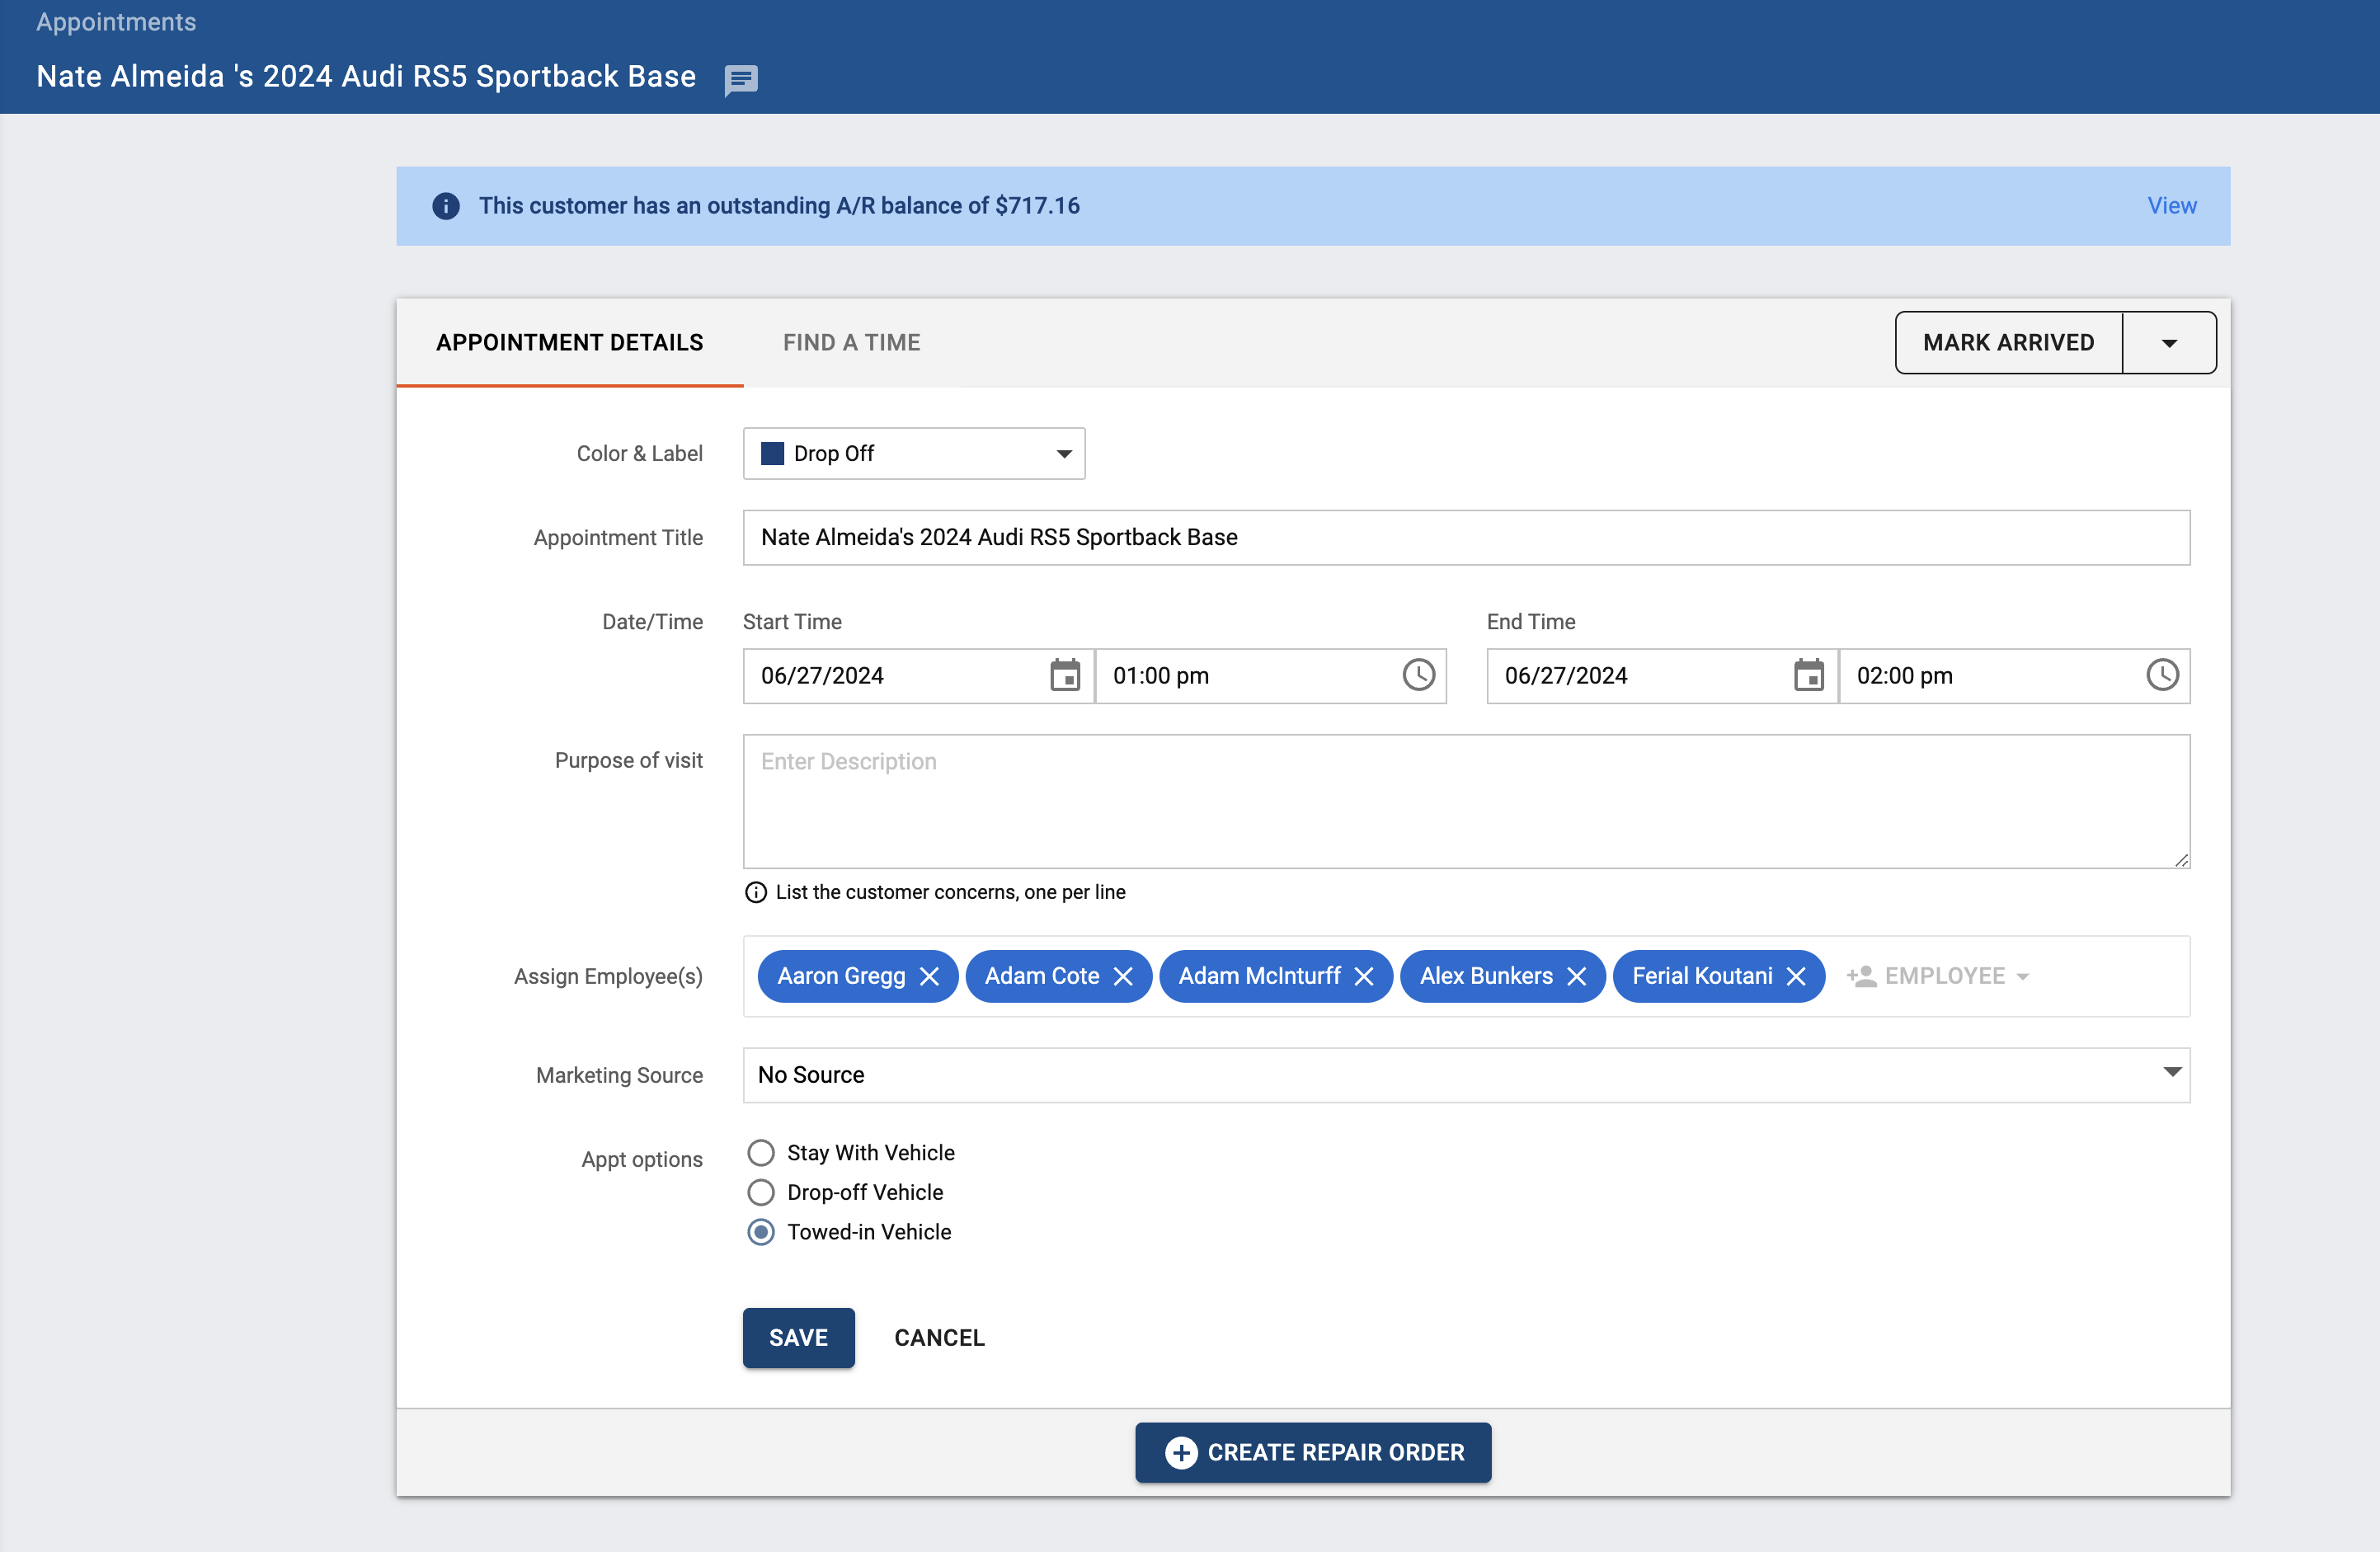
Select the edit icon to change information about the appointment. From there you can assign up to 5 employees. You are also able to edit any information about the appointment as well.
Tekmetric Online Booking - Block Time Events
For customers using Tekmetric Online Booking, using the 'Block' button will allow you to block time off from the Online Booking availability. You'll be able to set specific blocks of time, recurring time blocks or full day blocks using the pop-up modal, as shown below. This is a great tool to use for lunches, holidays, shop closures, or just to protect your calendar and your schedule.
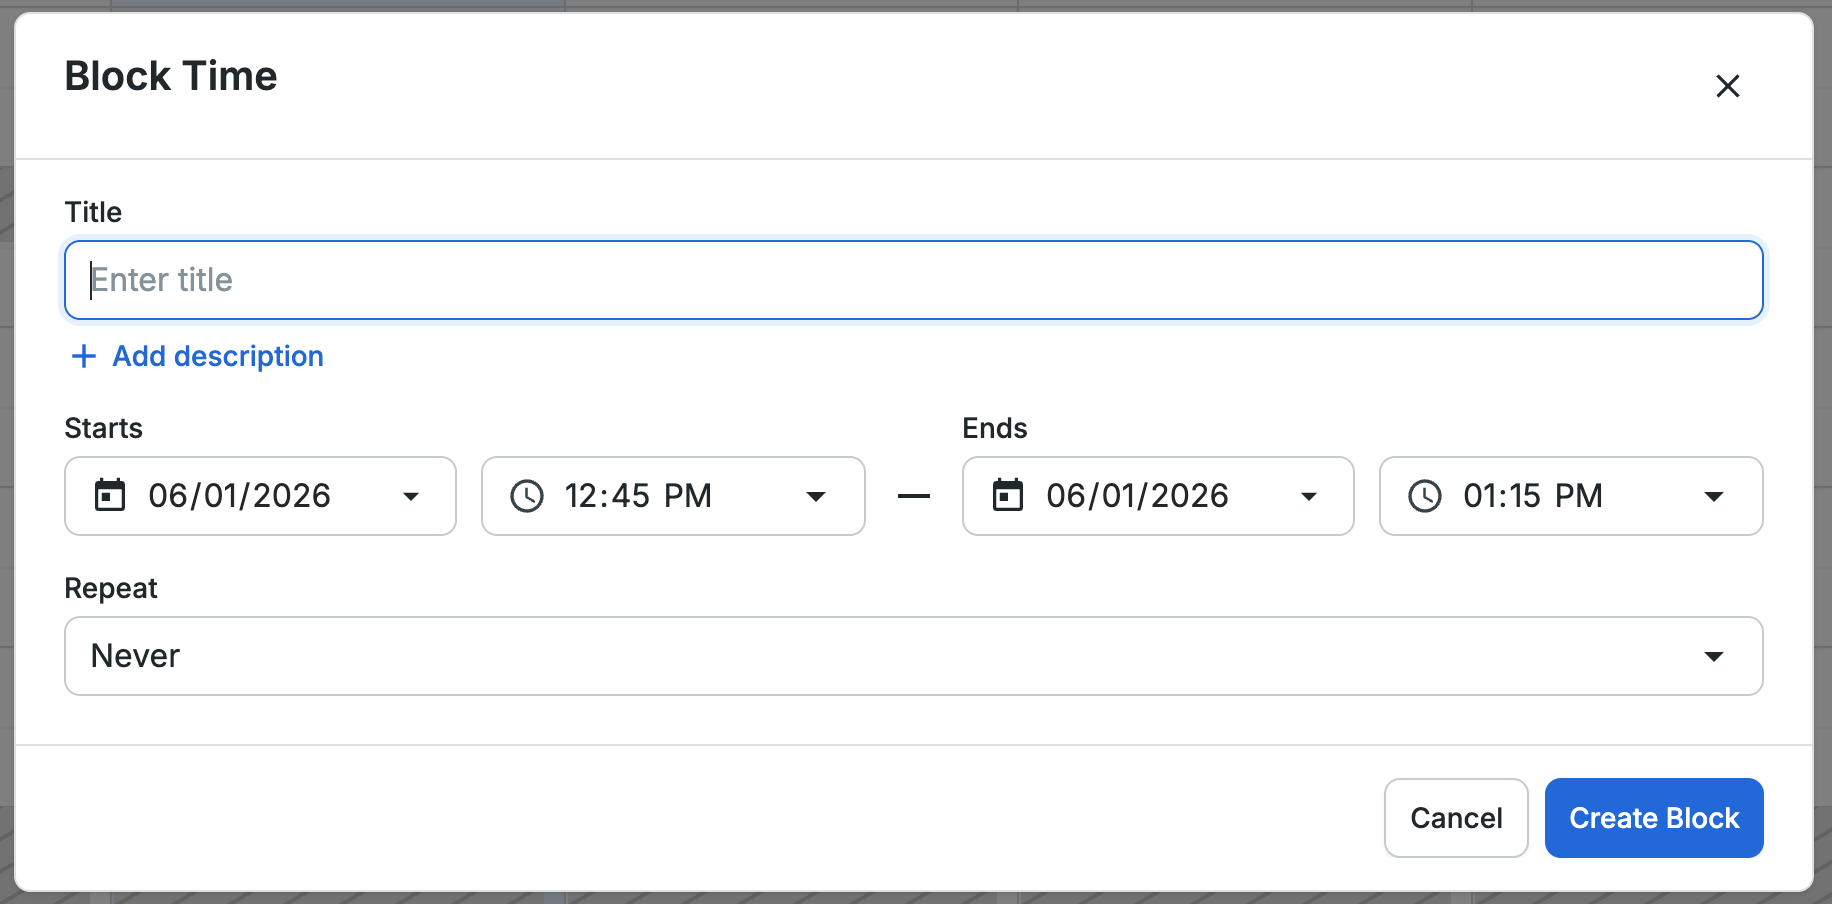
To create an all-day block, set the start and end time as 12:00am on the consecutive days, such as Monday 12:00am - Tuesday 12:00am.
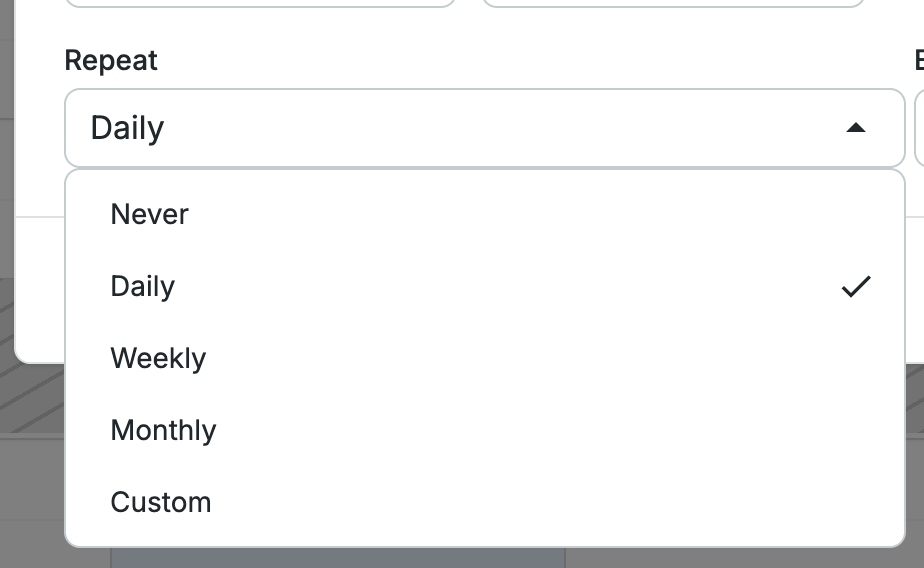
To create a recurring block, do not add multiple days between the start and end date as this will create a multi-day block. Simply add the day you want the recurring event to start as both the start and end date, then select the cadence you would like the block to repeat.
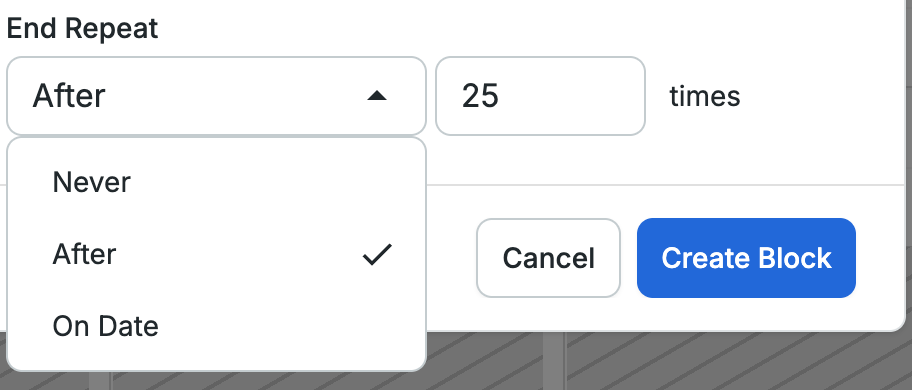
Set when you would like the recurring block to end by choosing the number of events in a series or by setting an end date.
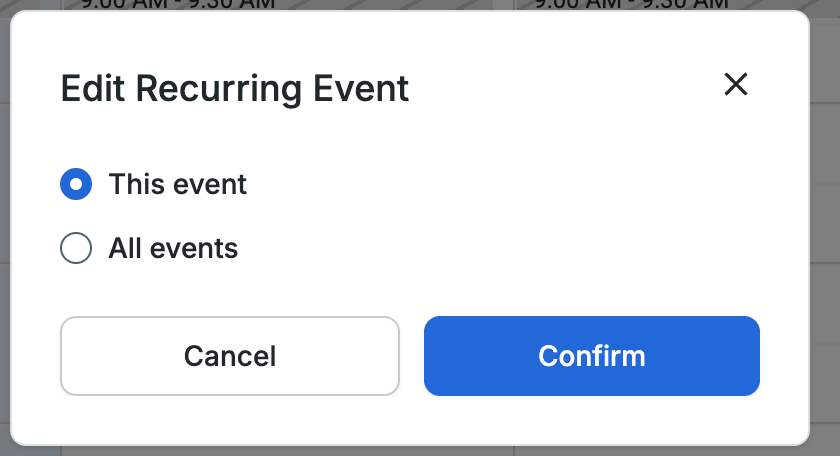
If you edit / delete an event in the recurring series, it will then become an individual event and will no longer be considered part of the series. You are able to edit one single event or all events in a series. Currently you are unable to edit this and upcoming events only, however this ability will be added in the future.
Customers booking online will not be able to schedule with your shop during the blocked times.
Blocked time will be displayed on your calendar, and editable just like any other appointment. Within Tekmetric, you will still be able to book appointments over this blocked time, but your customers scheduling online will not be able to book appointments during these blocks.
CRM Integration
If you currently use a CRM integration today, they will be able to send appointments into Tekmetric. They also will be able to pull the appointment status (arrived, confirmed, canceled, no show) using the API.
This will allow them to stop sending appointment reminders to canceled appointments. If you have any questions on this, please contact the CRM company you use today.
Additionally using the API third-party CRMs can update appointment status to be confirmed or cancelled.
Reference Multi-Shop Booking Tool help article for instructions on configuring your online bookings for your multi-shop customer facing booking.