Customer Tags is a feature that allows you to flag a customers' profiles with a certain status. Before this feature, shops did not have an efficient way of “flagging” their customers. Now, customer tags ensures all employees are aligned regarding a certain customer that walks into their shop, whether it’s a difficult customer, MVP, or a customer they fired and do not want to service.
This article will review the following information around customer tags:
Setup Customer Tags
To get started, click on the Customers section on the left menu bar, then select a customer you'd like to tag.
Once you're in the customer's profile, click the edit pencil icon on the top right corner to edit the customer's profile information. Navigate to the Customer Tag field to select the tag you want to add. Below are the current options you can select from:
-
-
[Orange] Difficult Customer - this tag should be used for customers you DO service in your shop, but you want your employees to be aware they are a bit difficult, and to tread lightly.
-
[Red] Do Not Service - this tag should be used for customers you don't want your service writers to ever service in your shop.
-
[Pink] Family & Friends - this tag should be used if you'd like to track who your family and friends are. This will easily allow service writers to quickly identify those members for a potential family discount!
-
[Purple] Fleet - this tag should be used if you'd like to track who your fleet customers are easily.
-
[Blue] Military - this tag should be used if you'd like to quickly identify any military members. This will easily allow your service writers to add a military discount when they walk into your shop.
-
[Green] MVP Customer - this tag should be used for your A+ customers. These are customers you want to give the best experience, or always squeeze in on a busy day because they give you tons of business, or simply because you enjoy working with them.
-
[Yellow] Warranty - this tag should be used for your Warranty Aftermarket customers you'd like to tag.
-
[No Color] No Tag - this tag should be used if you want to remove any of the existing tags from any of your customers' profiles.
Permissions
This feature is only visible to employees that have permission to access customer information. If your employee can not see customer information, then they will not see the customer tags.
Tag Visibility in Tekmetric
Once you setup customer tags, your employees can see the tags in the following areas:
Job Board
On the job board, we will only show the color associated with the tag. Reason being, is some of our shops have their job board showing on a screen within the waiting area of their shop. We want to make sure their customers do not see these tags on the screen. Shop employees can hover over the color of the tag in order to see what the tag status is.

Search Engines
Employees can also see a customer's tag when searching for the customer. The main three search engines where the tags are visible is in:
- Global Search Engine
- Repair Order Creation Form
- Appointment Creation Form
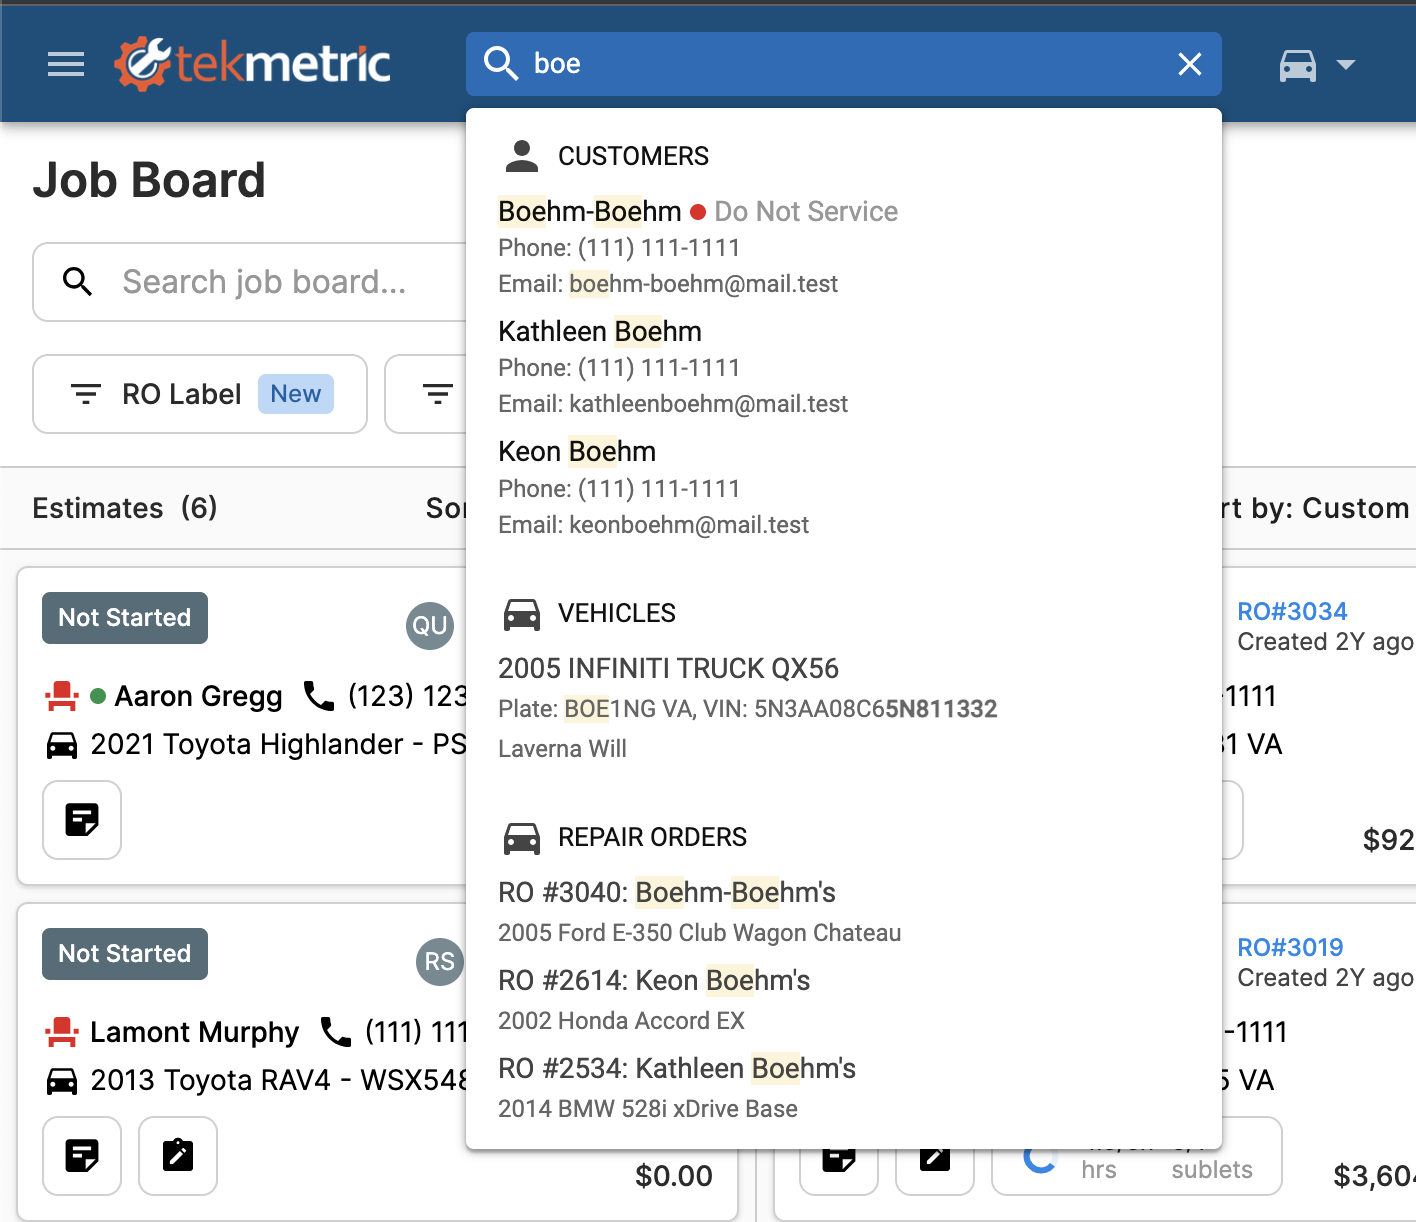
Global Search Engine:
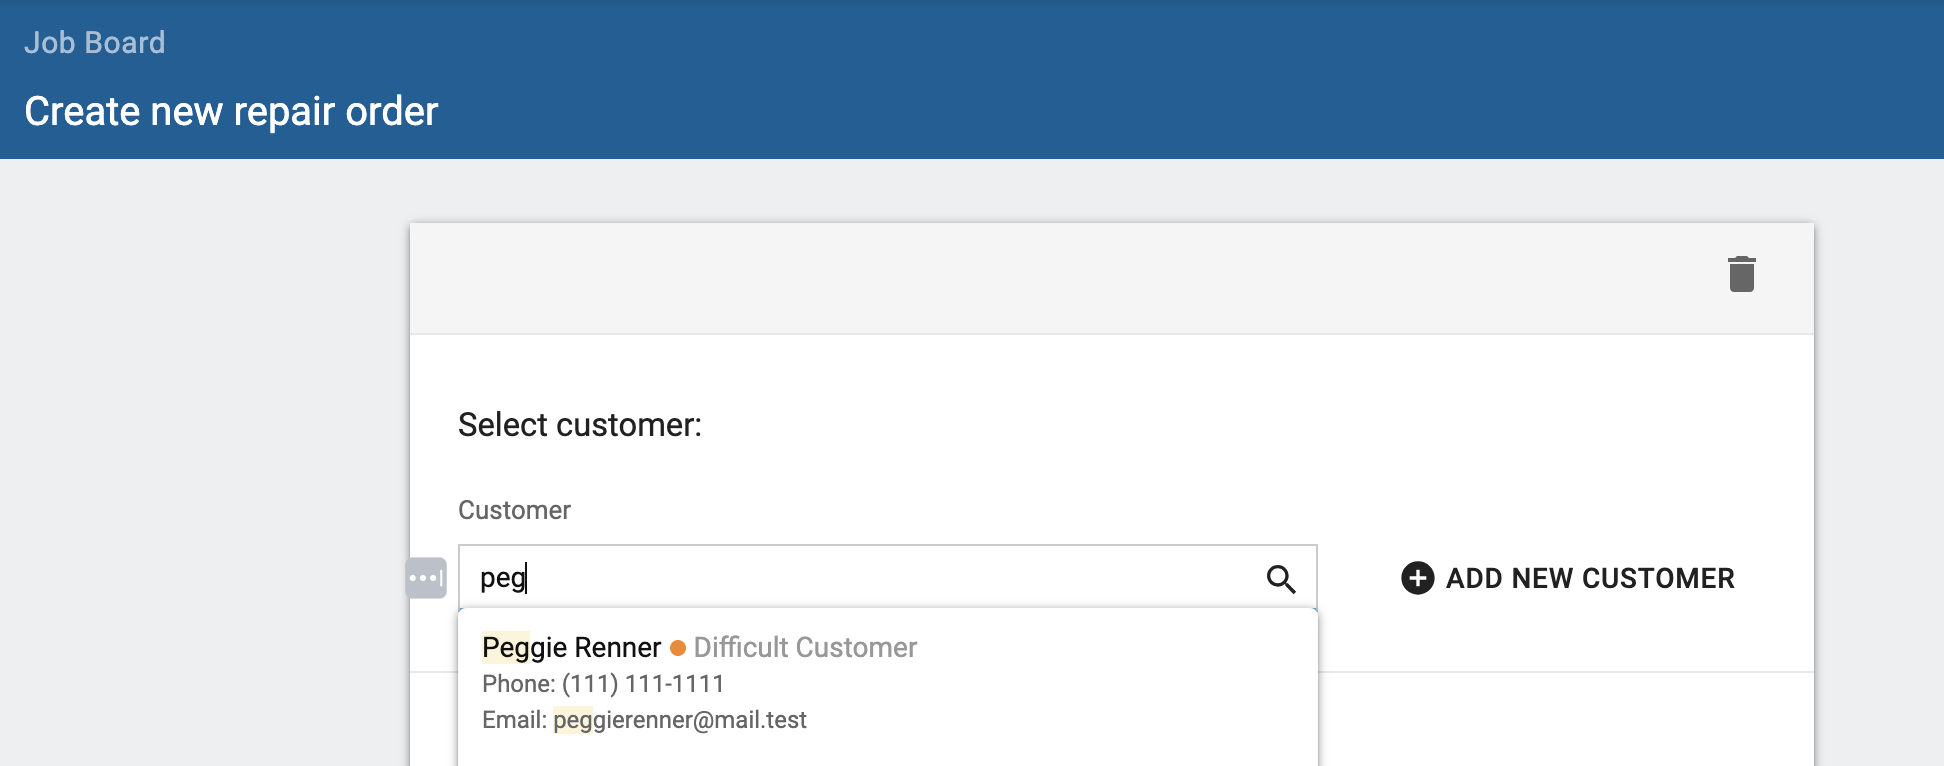
Repair Order Creation Form:
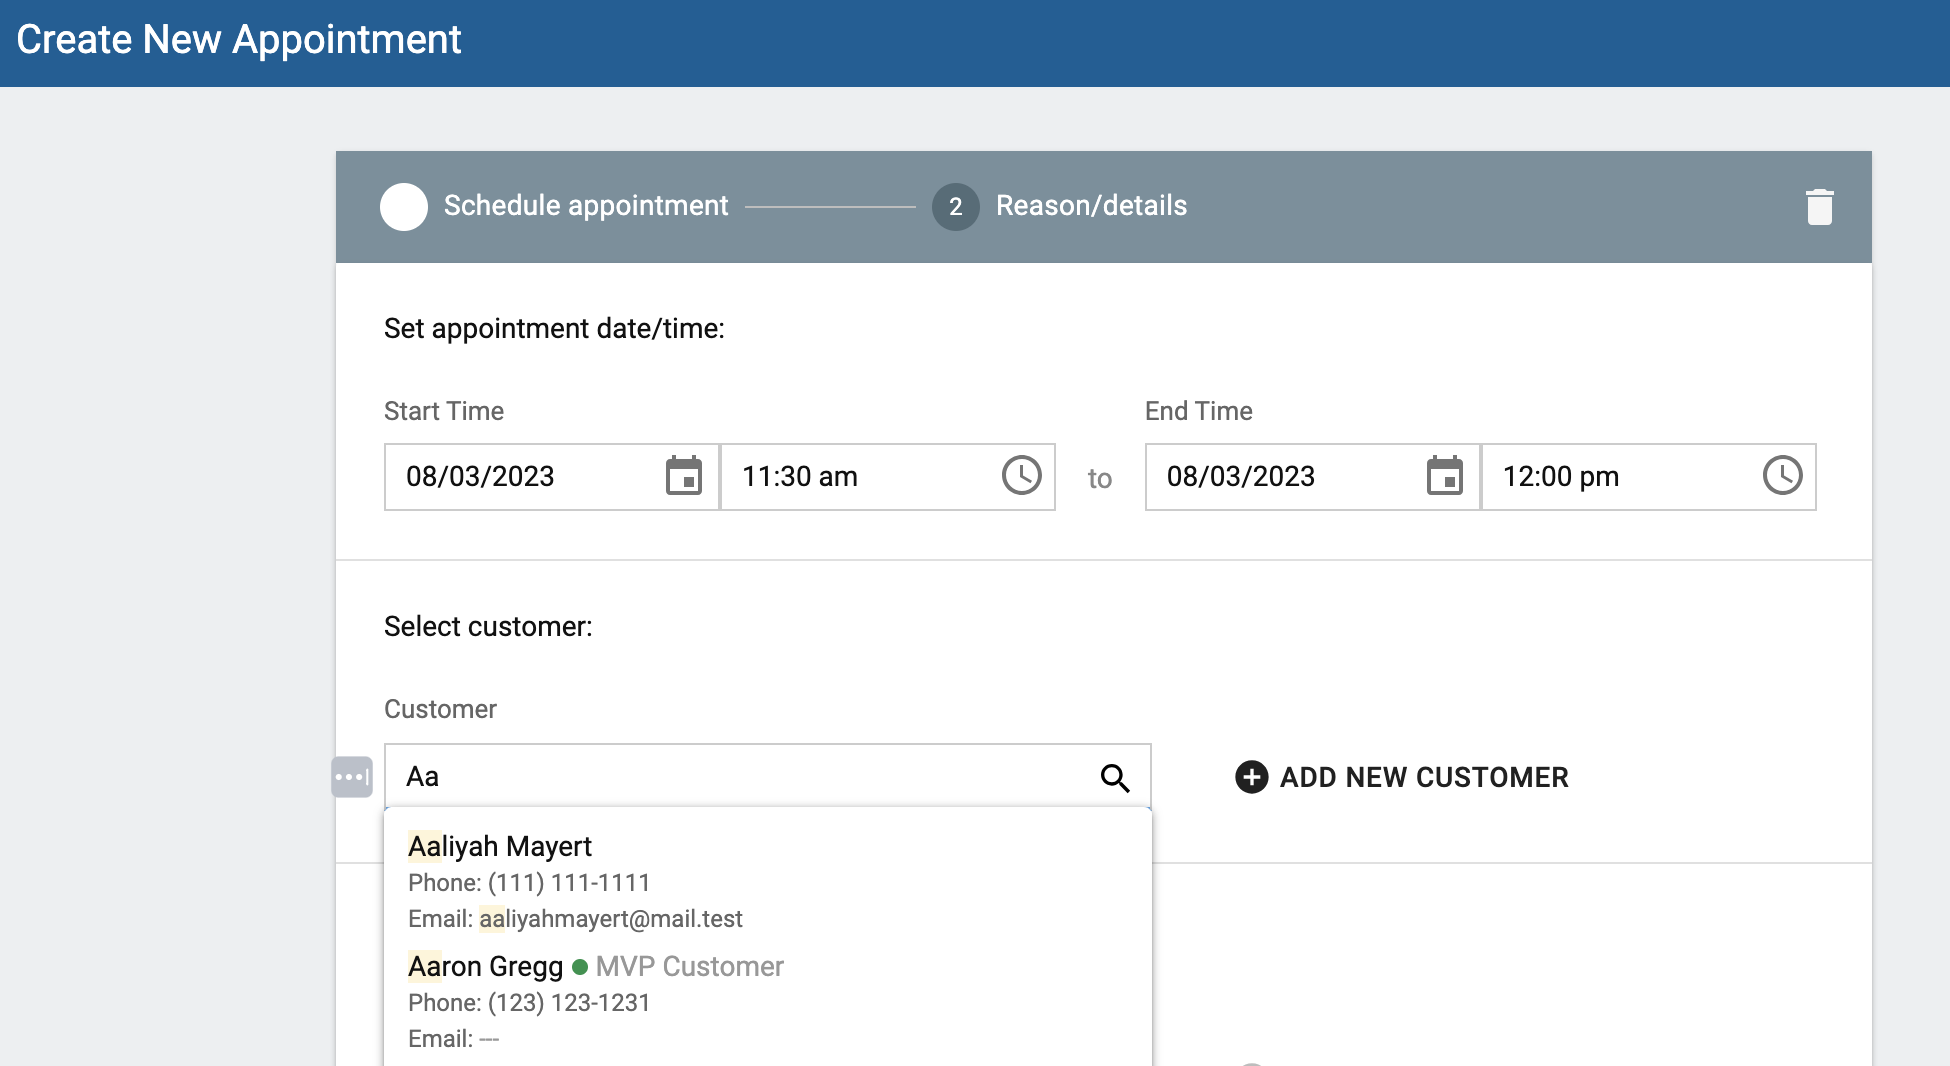
Appointment Creation Form:
Repair Order
The customer tag is also visible within the RO sidebar in a repair order. We will only show the color associated with the tag within the RO sidebar, however you can hover over the color if you need more information on which tag linked to the customer.
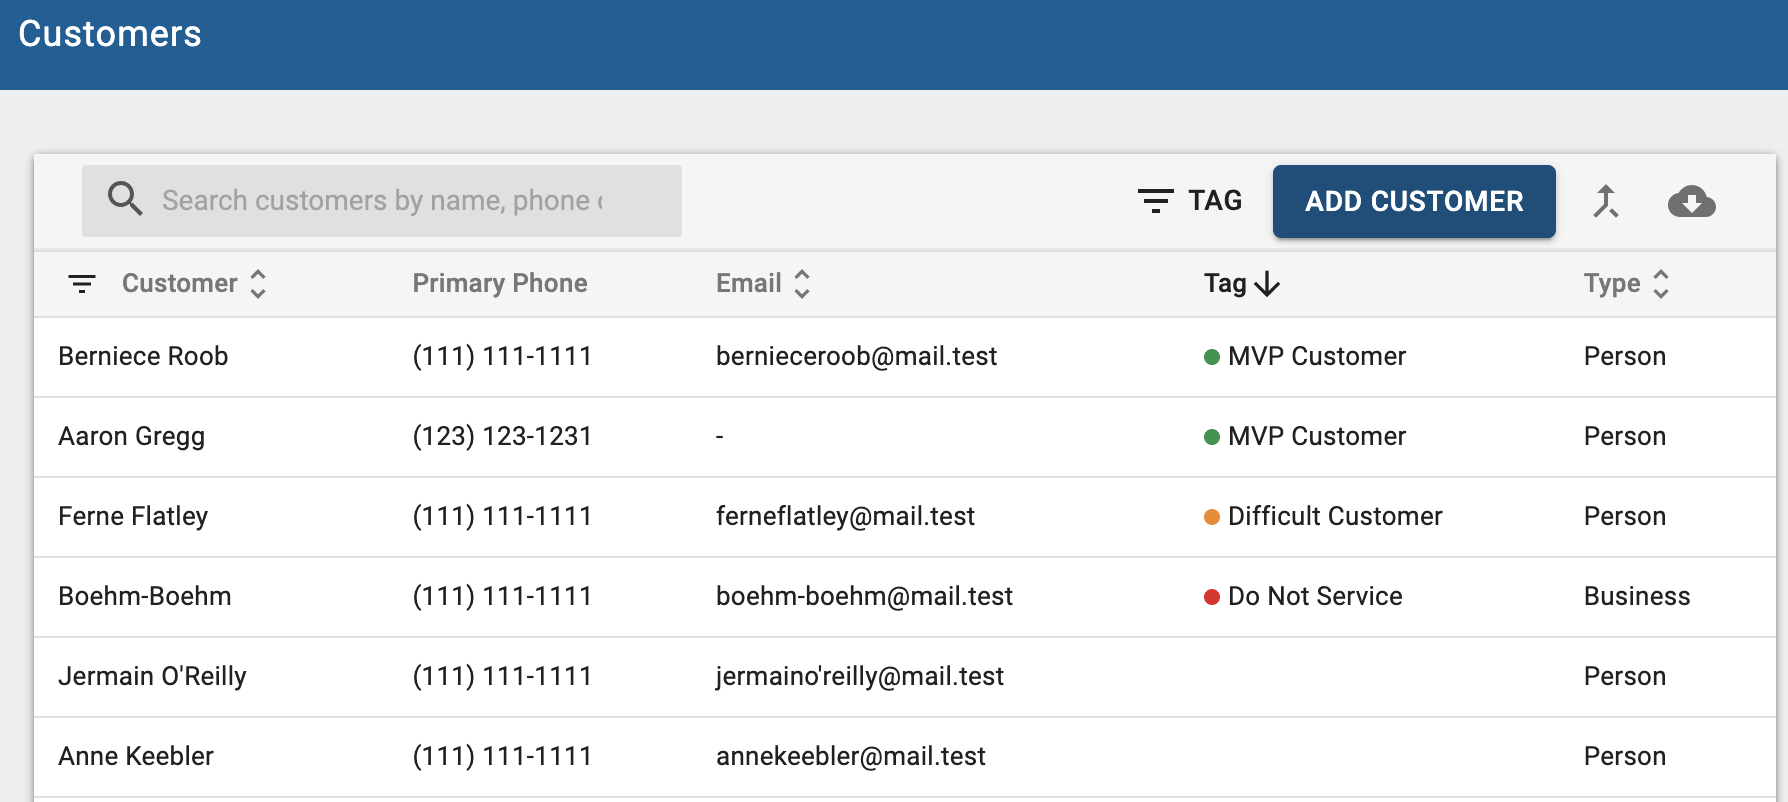
Customer List
You can also see the customer tags within your customer list, AND filter your customer list based on these tags.
Frequently Asked Questions:
-
Will my technicians be able to see these tags? If your technicians do not have access to customer information, then they will not be able to see the customer tags.
-
Can I add custom tags? For the first iteration of this feature, we do not allow custom tags to be created. This was due to certain complexities it added such as character limitations, and how the tag would be visible in search engines depending on screen size. However, we will continue to monitor feedback from our customers and improve this feature for you as needed.
Please contact our support team if you have any other questions around this feature.