The Tekmetric Online Booking solution can be implemented directly onto your website as an overlay, a separate webpage, or both, depending on your preference and how you want to display the widget to your customers.
iframe Overlay
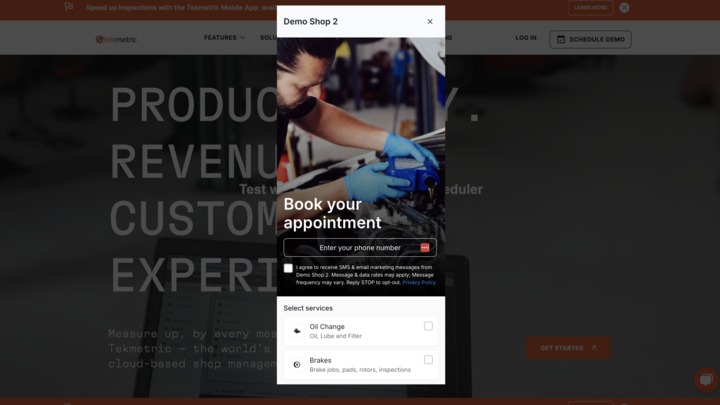
The iframe overlay keeps your customer on your webpage, and allows them to use the scheduler as a native experience.
Direct Link
The direct link can be used if your site cannot support the iframe, or used for your social media or other marketing campaigns.
Note: If you aren't sure which implementation you need or need additional support, reach out to our Support team.
Website Integration (iframe overlay)
Implementing as an iframe into your website allows you to provide a native experience, automatically embedding online booking into your website as a floating overlay when a customer clicks your booking or appointment button. This is a great way to keep customers on your site and make it feel like a premium experience.
This is a great option for shops that are comfortable managing the back end of their website with a little HTML experience. Additionally, any shop that uses a third-party developer to host and manage their site can choose this option by sending the script and code to their partner.
How to use the Website Integration Method
- Within the Tekmetric Online Booking Settings tab, click on ‘Get Code’
- Copy the first code, the Tekmetric embed code (1) . Paste this code into your website editor directly into the <body> section of the page.
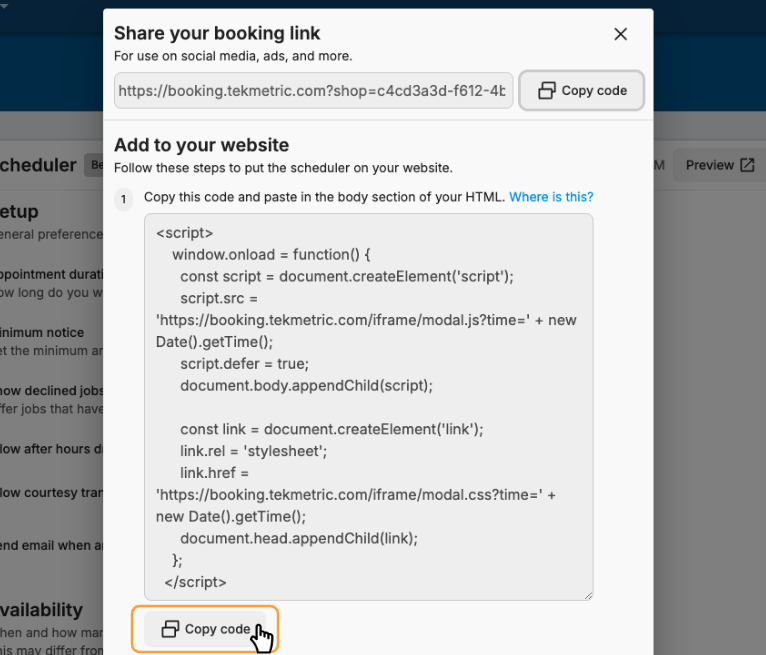
3. Within ‘Get Code’, copy the second code (2) .

4. Use this code to tag any button within your website that you want to use to launch the Online Booking.
Be sure to change any buttons you’re converting from ‘Contact us’ to ‘Book now’ or ‘Schedule an appointment.’
If you're sending your code and details to your website manager, feel free to also send the additional documentation here along with the code to provide additional details.
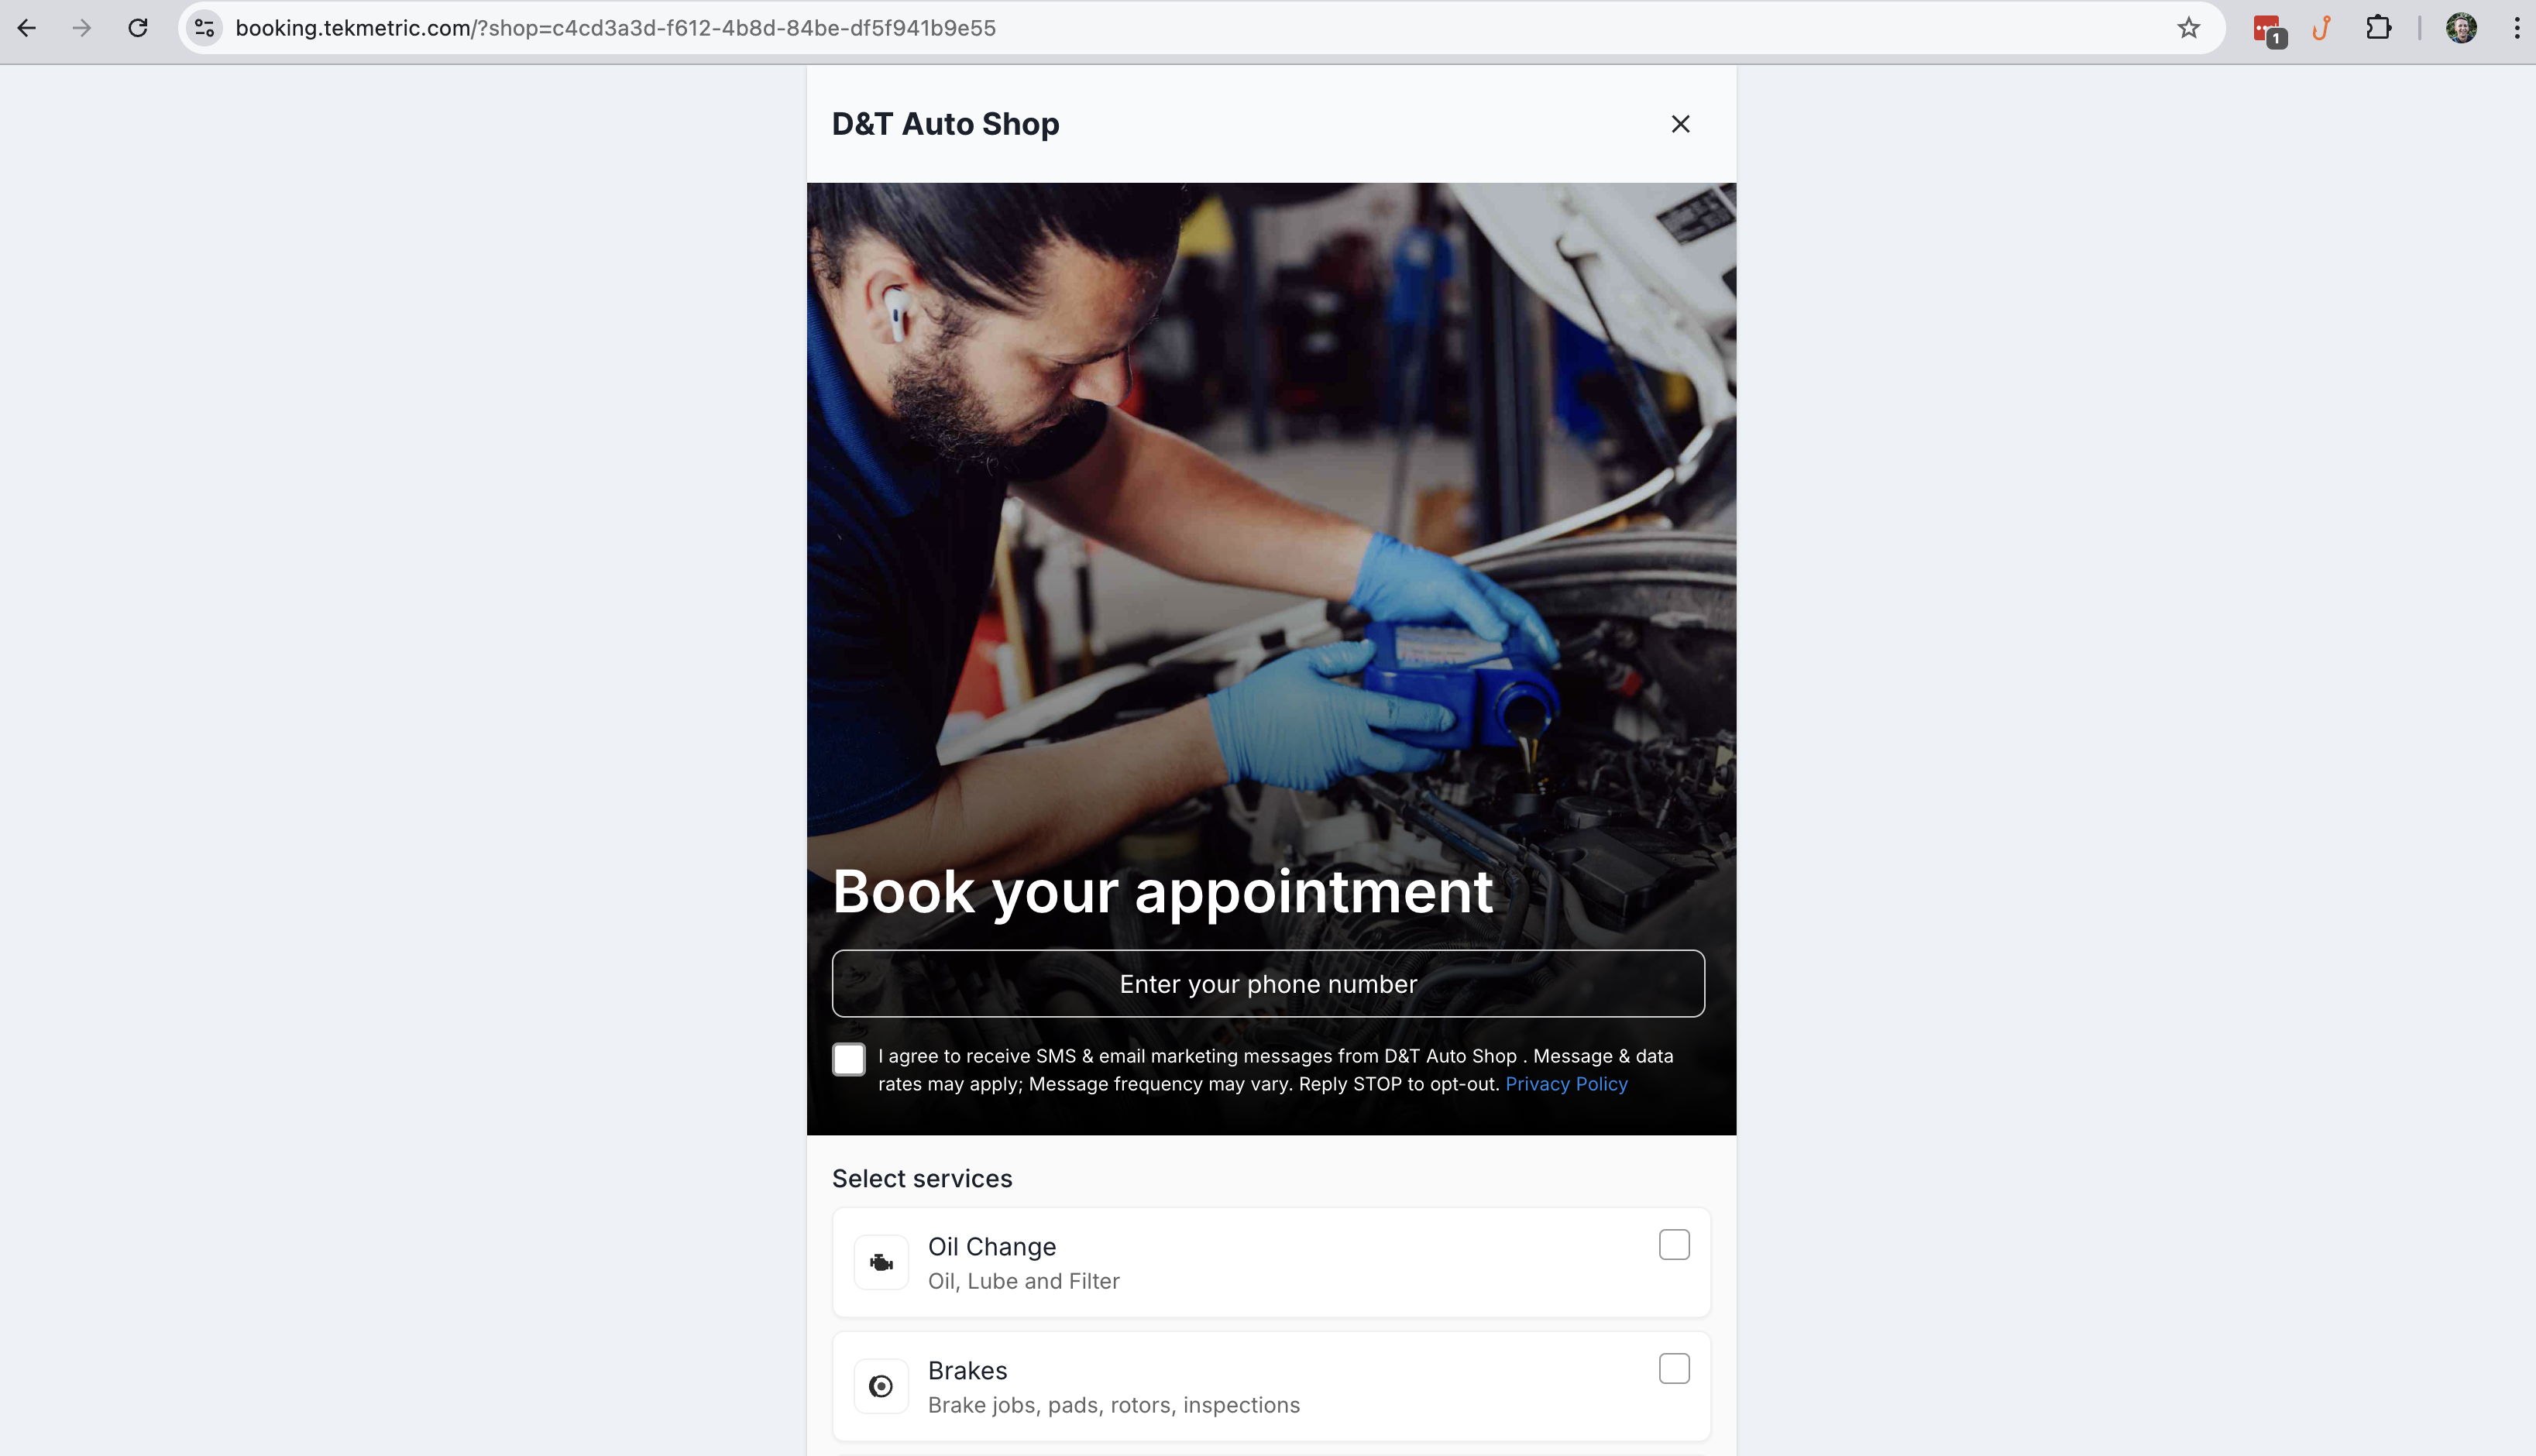
Direct Link
A direct link will direct customers to a new page, where only the online booking widget will be displayed. This is a great option for shops that want to get up and running quickly with online booking or to quickly attach to your Google Business Profile or Facebook page.
How to use the direct link method
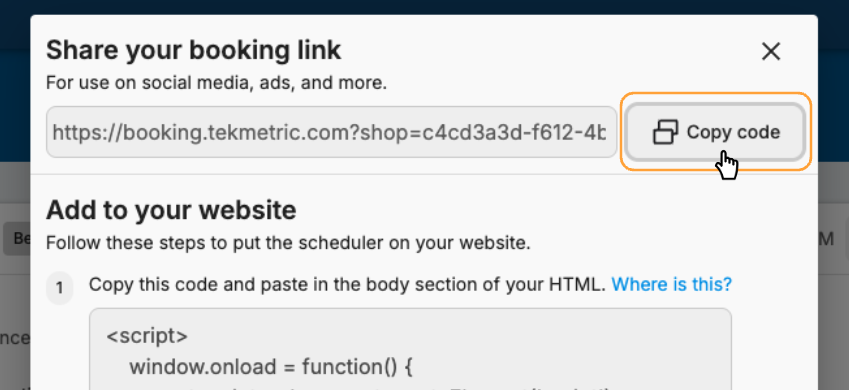
- On the online booking settings page, click on Get Code
- Next to your booking link, click Copy Code
- Copy this link, and replace it as the link for any "Contact Us", "Request Appointment" links on your website
- Be sure to change the text on any of these links to "Book Appointment", instead of "Contact Us" etc.
Note, using the Direct Link option is an ideal method for testing your booking widget prior to launching it to your customers. You’ll be able to use this live link to try out your online booking just as a customer would, walk through the flow, and book time on your Tekmetric calendar prior to releasing to your customers.
Get the Google 'Book Online' button
With our direct integration to Google, you can add the 'Book Online' button to your Google search results page or Google maps button instantly.
If your shop has a different third party already providing this feature, be sure to turn off that integration in their settings page or send a note to them to disable their Google integration.
How to add your booking link to your Google Business Profile
Adding your online booking link to your Google Business Profile (previously Google My Business) can help customers easily book appointments when they search for you on Google.
Once you've copied your booking link from the Get Code button, learn how you can add it to your Google Business Profile.
How to Integrate the TM Booking Tool Into Third Party Websites
Wix:
Add the booking tool script to the body end
<script>
  window.onload = function() {
    const script = document.createElement('script');
    script.src =
      'https://booking.tekmetric.com/iframe/modal.js?time=' + new Date().getTime();
    script.defer = true;
    document.body.appendChild(script);

    const link = document.createElement('link');
    link.rel = 'stylesheet';
    link.href =
      'https://booking.tekmetric.com/iframe/modal.css?time=' + new Date().getTime();
    document.head.appendChild(link);
  };
</script>
Add the following script to the body end as well, do not overwrite the booking tool script, and be sure to replace the placeholder "BOOKING_ID"... This script injects the OnClick event and booking ID.
<script>
(function () {
const BOOKING_ID = 'a895cc57-db2b-442d-9b75-f7e8a8c4edf4';
function isTargetButton(el) {
const labelEl =
el.querySelector('[data-testid="stylablebutton-label"]') || el;
const text = (labelEl.textContent || '').toLowerCase().trim();
return /book|schedule|appointment|reserve/.test(text);
}
function wireButton(el) {
if (el.dataset.bookingWired === '1') return;
el.dataset.bookingWired = '1';
el.addEventListener('click', function (e) {
e.preventDefault();
try {
(window.onShowBooking || onShowBooking)(BOOKING_ID);
} catch (err) {
console.error('onShowBooking is not defined', err);
}
}, { capture: true });
}
function scan() {
document.querySelectorAll('button, a').forEach((el) => {
if (isTargetButton(el)) wireButton(el);
});
}
document.addEventListener('DOMContentLoaded', scan);
const mo = new MutationObserver(scan);
mo.observe(document.documentElement, { childList: true, subtree: true });
setTimeout(scan, 500);
setTimeout(scan, 1500);
})();
</script>