It will be easier for you to oversee bandwidth and workflow for your shop by using the calendar to manage customer appointments scheduled for the day. This will help you dictate when you can take in walk-in customers and how long the potential wait could be. You can also gauge the number of walk-ins each day by adjusting the colors and checking the "create appointment with each new RO" setting in advance settings.
You can utilize appointments further by implementing a process to pre-schedule customers for their next service, similarly to what is done at a doctor’s office when checking out. To take this a step further, we recommend partnering up with one of our marketing partner integrations that will set up and auto-send reminders for your appointments in order to help reduce your no show rate.
In the Appointments section in Shop Settings, you can control the following:
To Get Started
- Click the Shop Settings section on the bottom of the left menu bar.
- Click the 3rd tab, Appointments.
-
Appointment Settings table - here you will setup and customize the time to display in your calendar, colors, and more.
Setup Displayed Hours on Calendar
- Click Daily Schedule to control the hours which the appointment calendar displays for the week and day view.
- Set the Day Start Time to the time you would like to start displaying appointments.
- Set the Day End Time to the time you will no longer be scheduling appointments.
- You can also setup a default appointment duration time - for example, if you set it to 60 minutes, then any appointment created will default to being one hour long.
- Click Save Settings when you are done setting up the hours for your Appointments Calendar.
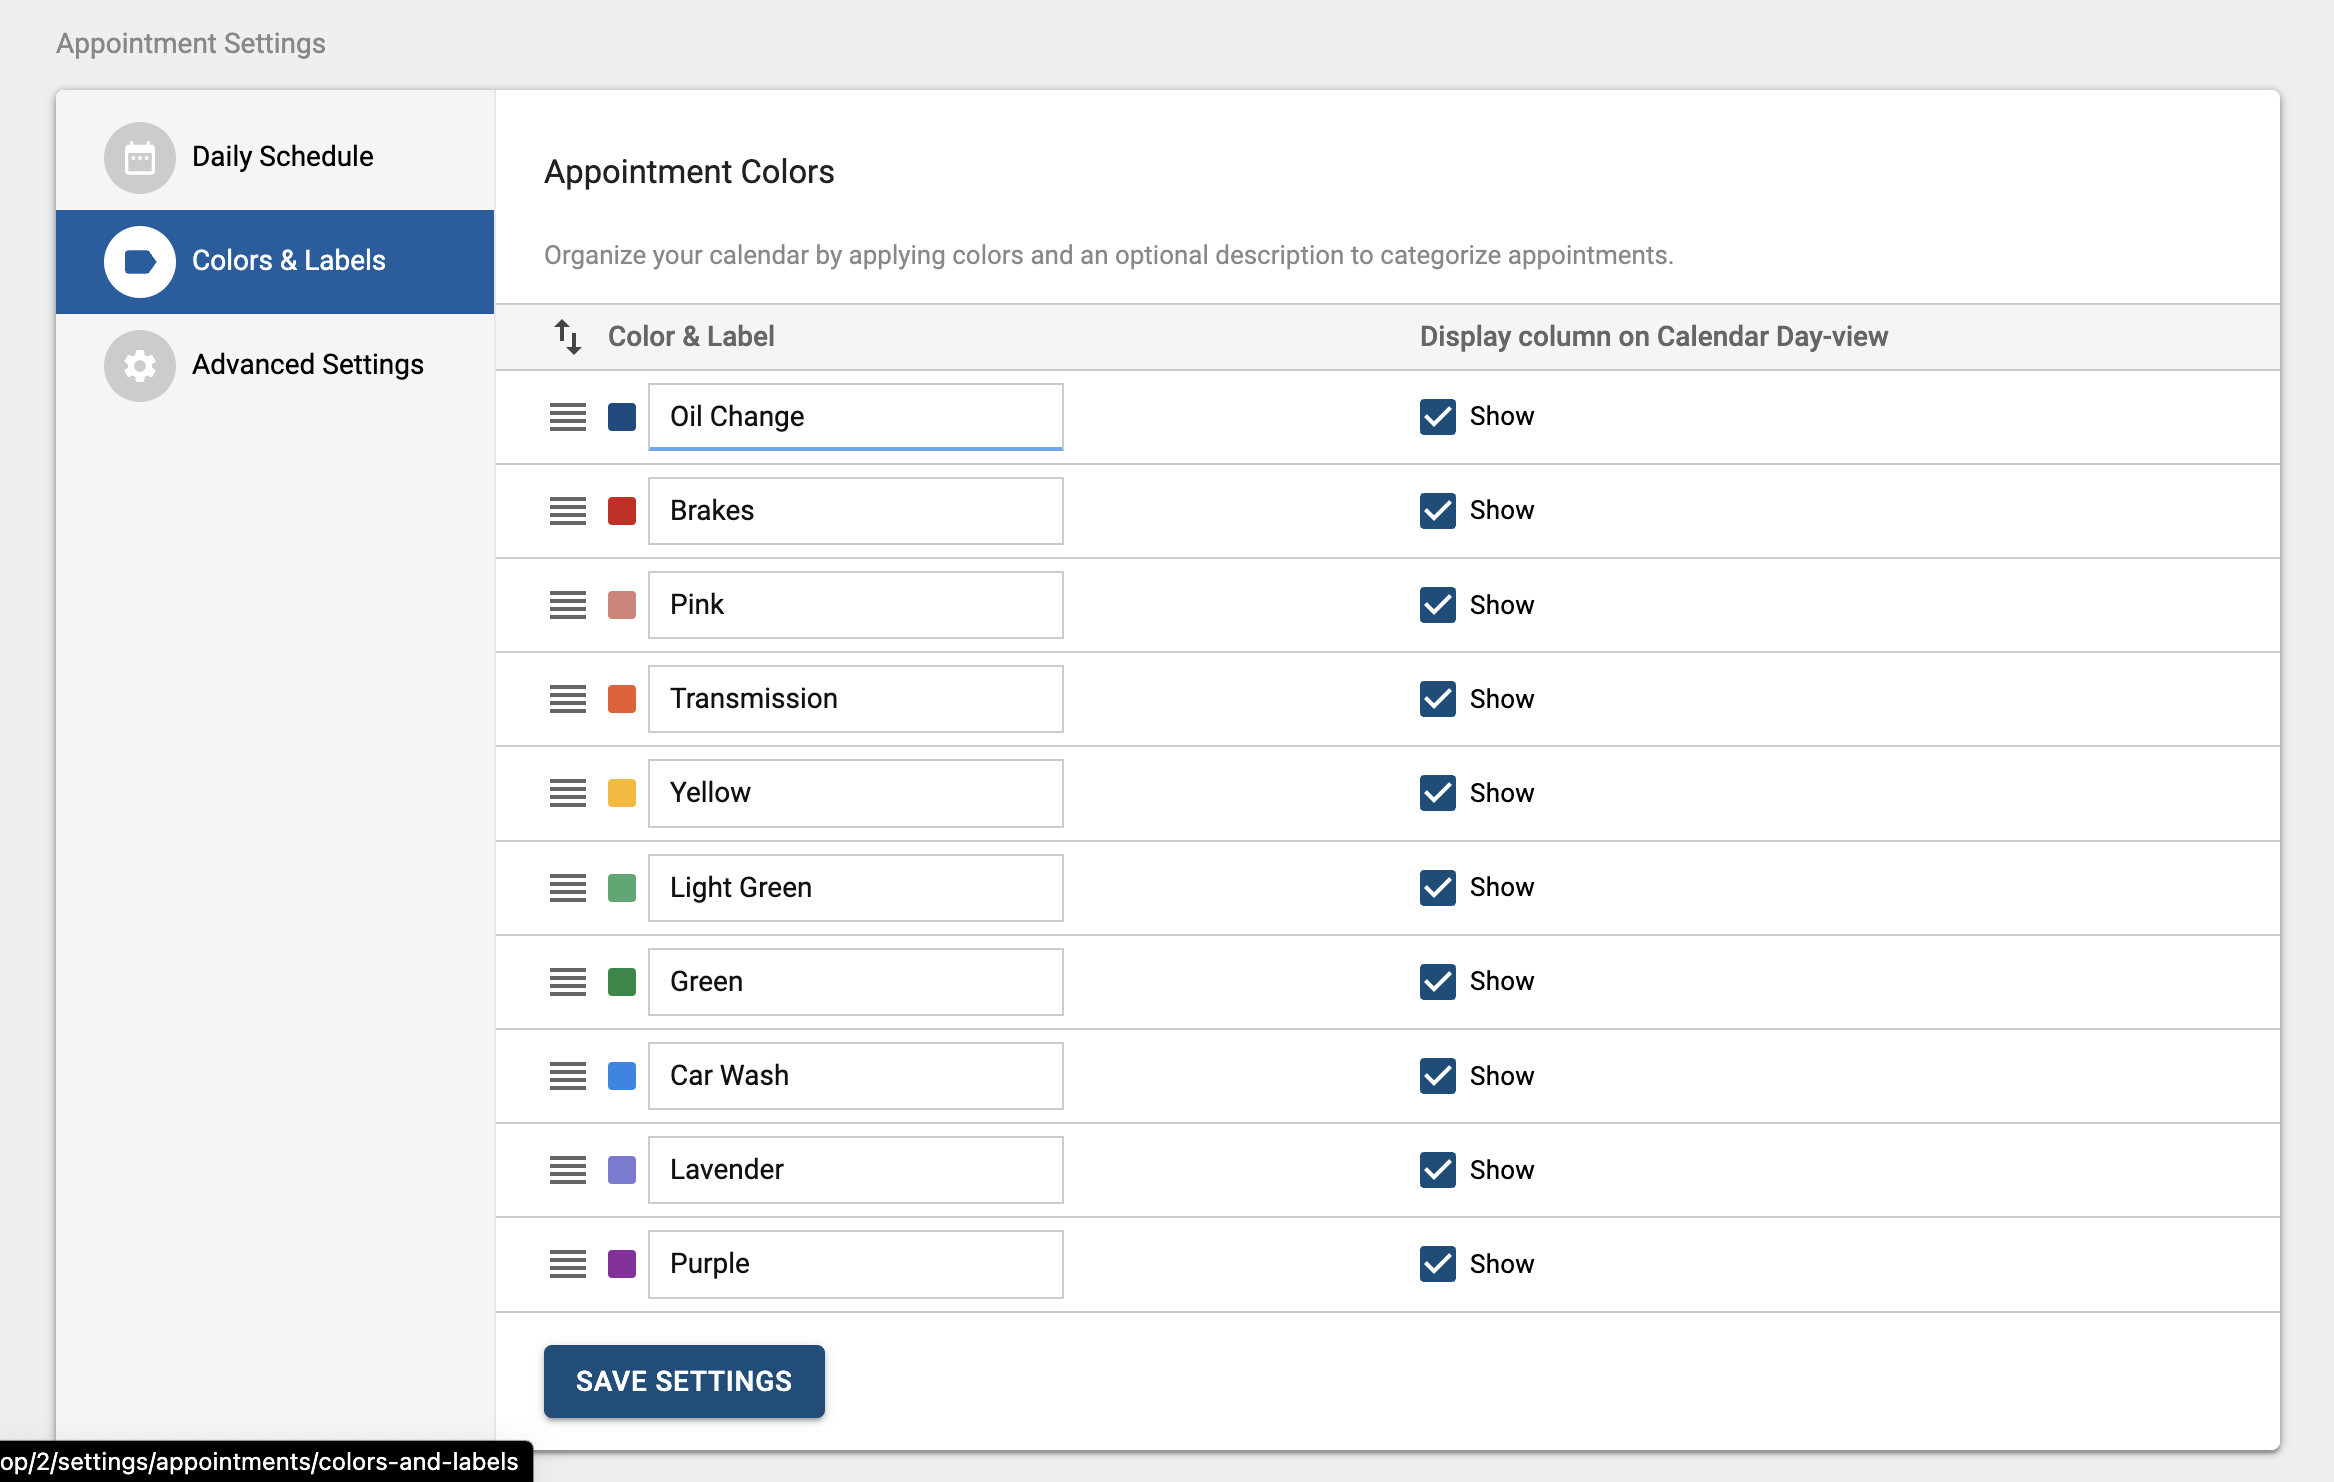
Customize Appointment Colors
By default, all appointments created will be dark blue. You can change the color during initial appointment creation or afterward by editing the appointment or dragging and dropping using the View by Day-Color configuration on the calendar.
- Click Colors & Labels to customize what each color represents on the Appointments Calendar.
- Next to each color, type what the desired color(s) represent.
- Click Save Settings when you are done customizing the color labels.
Recommendations: Label colors by job type, bay, available equipment, etc.
Turn On/Off Automated RO Creation with Each Appointment
-
Click Advanced Settings to configure automated RO Creation with each appointment.
- Box is checked - An appointment will automatically be created when you create a repair order.
- Box is unchecked - An appointment will NOT be created when you create a repair order.
- Click Save Settings when you are done configuring RO creation settings.