To print lube stickers from your GODEX printer, you'll need to complete the following steps. Often, there is a bit of tweaking required depending on the exact printer and stickers your shop uses. We recommend starting and then making small adjustments until the ideal print result is found. This article will review the following:
Adjustments to Printer Hardware Settings
-
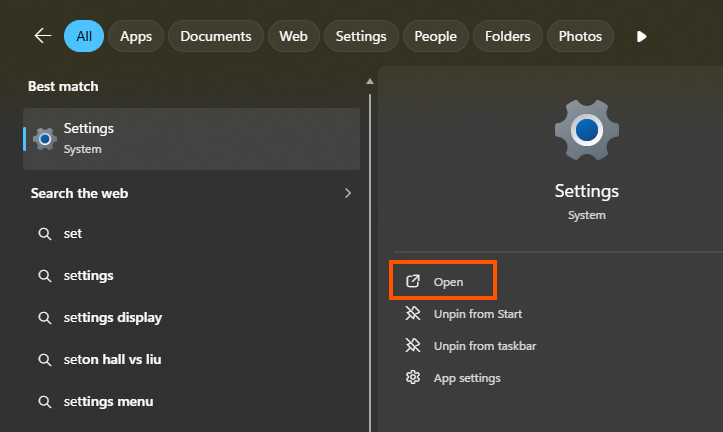
Open the printer hardware settings (this is outside of Tekmetric in your computer settings) by opening your desktop Settings application.
-
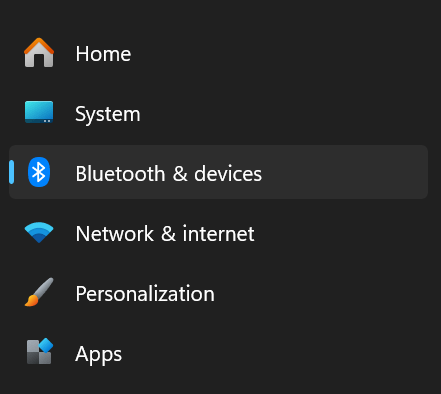
Click Bluetooth & devices in the left sidebar, then select Printers & scanners.
- Choose your specific Godex printer from the list.
-
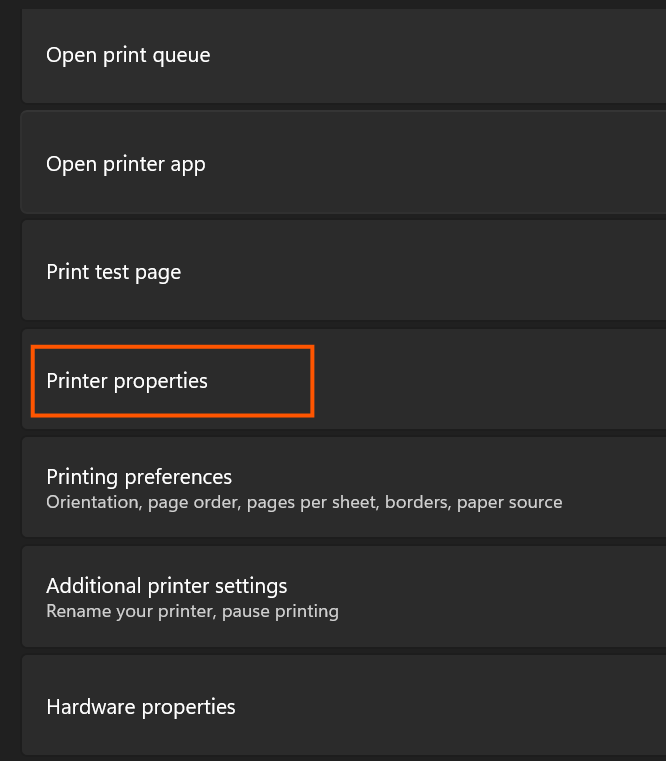
Click Printer properties or scroll down and select More devices and printer settings to access legacy hardware properties.
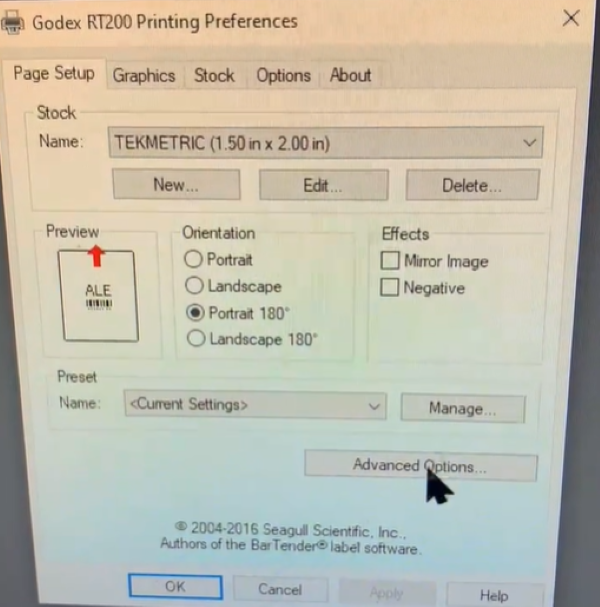
- Click on the Page Setup tab at the top of the Printing Preferences window that opens.
- Configure the settings to reflect the following:
-
Name: Tekmetric (1.5in X 2.0in)
-
Orientation: Portrait 180
-
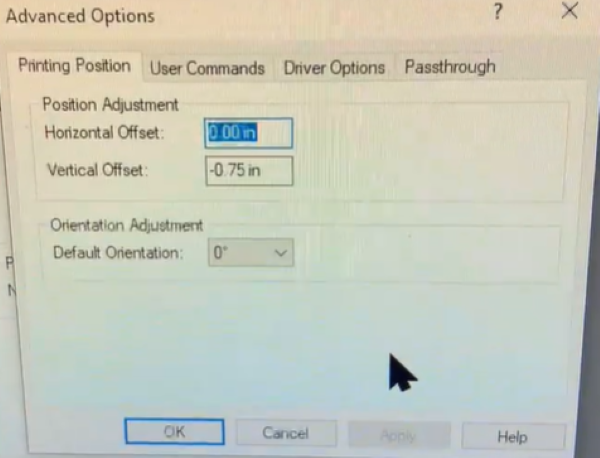
Horizontal Offset: 0.00in (located in Advanced Options)
-
Vertical Offset: -0.75in (located in Advanced Options)
Adjustments to Tekmetric Printing Settings
Start with the settings below and make small adjustments as necessary depending on your sticker size:
- Once hardware settings have been changed, navigate to an open Repair Order in Tekmetric.
-
You'll need to make sure the initial (In) mileage is entered on the Repair Order in the top-right corner first.
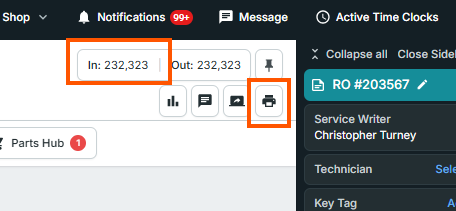
- Then click the printer icon button and choose Print Oil Sticker.
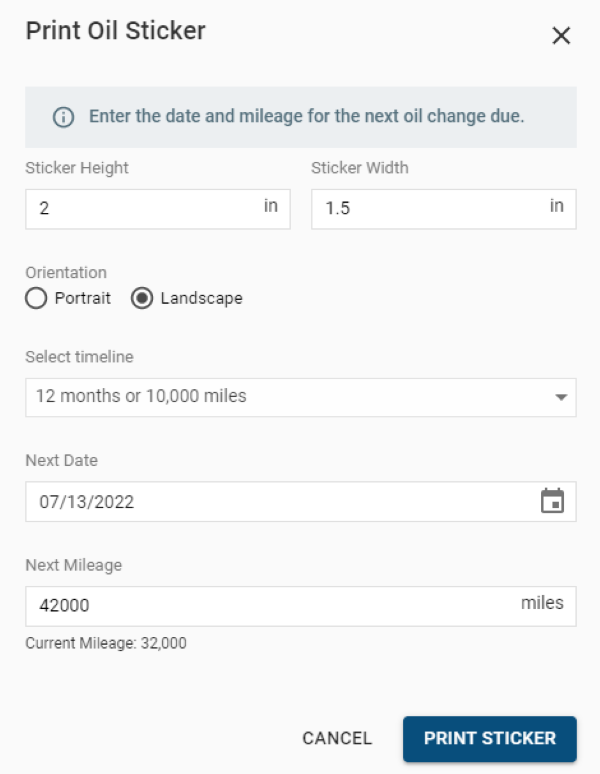
- Adjust the sticker height and width ratio. Start with the settings below and make small adjustments as necessary depending on your sticker size:
Printing the GODEX Sticker
-
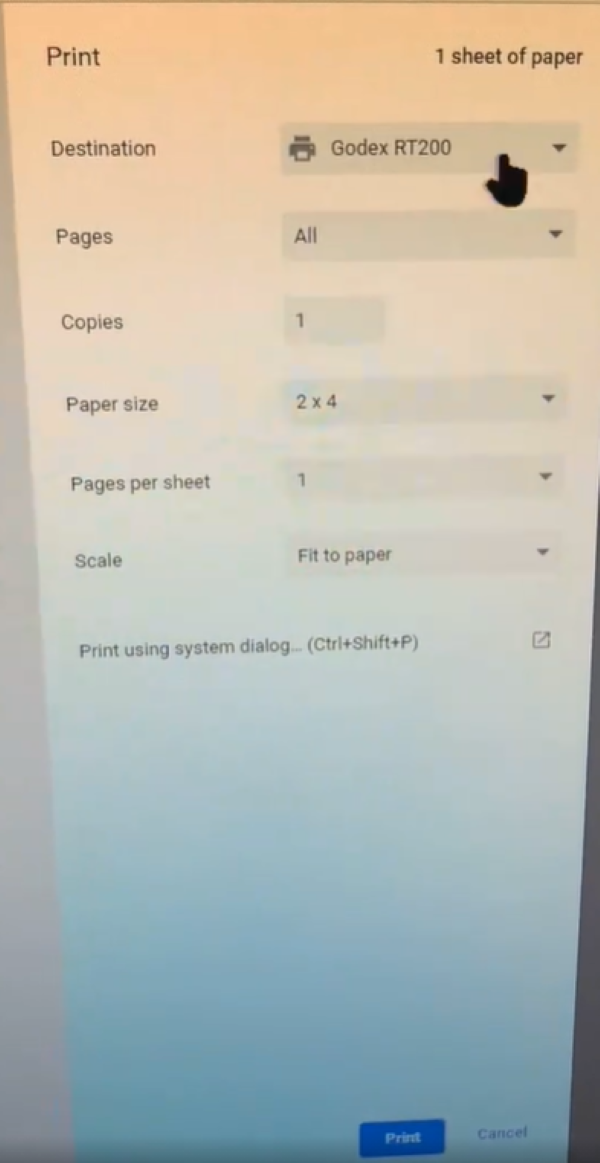
Destination: GODEX RT200 (or other name for printer)
-
Pages: All
-
Copies: 1
-
Paper size: 2 X 4
-
Pages Per Sheet: 1
-
Scale: Fit to paper
Godex Lube Sticker Printer Troubleshooting
Step 1: Check Your Computer's Printer Settings
Tekmetric sends print jobs to your computer's default printer, so it's critical that your Godex printer is correctly configured there.
-
Match Your Label Size:
- On your computer, go to Devices & Printers or Printers & Scanners.
- Right-click your Godex printer and open Printer Properties or Printing Preferences.
- In the
Page Setup or Paper tab, ensure the width and height match the exact dimensions of your physical lube stickers. (e.g., 2.0" x 1.5").
-
Set Orientation:
- In the same preferences window, set the orientation to
Landscape or Portrait 180 to ensure the text prints correctly on the label.
-
Calibrate for Media:
- Turn your Godex printer OFF.
- Press and hold the FEED button while you turn the printer back ON.
- Continue to hold the FEED button until you hear a series of beeps, then release. The printer will feed a few labels to automatically calibrate to the correct size.
Step 2: Troubleshoot within Tekmetric
Once your computer's settings are correct, you need to ensure Tekmetric is sending the print job correctly.
-
Set Up a Test Print:
- In Tekmetric, open any active Repair Order (RO).
- Ensure the mileage is entered in the top-right corner.
- Click the printer icon and select Print Oil Sticker.
-
Adjust the Sticker Ratio:
- When the print dialog appears, you will see a preview of the sticker.
- Use the
Height and Width ratio adjustments to ensure the text fits perfectly inside the label. You may need to make small adjustments and do test prints until it's centered and the text isn't cut off.
Step 3: Handle Common Connectivity & Driver Issues
If the issue persists, it's likely a communication problem between your computer and the printer.
-
Clear the Print Queue:
- Go to your computer's Printers & Scanners list, click on your Godex printer, and select "Open Queue."
- Right-click any documents in the list and select Cancel to clear all pending print jobs. A stuck job can prevent any new prints from going through.
-
Restart Everything:
- Turn off the printer, unplug it from the computer, and then restart your computer.
- Once your computer is ready, plug the printer back in and turn it on.
-
Reinstall the Driver:
- A corrupted or outdated driver can cause a range of issues.
- Go to your computer's Printers & Scanners settings and remove the Godex printer.
- Go to the official Godex website, download the latest driver for your model, and follow the installation instructions.
Looking for an Alternative?
Option 1: Canned Job Automations
If your shop uses Tekmetric Marketing, you can skip the sticker and have Tekmetric remind customers automatically when their next oil change is due.
Canned Job Automations send customers a message at the time or mileage you choose. They support both mileage-based and time-based triggers. Instead of relying on a customer to notice a windshield sticker, look up your shop, and call to book, the reminder goes to them at the right moment.
- Set when reminders go out in your shop’s Automation settings.
- No sticker or printer setup is needed.
- Requires Tekmetric Marketing.
Option 2: Print Stickers with the My Oil Sticker Integration
My Oil Sticker is a third-party integration from Detect Dog that adds a print button to your Tekmetric repair orders. It prints custom-branded stickers with your logo, a next-service date and mileage, and a QR code that sends customers to your scheduling site. It uses its own dedicated sticker printer rather than a Godex.
View our My Oil Sticker Integration Guide.