Overview
This guide will walk you through how to use the Bulk Inventory Editing feature to streamline inventory management in your shop. It includes step-by-step instructions, tips, and examples for making large-scale updates to your inventory with ease.
The Bulk Inventory Editing feature allows you to manage your inventory efficiently by making bulk updates to part details, counts, and costs. This tool is designed to save you time, reduce errors, and help maintain accurate inventory records.
Accessing the Bulk Inventory Editing Feature
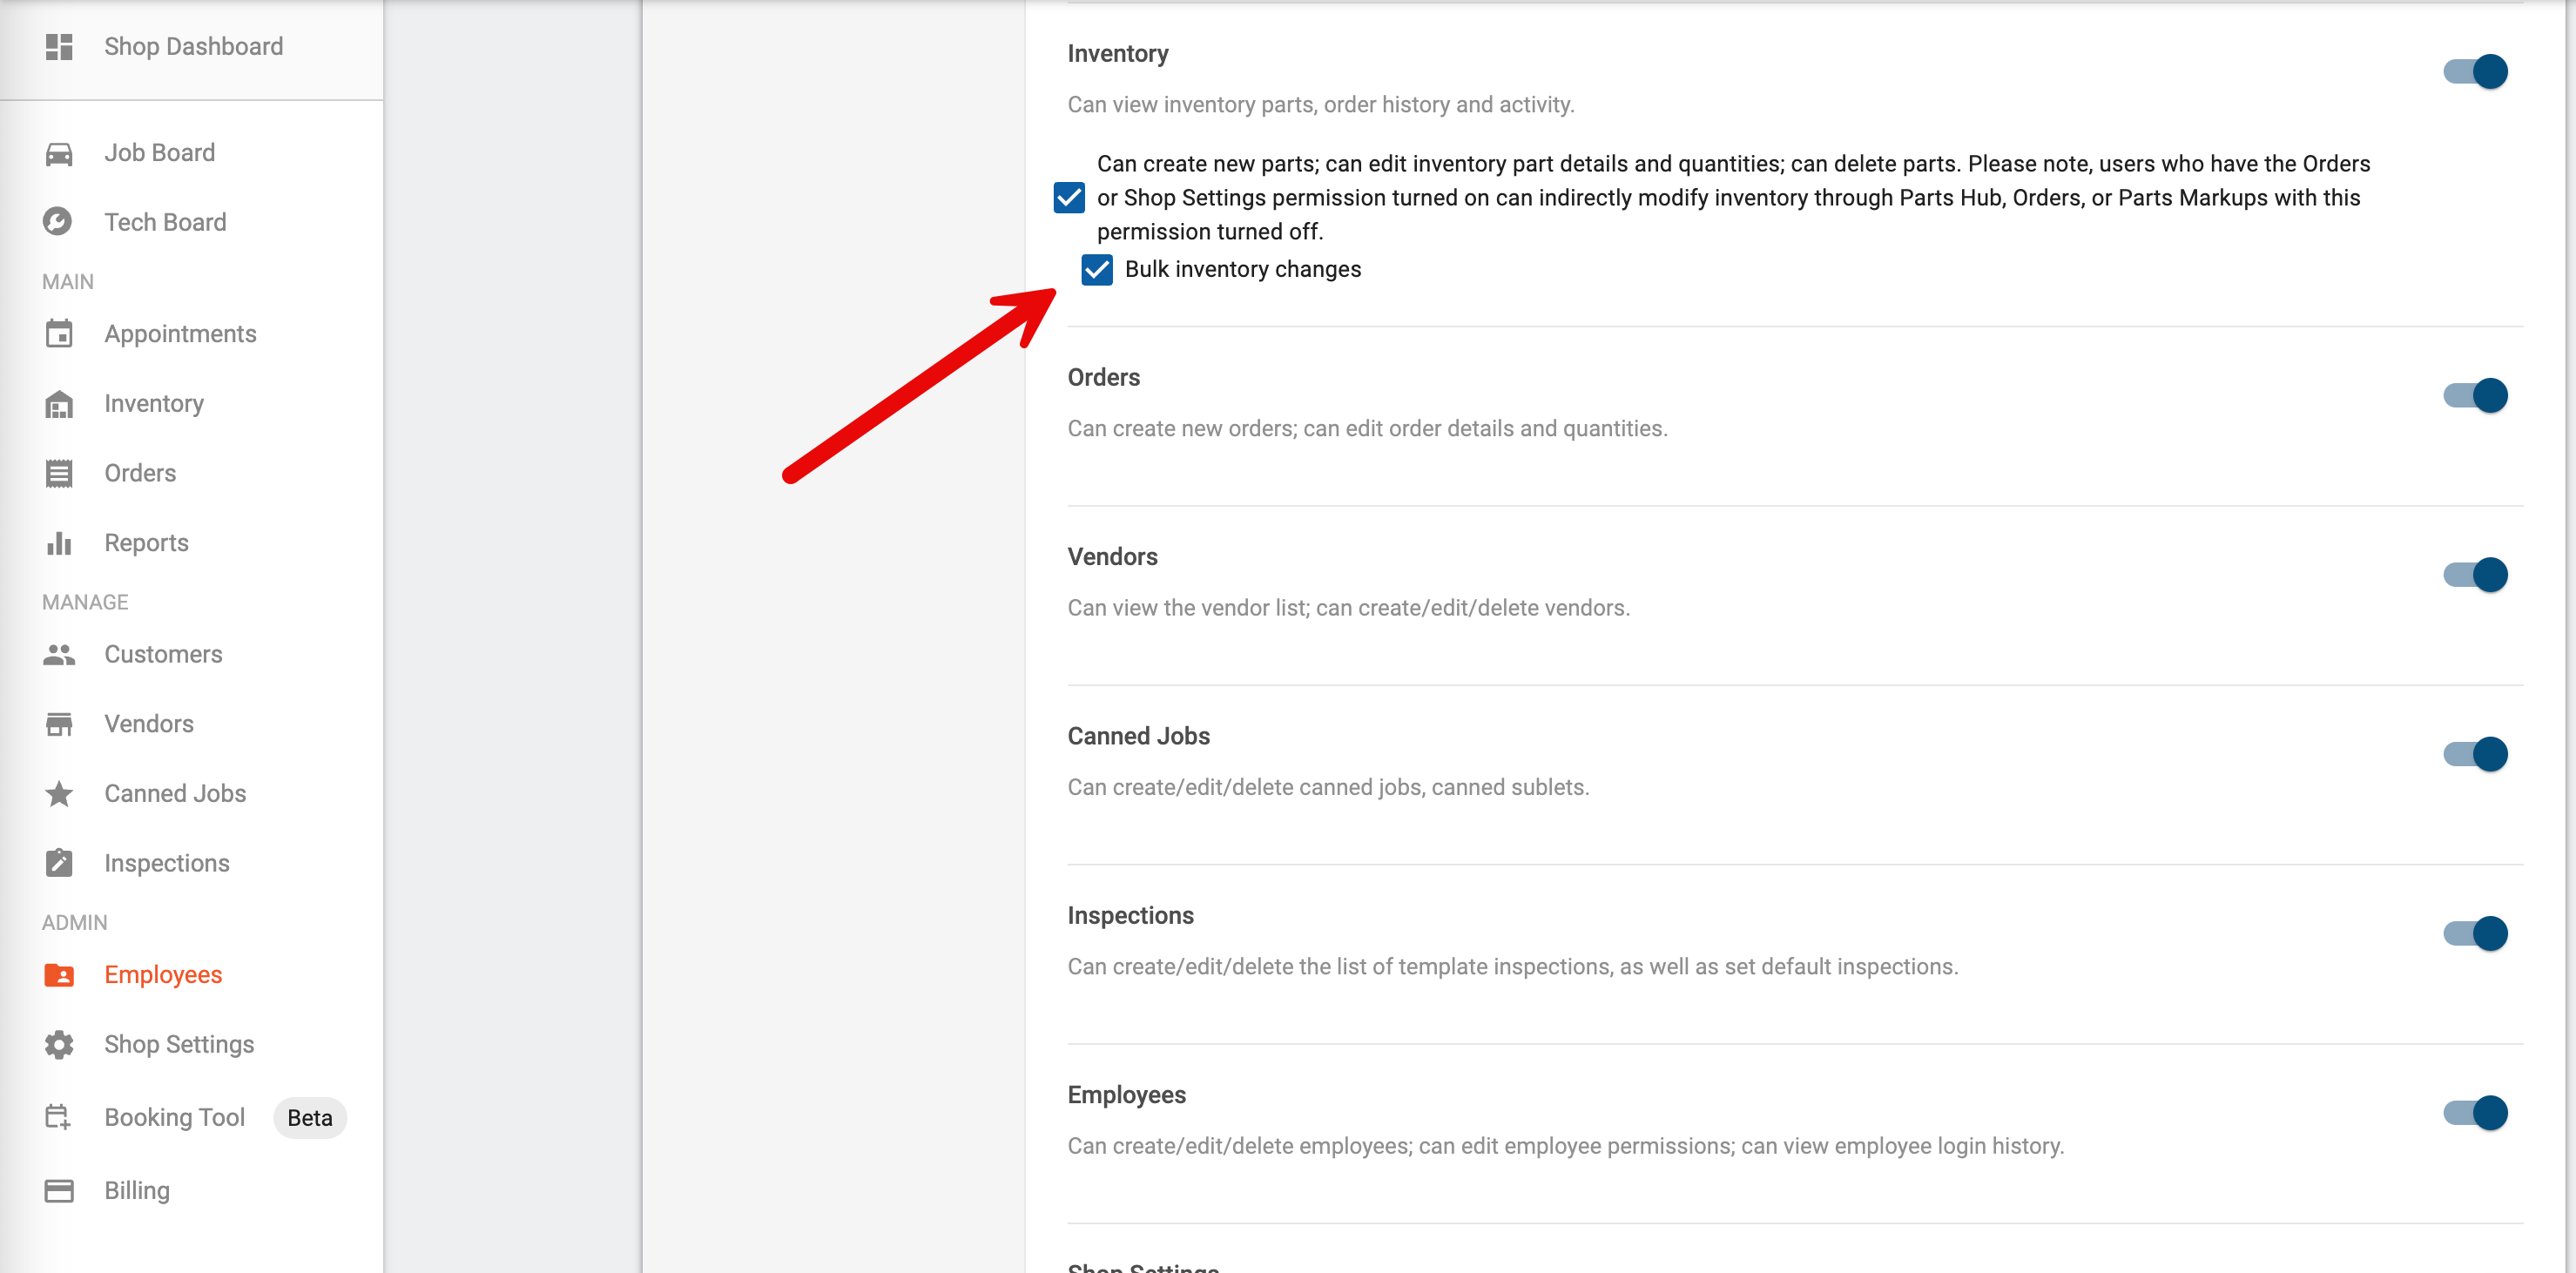
Check Permissions: Ensure you have the "Bulk Inventory Changes" permission enabled. This can be set up under User Role Management. By default, only the owner will have this permission enabled.
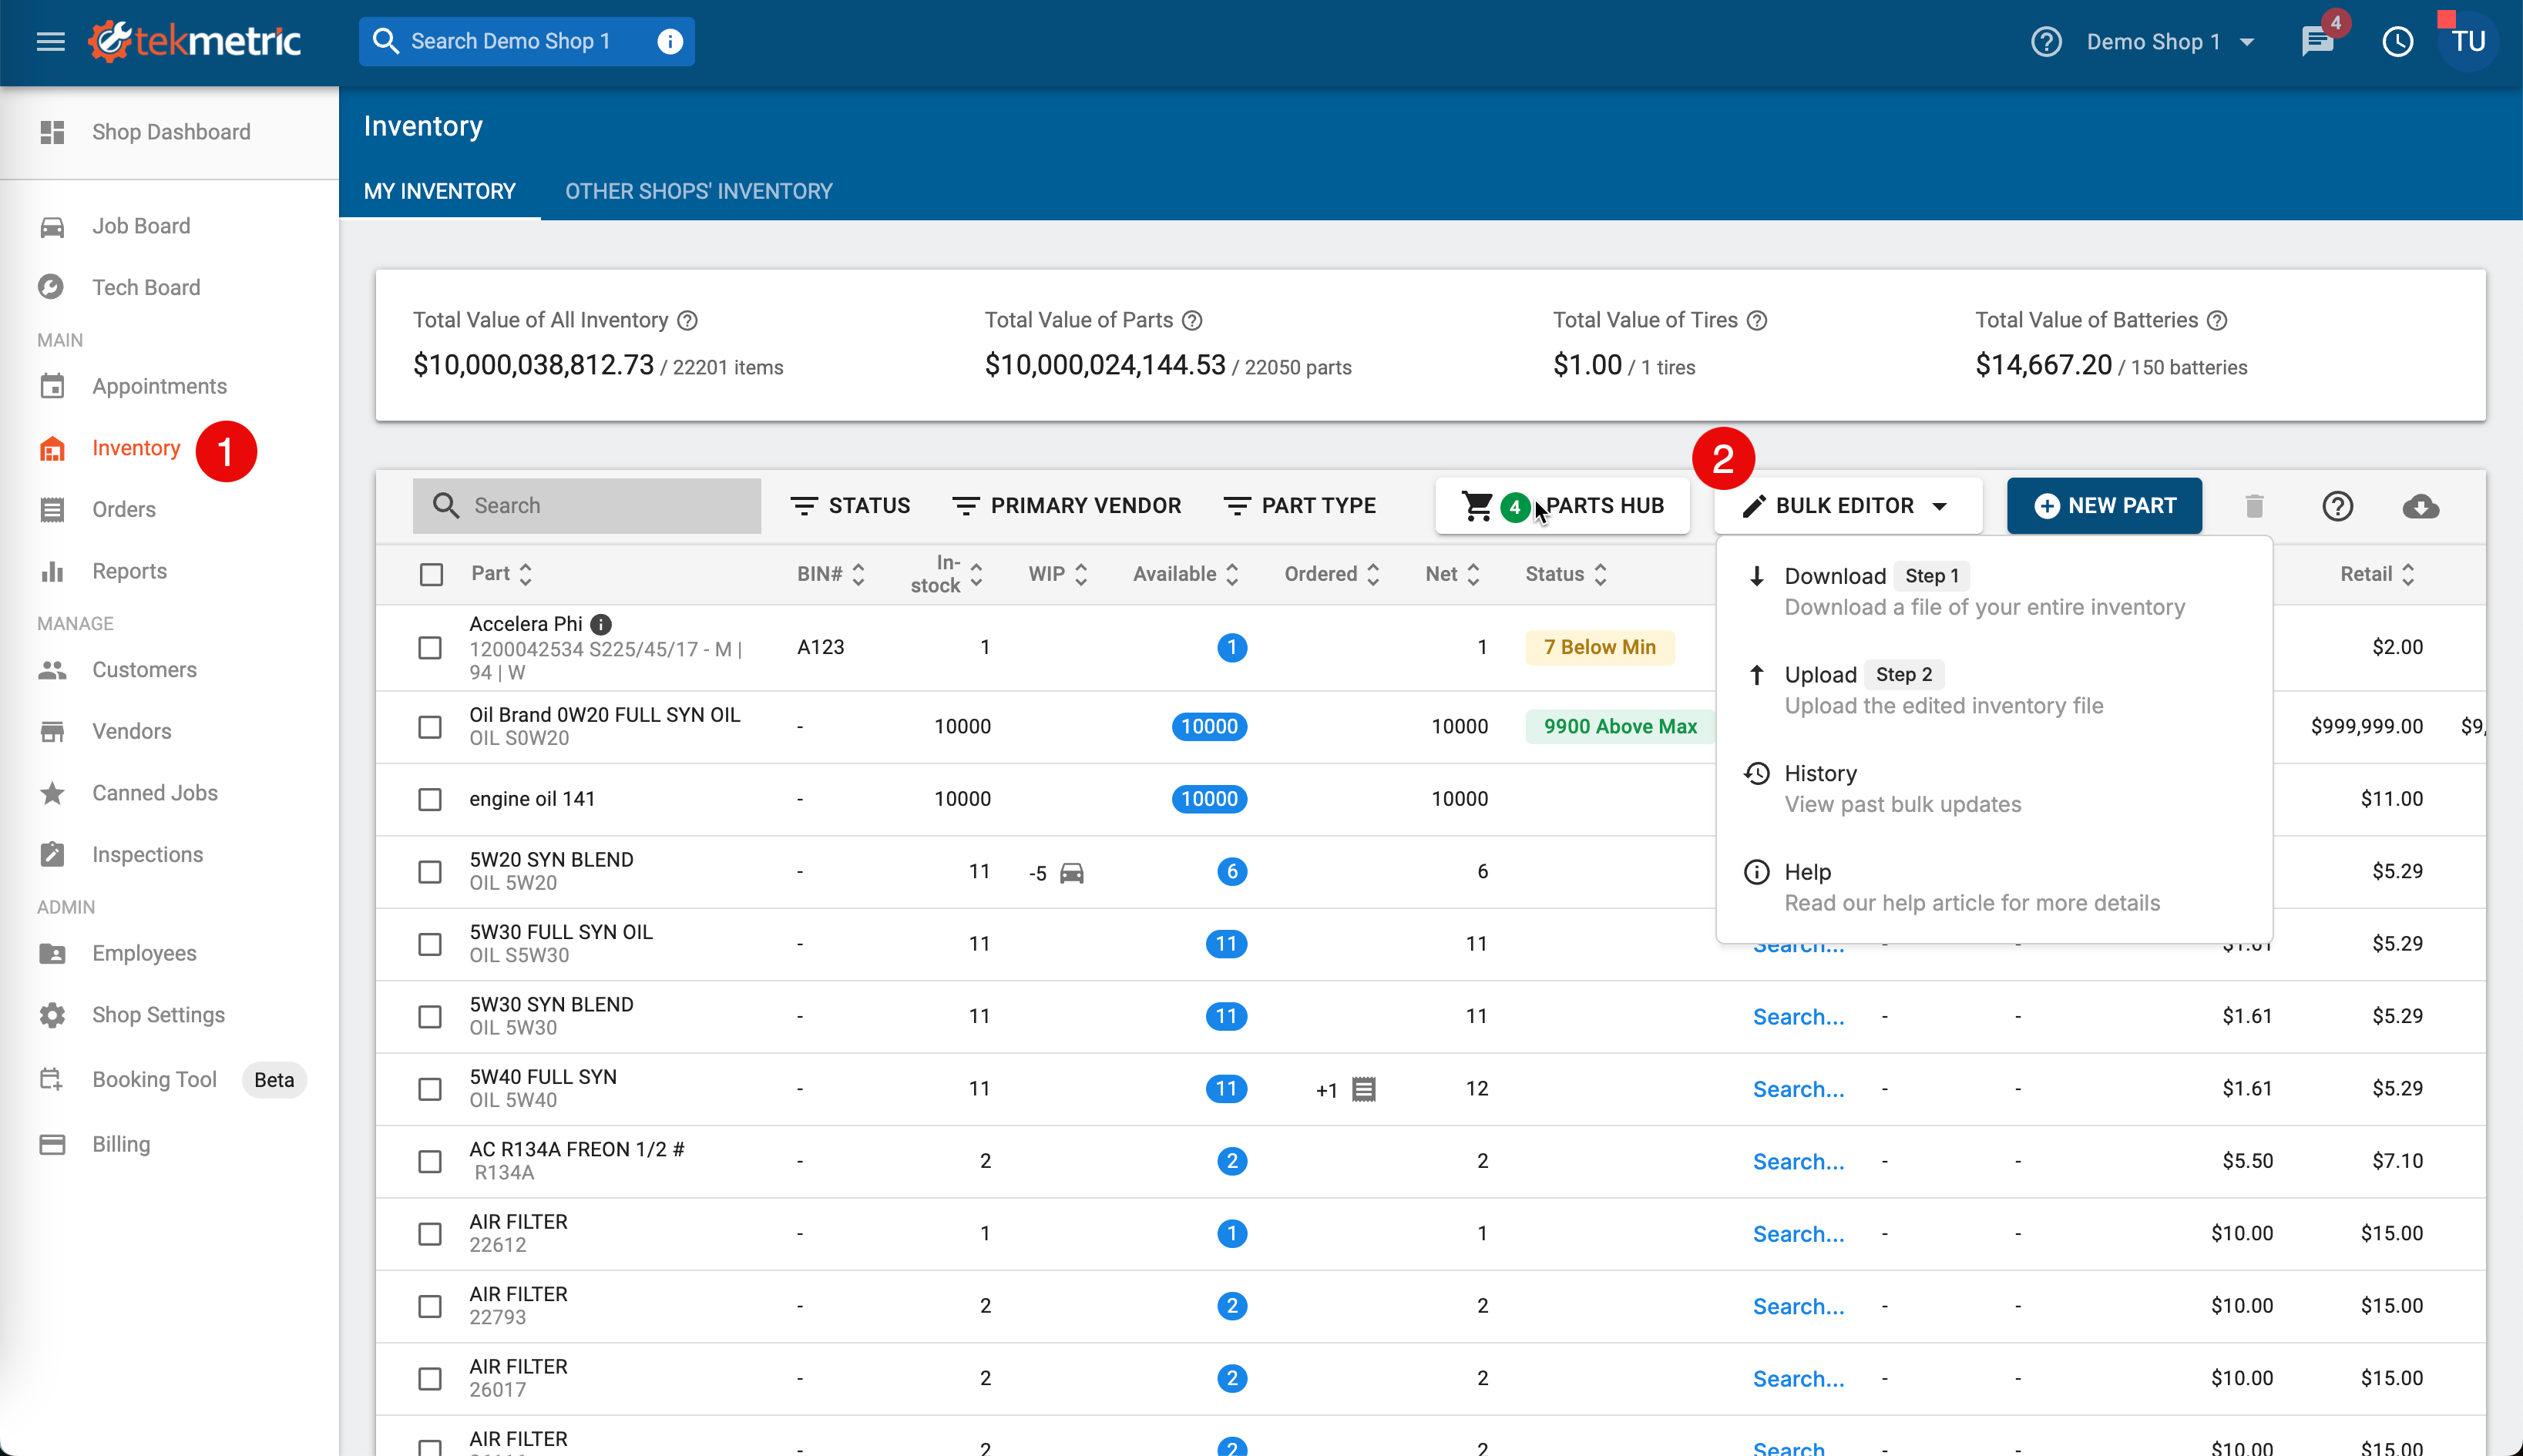
Navigate to Inventory: Go to the Inventory section in Tekmetric.
Locate the Bulk Edit Option: Look for the "Bulk Edit" button in the toolbar.
Download the Inventory File
-
Click "Download": This will download your entire inventory as an
.xlsx file.
-
Understand the File Format: The exported file will include the following columns:
- Part Name, Part Number, Quantity, Unit Cost, Retail Price, and other part details.
- Tire-specific columns, such as Tire Model, Width, Ratio, and Speed Rating (if applicable).
-
File Naming Convention: The downloaded file will have a name like
ShopName_Inventory_YYYY-mm-dd_HH-MM-SS.xlsx for easy identification.

Upload the Edited Inventory File
-
Edit the File:
- Open the
.xlsx file and make your changes (e.g., updating quantities, costs, or part details).
-
Important:
- Do not modify the Checksum or ID columns to avoid errors during upload.
- Do not change column headers to avoid errors during upload.
-
Save or Export the File:
- Once you've made your changes, save the file in the same
.xlsx format.
- Ensure that all edits are properly saved before proceeding to upload.
-
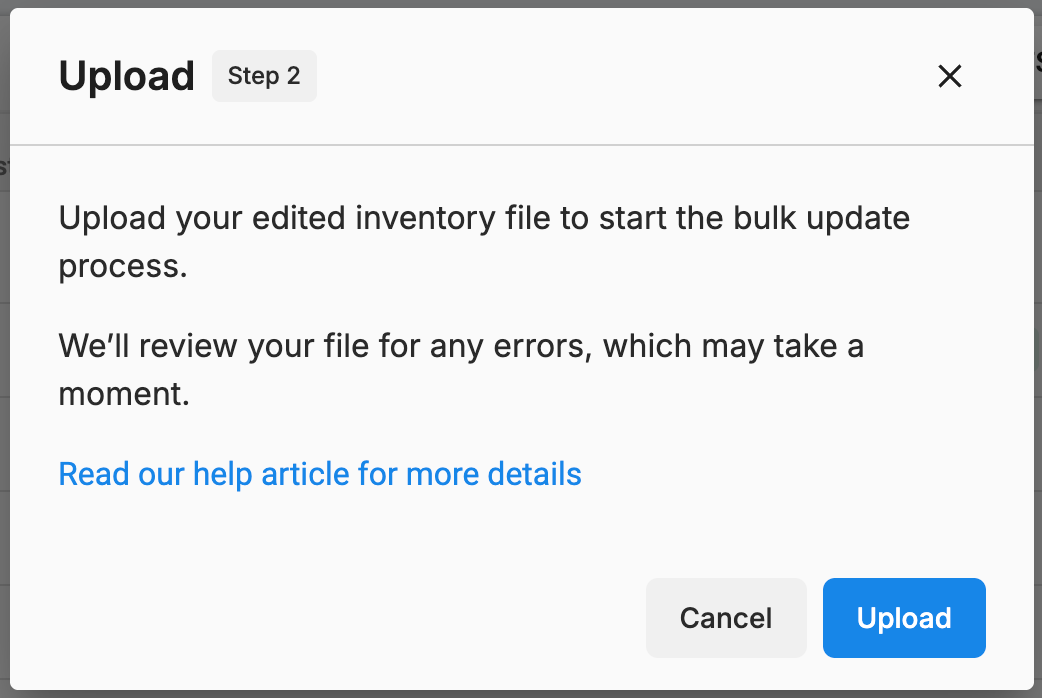
Click "Upload Inventory File": Once your edits are complete, return to the Bulk Inventory Editing Tool and click the upload button.
-
Choose Your File: Select the edited file from your computer.
-
Review and Confirm:
- The system will validate your file. If any errors are found (like missing fields or duplicates), you’ll be prompted to fix them before uploading again.
-
Finalize the Upload: After validation, confirm the upload to merge the changes into your inventory.
Viewing Changes and Logs
-
Activity Feed (learn more about the Activity Feed here):
- Changes to inventory (e.g., Quantity, Costs, Retail Price) will be logged in the Activity Feed.
- Example: "John Doe changed quantity in-stock from 10 to 15 for Part #12345."
-
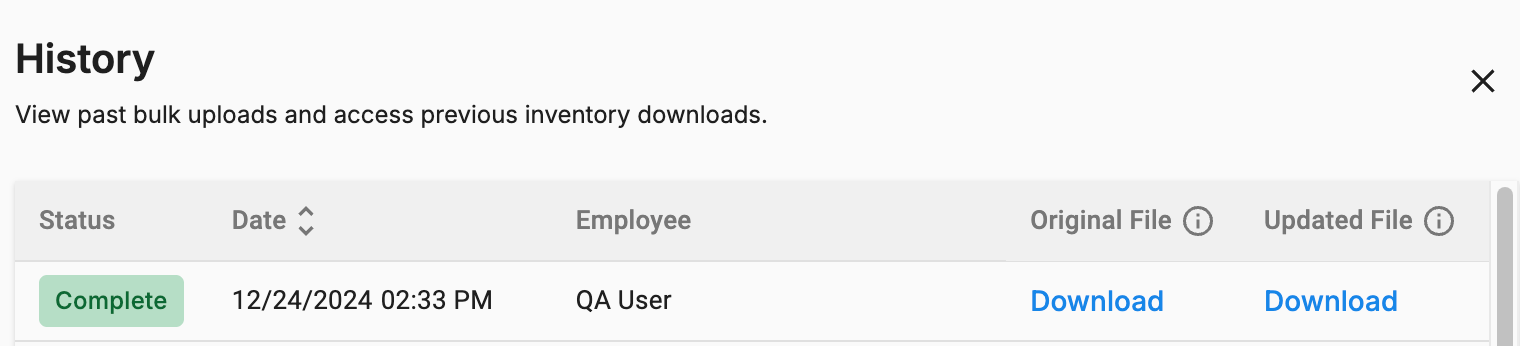
Bulk Upload History:
- Access a history of all uploads, including:
- Timestamp
- User who completed the upload
- Original file
- Updated file
Tips for Success
-
Do Not Edit the First Two Columns:
-
Checksum: This is used to detect changes in each row. Editing or deleting this column will cause tracking issues.
-
ID: This column uniquely identifies each inventory part. Modifying it will prevent the system from correctly matching the part during the upload.
-
Do Not Modify Column Headers: The system expects certain headers (e.g., Part Name, Quantity). Changing these can cause errors when uploading.
-
Ensure Numeric Fields are Correct: Make sure fields like Quantity, Unit Cost, and Retail Price contain only numbers (no letters or special characters).
-
Fill in Required Fields: Always fill in required fields like Quantity, Unit Cost, and Retail Price to avoid upload errors.
-
Use Consistent Naming Conventions: Ensure part names and details match your shop’s naming conventions for easier tracking.
Frequently Asked Questions
Q: What happens if I make a mistake during the upload?
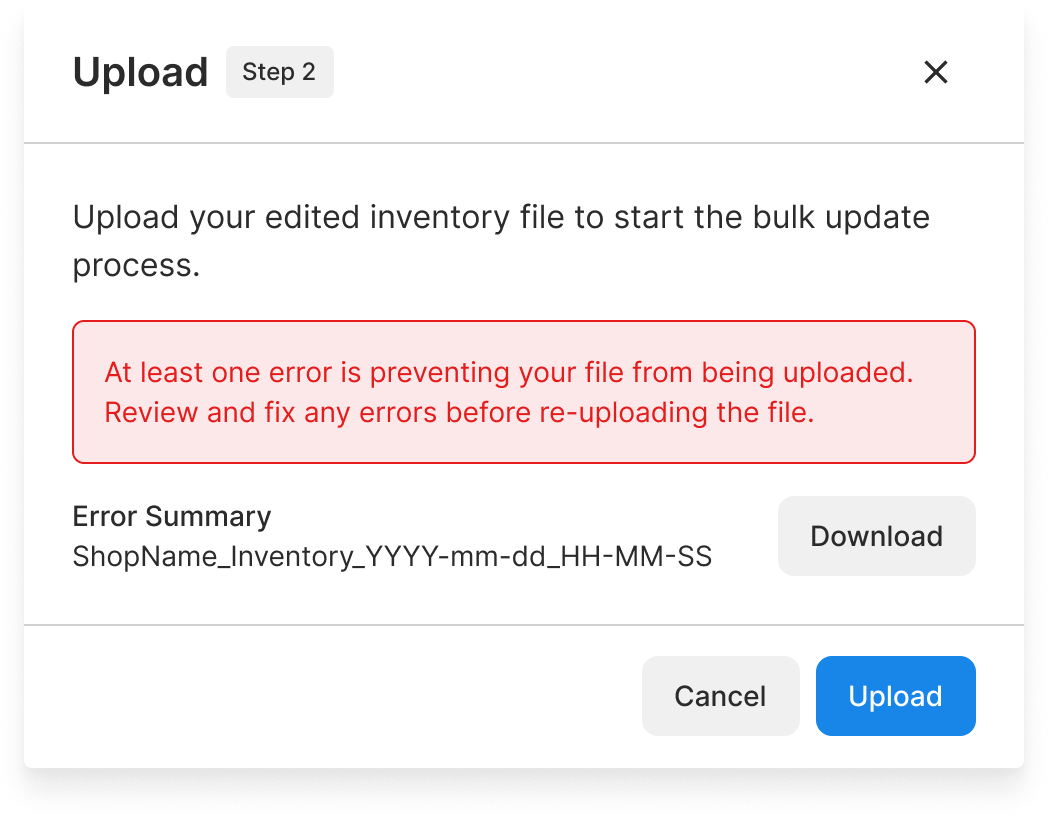
A: The system will flag errors and provide a detailed error report for you to correct and re-upload.
Q: Can I add/delete parts with this tool?
A: No, this tool currently only supports updating existing parts. Parts cannot be added or deleted in this version.
Q: What permissions are required to use this feature?
A: The "Bulk Inventory Changes" permission must be enabled for your user role.
Q: Why did I get a warning about key changes during my upload?
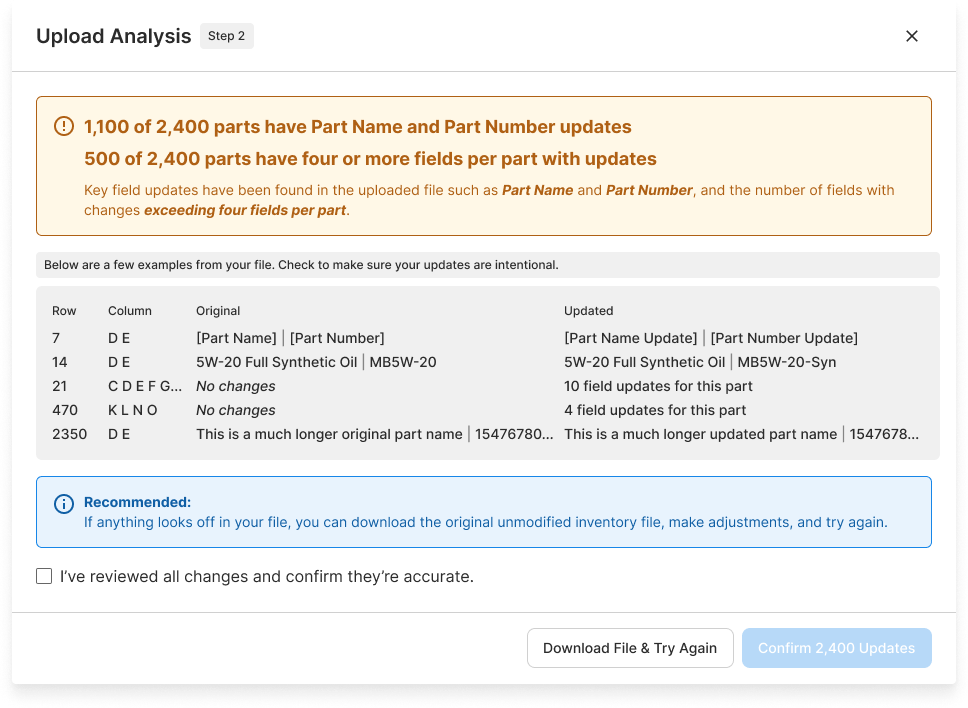
A: If your upload appears risky—for example, if you change both the Part Name and Part Number on several parts, or modify four or more fields on the same part—the system will display a warning. This warning helps you catch unintended changes before they go live.