Inside of Tekmetric, you can manage your receivables through the Accounts Receivable report. In this article, we will review the following:
- How to read your Accounts Receivable report
- How to email A/R statements
- How to print A/R statements from your Accounts Receivable report
- How to take full statement payments for your Accounts Receivable customers
- How to take partial statement payments for your Accounts Receivable customers
How to read the Accounts Receivable Report
When you navigate to the Accounts Receivable Report (Reports > Financial Reports > Accounts Receivable), you'll be taken to the Customer view. This view displays:
- The A/R balance per customer in your shop
- The age of the A/R balance per customer in your shop (0-30 days, 31-60 days, etc.)
- The total A/R balance in your shop (all customers combined)
- The age of the total A/R balance in your shop (all customers combined)
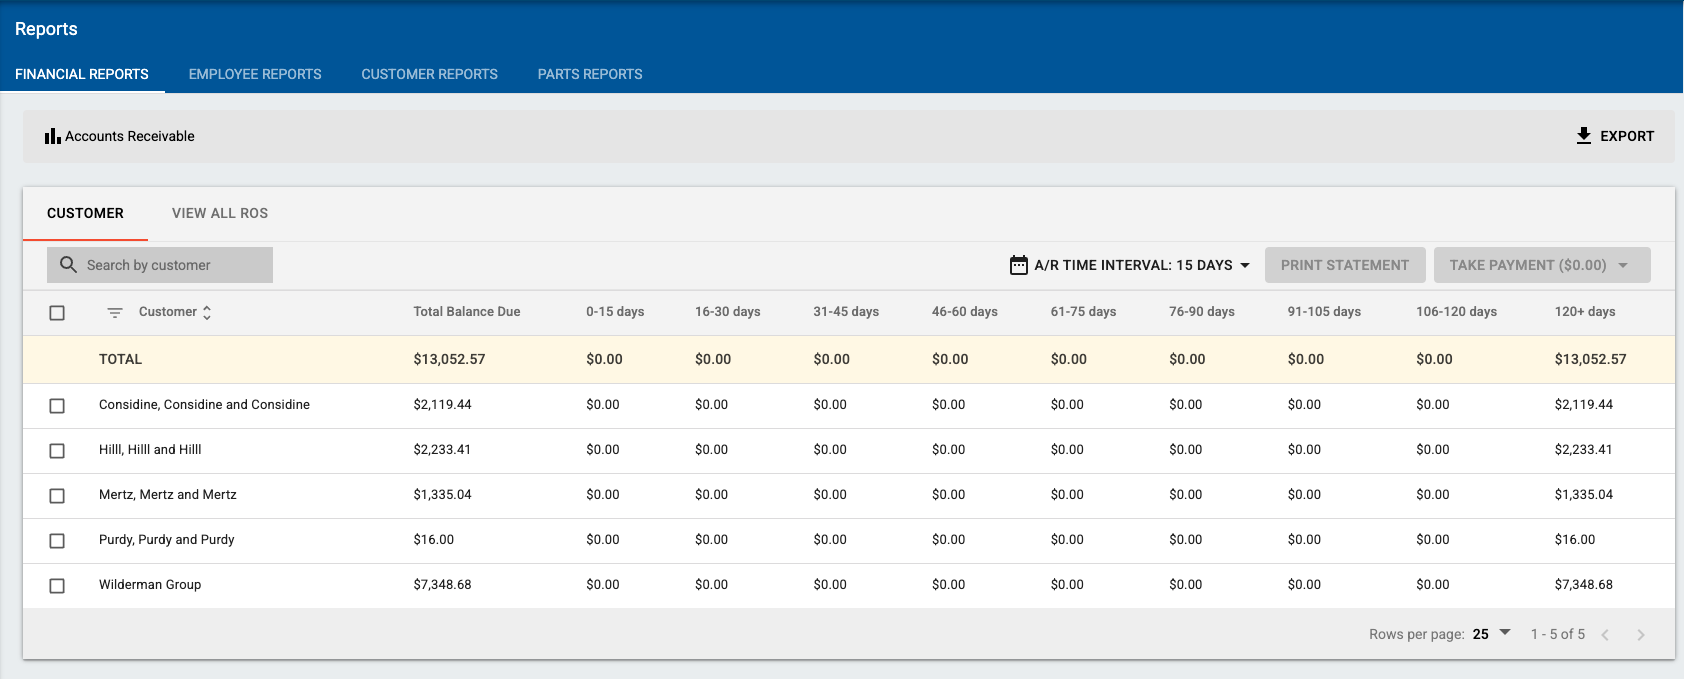
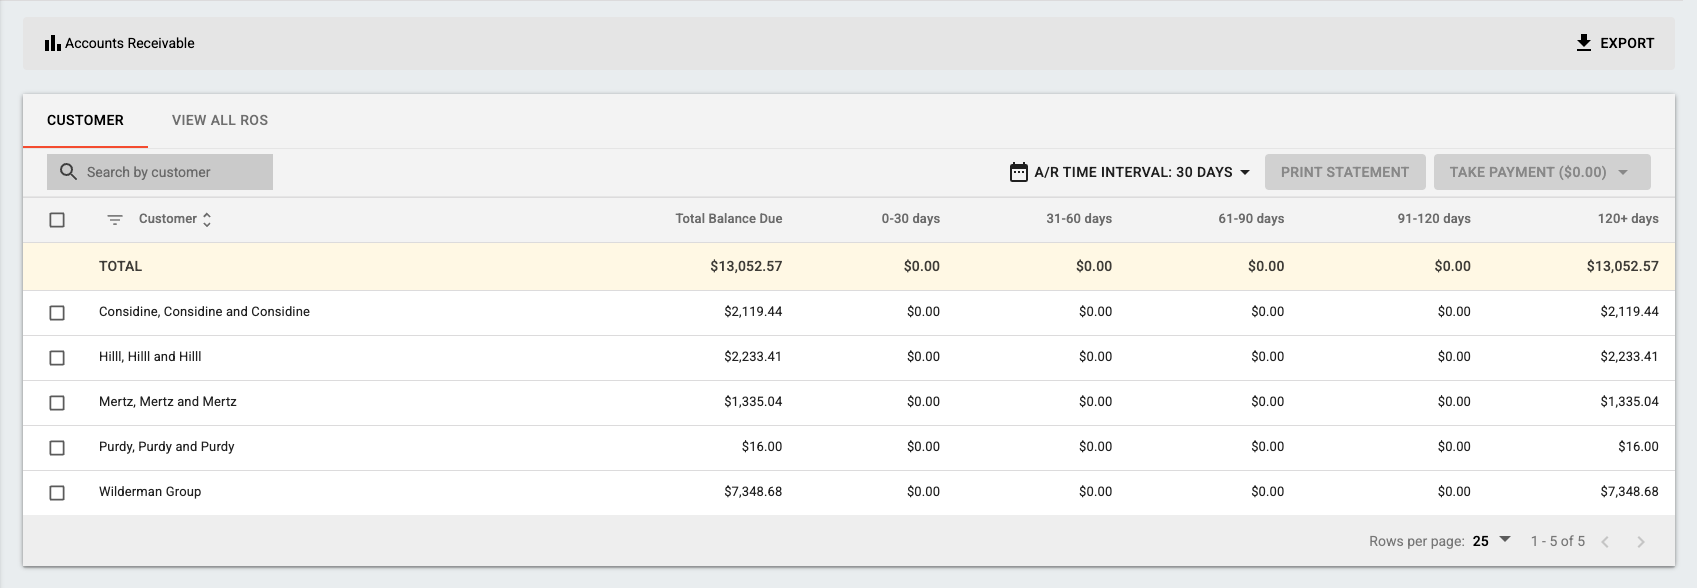
If you'd like to change the age ranges displayed in the report, you can use the A/R Time Interval filter. Your choices are 10, 15, 20, and 30 day ranges. Your choice will change the format of the table to display the range you've selected.
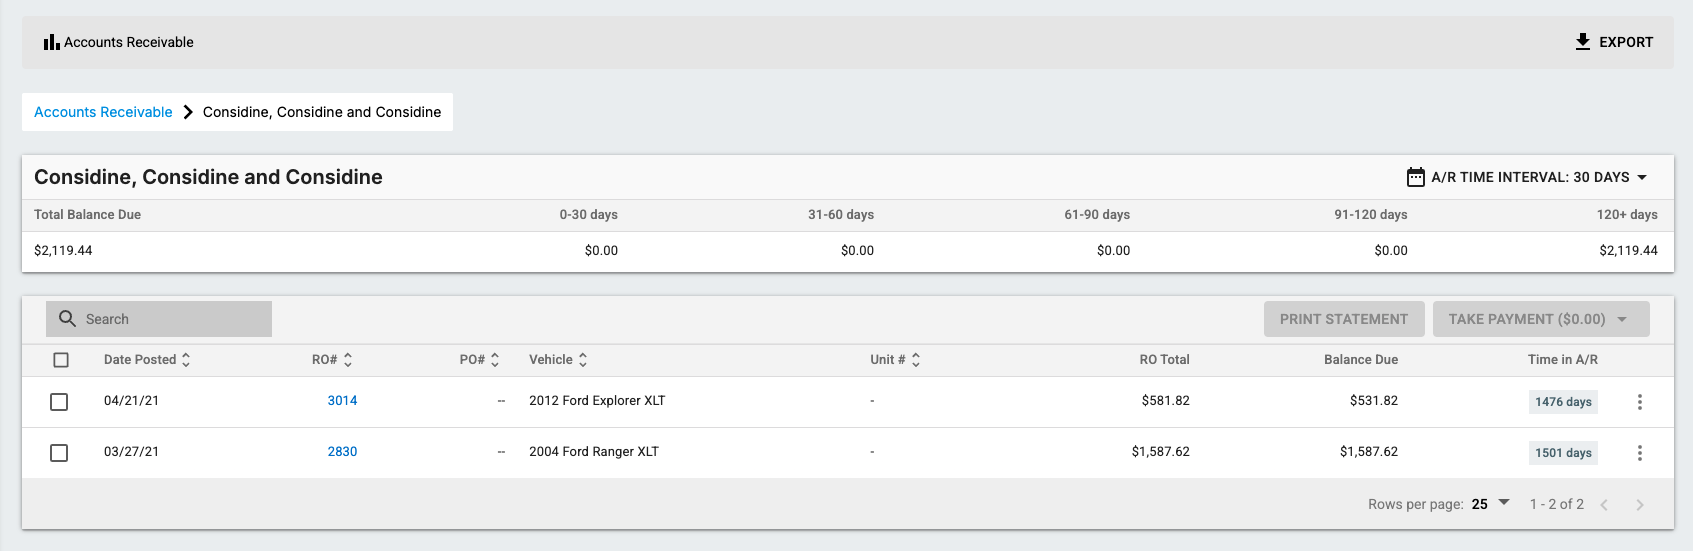
You can select a customer to be taken into that customer's A/R details page. This page displays the customer's total balance and age of the balance, along with a list of all ROs for the customer that still have an A/R balance due.
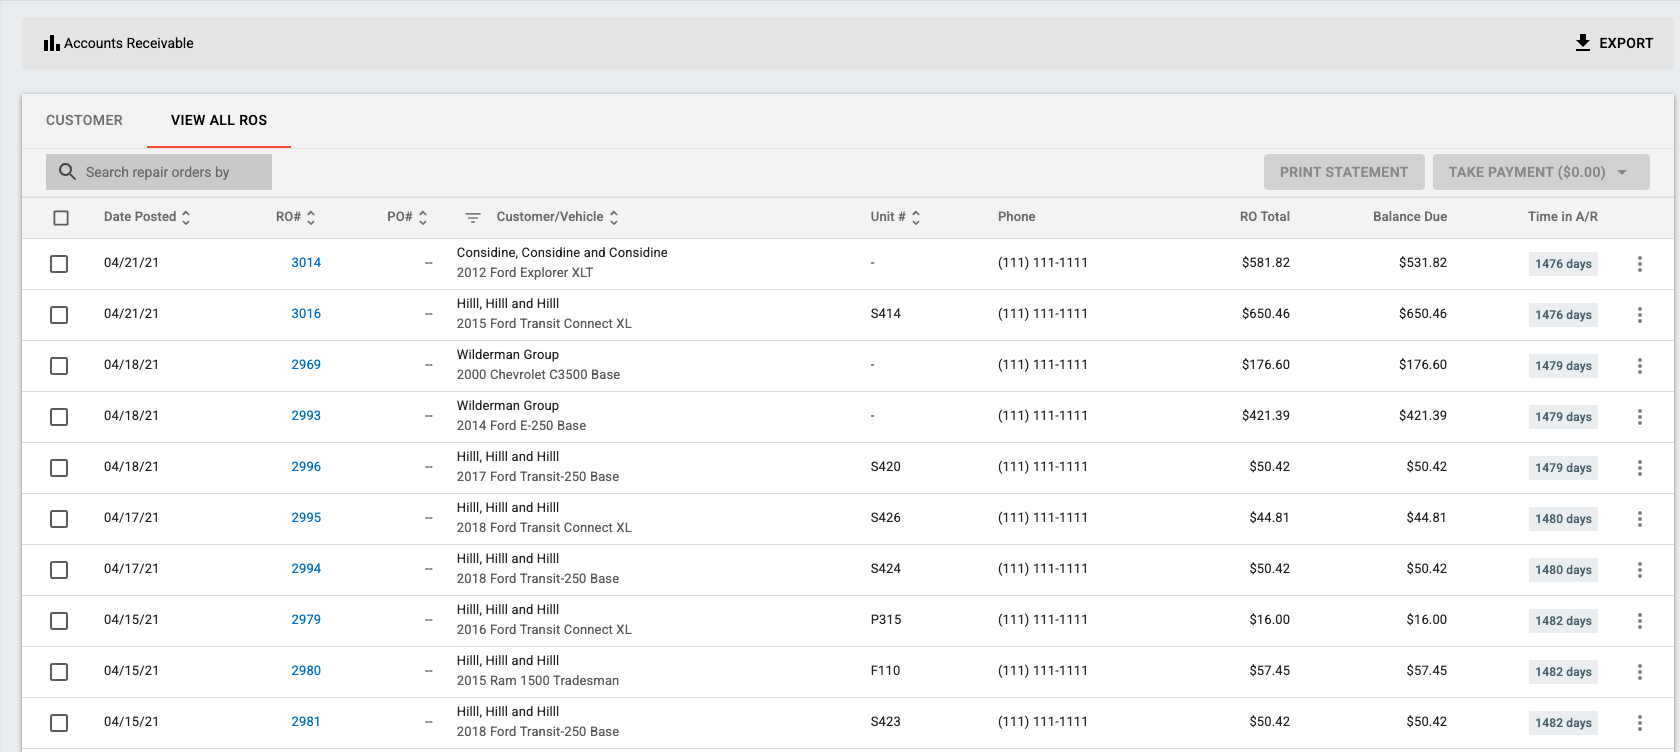
The View All ROs tab in the report is simply a list of all ROs in your shop that have been sent to A/R and still have a balance. It is basically a replica of the "old" Accounts Receivable report (without the graph).
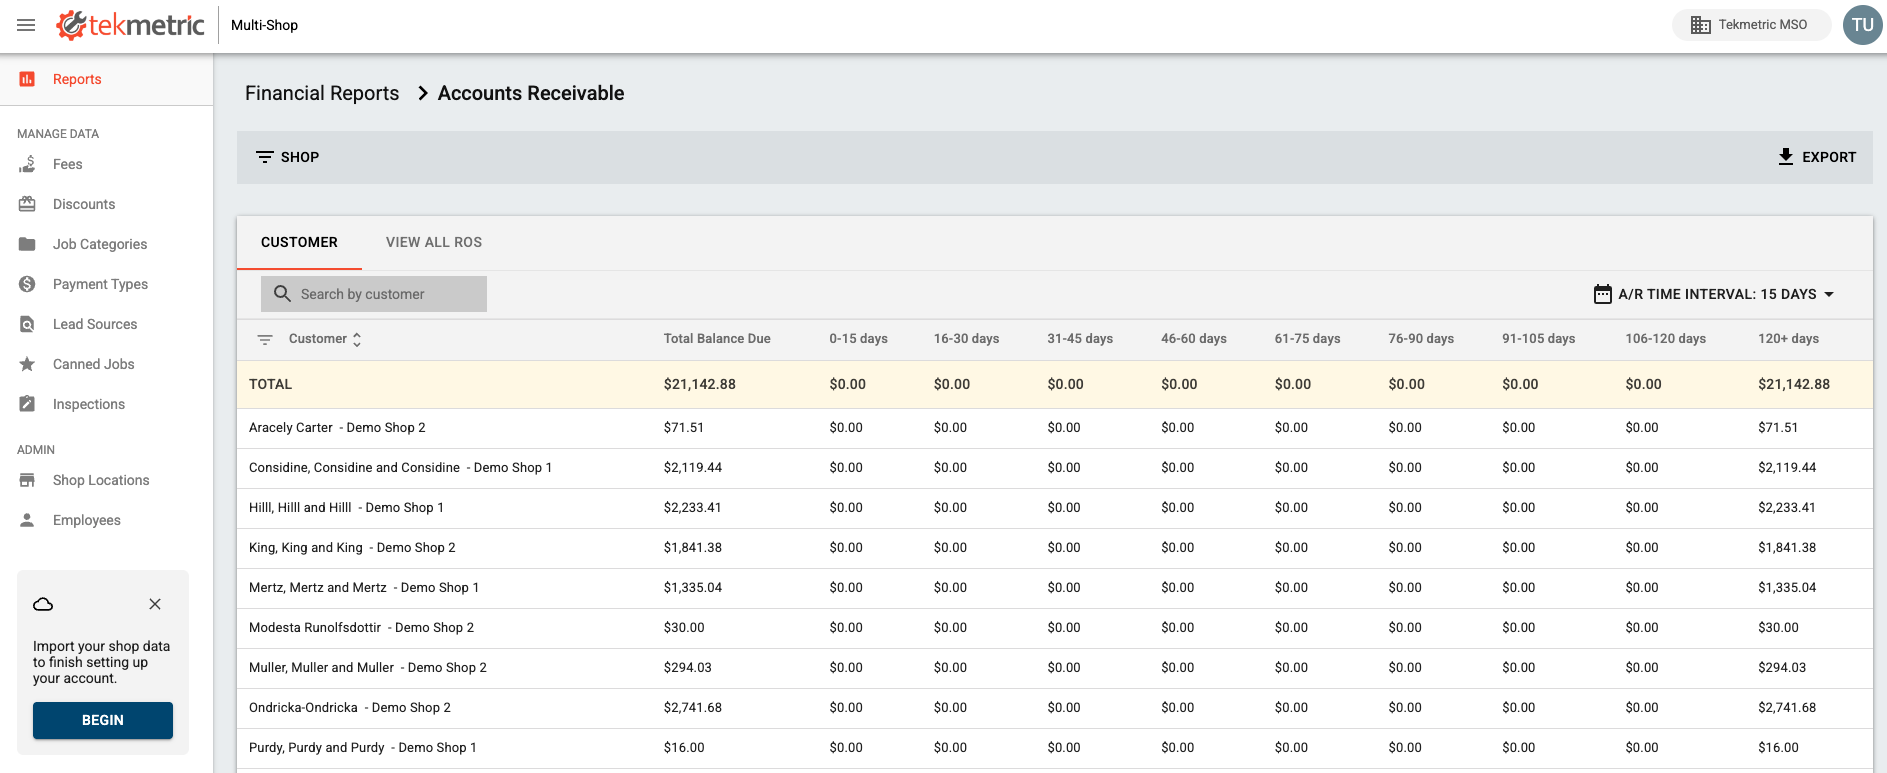
The Multi-Shop version of the Accounts Receivable Report has been updated with this new format as well. It contains the Customer tab, the customer details page, and the View All ROs tab. You can read more about Multi-Shop Reporting here.
These new report views offer different ways to select customers / invoices to perform actions on, such as printing statements and taking payments (described below in the article).
- If you want to take action on a customer's entire balance (all of their invoices), you can select their name in the Customer view of the report
- If you want to take action on specific invoices, you can individually select them in the detailed view for a customer (after clicking on the customer's name in the Customer view) or within the View All ROs view of the report
- If you want to take action on ALL of your customers' balances, you can select the "Select All" checkbox at the top of the Customer view of the report (next to the "Date Posted" header).
How to Email A/R Statements
This video contains a high level overview of how to email A/R statements. For a more detailed description, please continue reading below!
You can batch email A/R Statements and any associated invoices to your customers directly from Tekmetric. Within the following locations, you'll find an Email button next to the Print Statement button:
- All views of the A/R Report
- Customer Profile -> Customer Details -> Repair Orders -> A/R
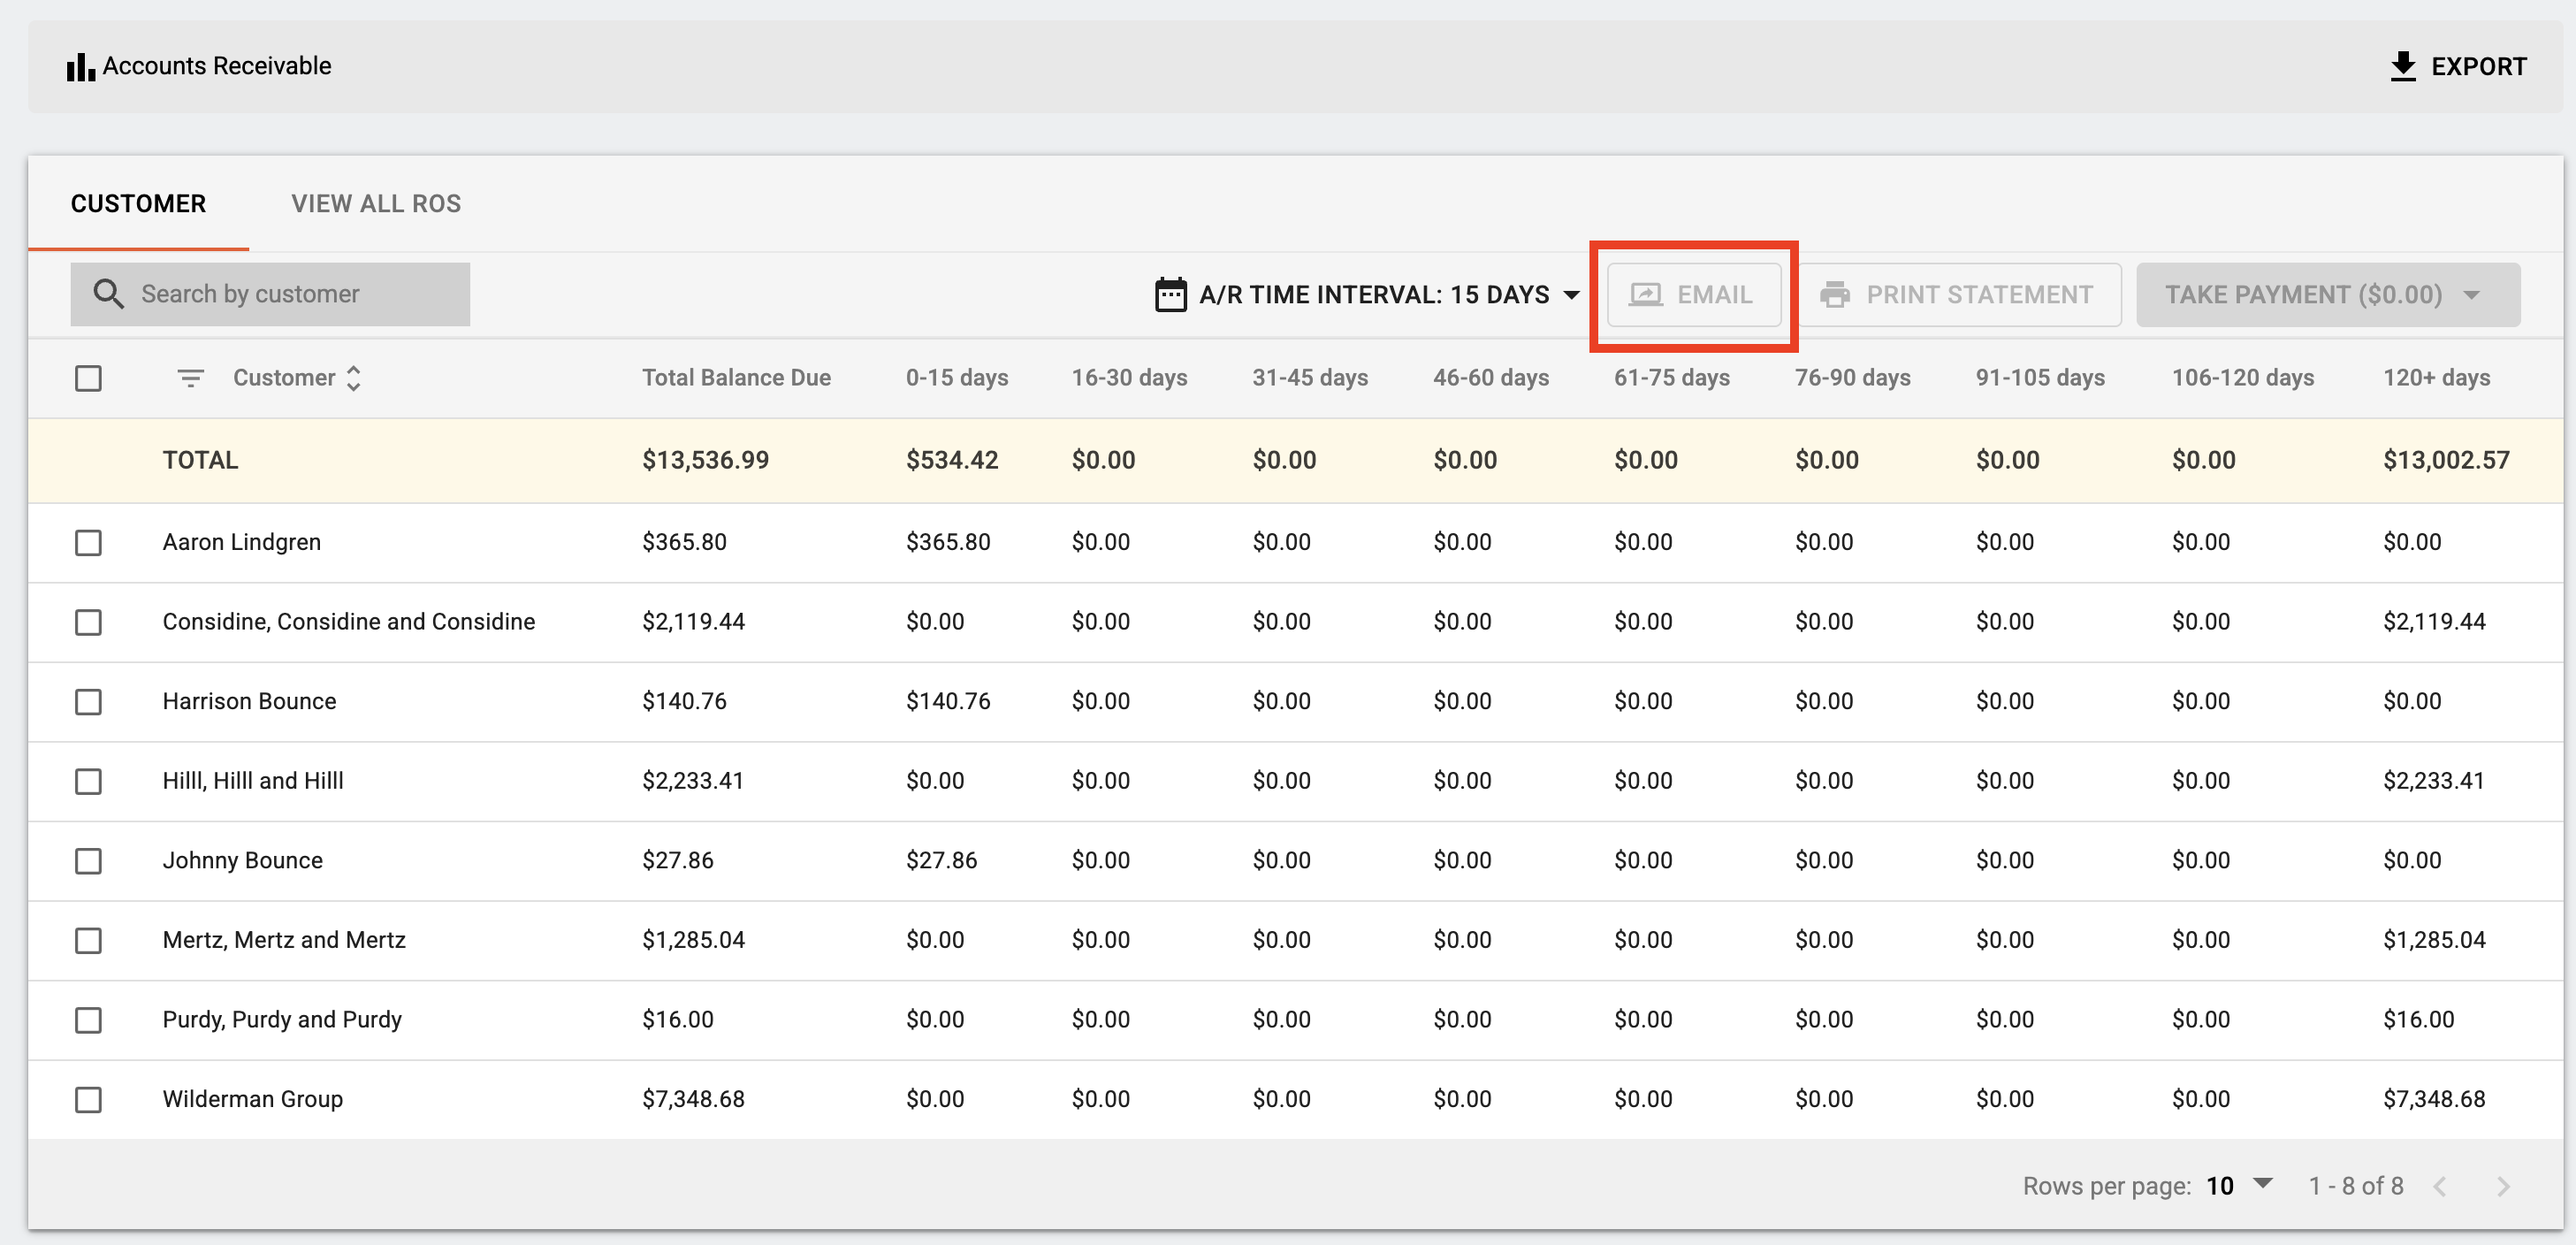
This button will remain disabled until you've selected at least one repair order to generate a statement for.
- If you want to email all your customers at once, select ALL customers in the Customer view of the A/R Report or ALL ROs in the View All ROs view of the A/R Report.
- If you want to generate a statement for one customer's entire A/R balance, you can select the customer in the A/R Report.
- If you want to generate a statement for just part of the customer's balance, you can pick and choose which ROs to include either within their customer profile or their individual view in the A/R Report.
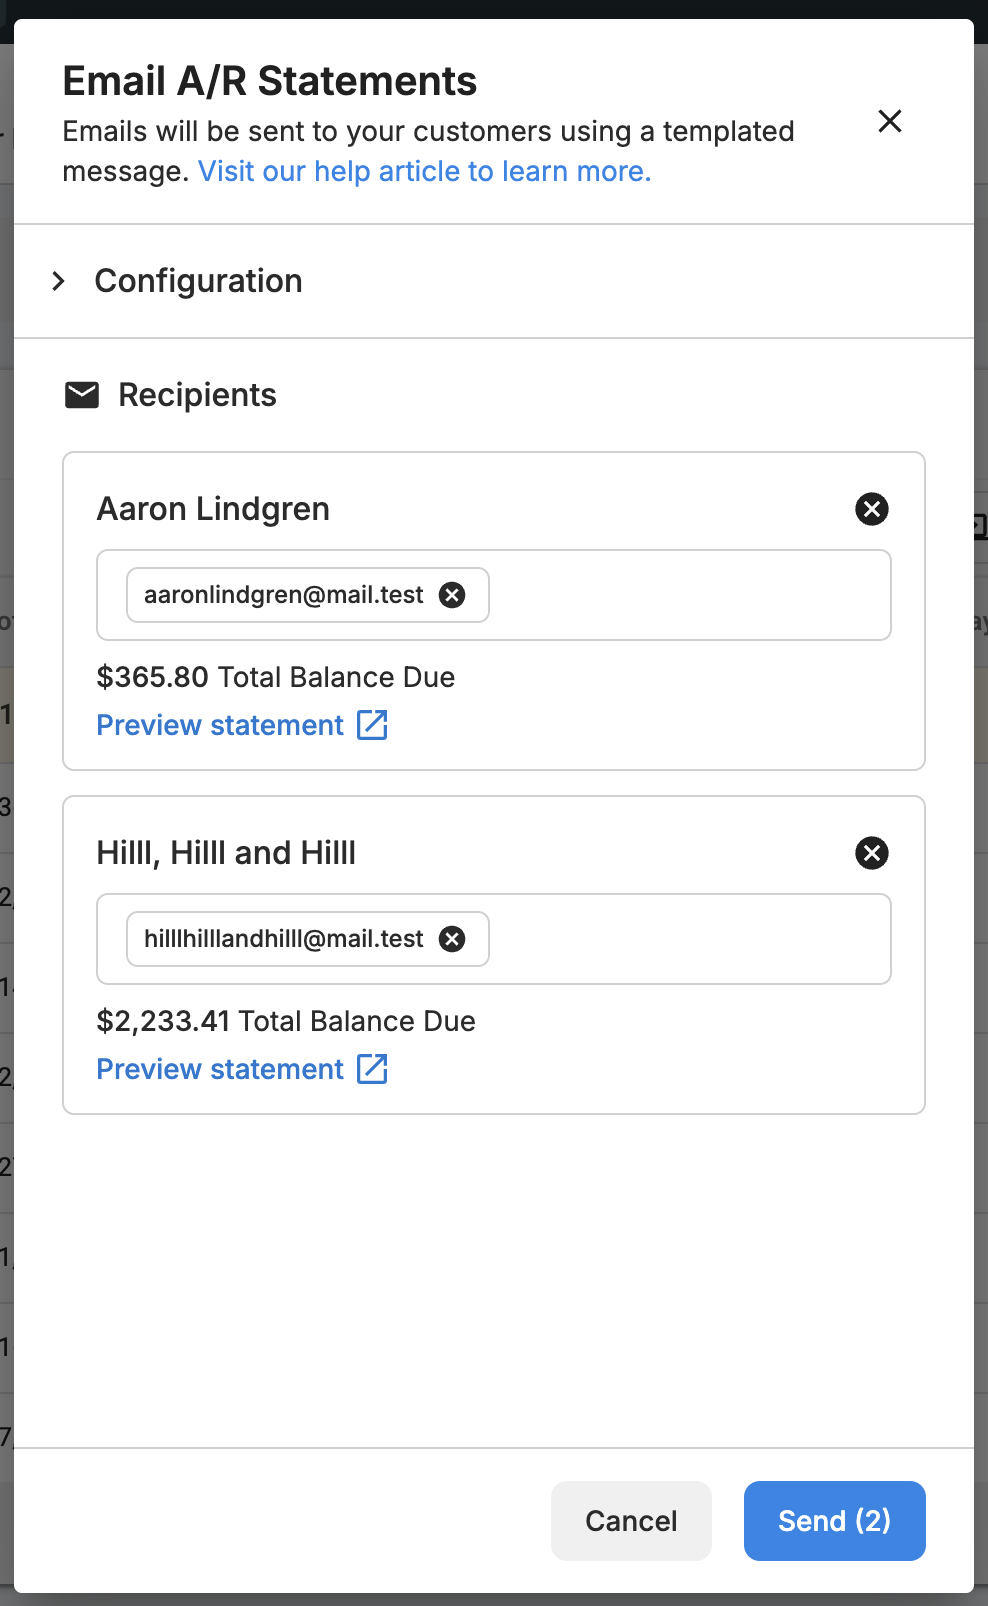
Once you've selected which ROs to generate a statement for and select the Email button, you'll see a modal like the one below. In the example below, I've selected two customers to send emails to. This means that two separate emails will be generated - one to each customer.
In this modal, you can:
- View the customer's name and email. You can choose to edit the recipient email for the customer in this form if you want, but this will NOT change the customer's email on file.
- View the total balance due for the customer (this depends on which ROs you've selected to generate a statement for)
- Preview the statement itself. When you select this option, the system will open the PDF statement in a separate tab within your browser.
If you open up the Configuration section of the modal, you can change a few different settings that will apply to ALL A/R Statement emails to ALL customers that you've selected.
- Reply-to email: You can choose which email address that your customers can reply to whenever they receive an A/R Statement email from your shop.
- Include Cc or Bcc: If you want to include any Cc or Bcc emails in ALL emails, you can do so. We recommend including your accounting email address as a Cc so that you have a record of all sent statements.
- Include invoices: When this setting is ON, all repair order invoices associated with the A/R Statement will be automatically appended to the statement PDF. You can choose to turn this off if you like.
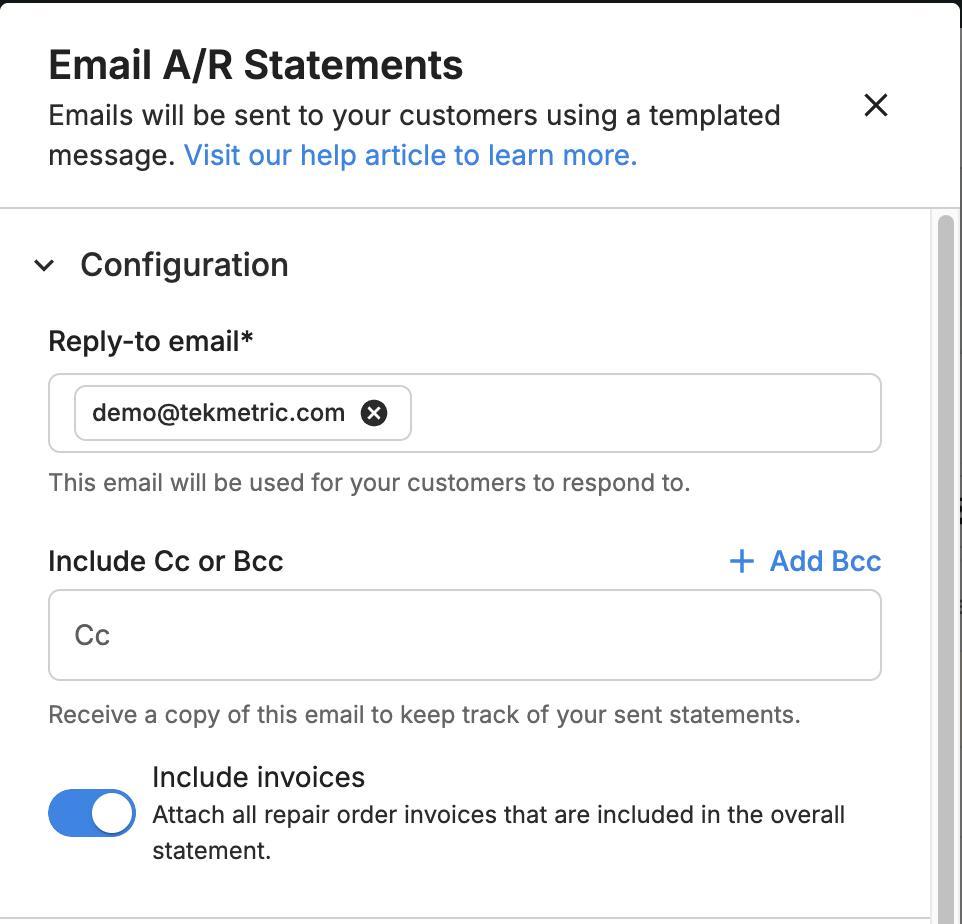
Once you've made your settings choices and select Send, all selected customers will receive an email with their A/R statement and any associated invoices!
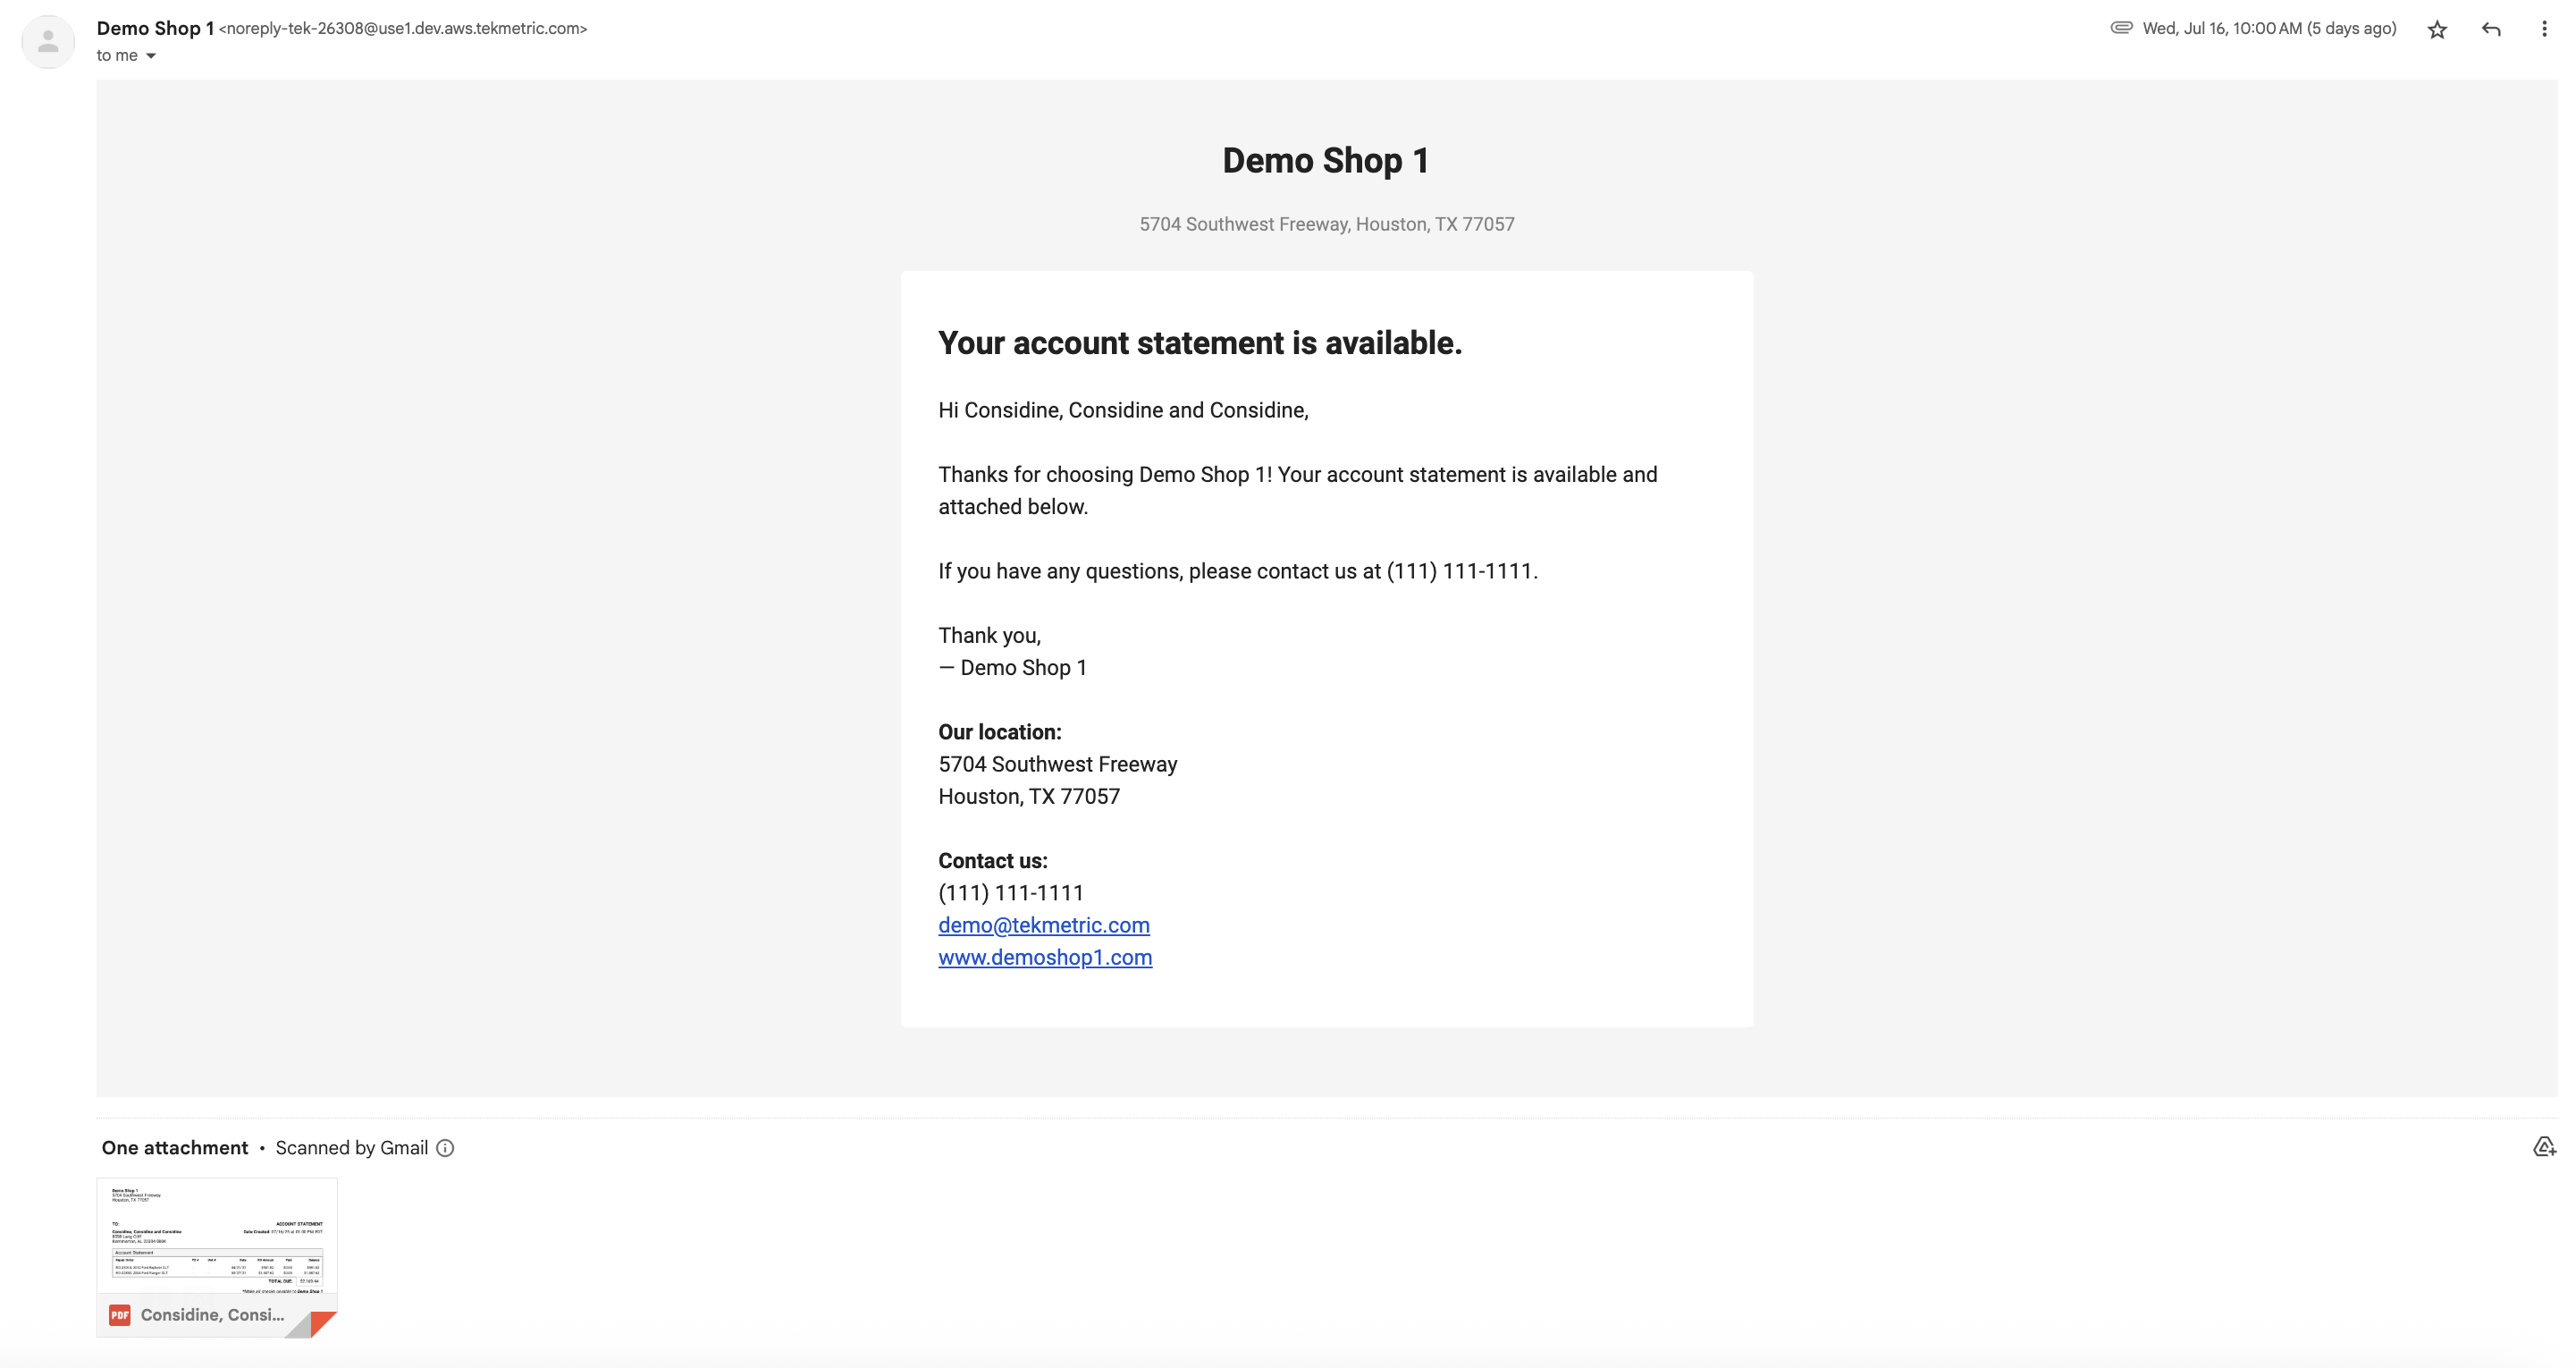
Below is an example of how this email looks. The A/R statement and associated invoices will be attached to the email as a PDF.
How to Print A/R Statements
You can batch print A/R Statements in Tekmetric from the Accounts Receivable Report.
- To access the report, use the main menu on the left to go to Reports and then choose the Accounts Receivable Report.
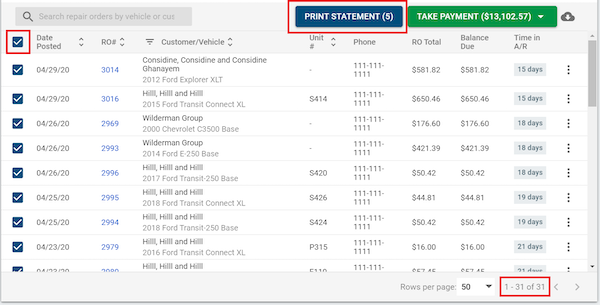
- From within the report, ensure the number of records you are printing is maximized to include all records on one page.
- Click the very top check-box nest to the Date Posted header. This will auto-select all the A/R records and accumulate them into the correct number of statements depending on how many unique customers there are needing statements.
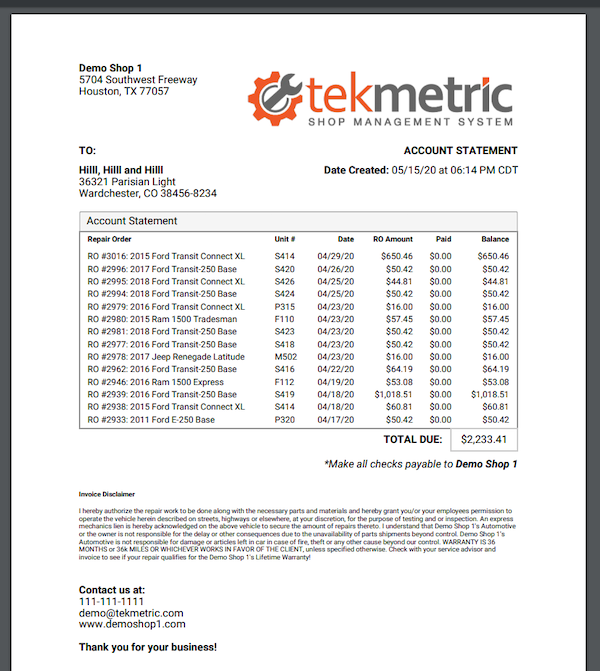
- Click Print Statement. PDF pages will generate that you can easily print. They are designed to be able to fold and slide into window mailing envelopes.
How to take Full Statement Payments
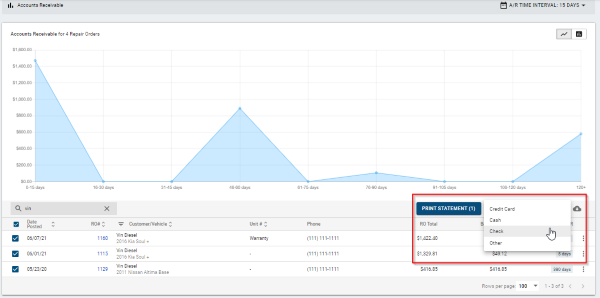
- Select the invoices you will like to pay for a particular customer/account.
- Click the green Take Payment button and select the payment method.
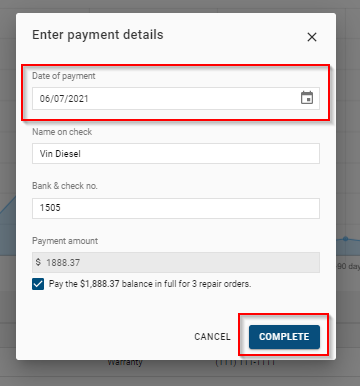
- Confirm the date of payment is correct or adjust as needed.
- Click the blue Complete button.
How to take Partial Statement Payments
If a customer is making a partial payment you will complete the following:
-
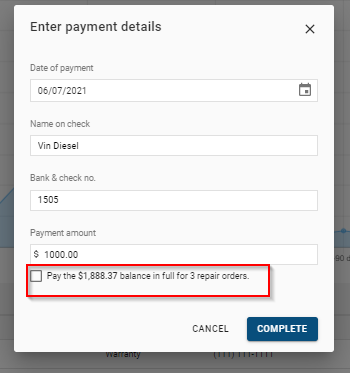
Uncheck the box pay the balance in full.
- Enter the amount that is to be paid in the payment amount box.
- Click the Blue Complete button.