Overview
Part Classification is a field on each inventory part that determines which jobs that part appears in when building an estimate. Setting a classification on your inventory parts ensures they show up automatically when adding parts to a job — saving time and reducing manual lookup.
Why this Matters
Part Classification isn’t just a filing system; it’s the engine that powers your shop’s speed and accuracy. If a part does not have a classification, it will not appear as an option when adding parts to a job from your inventory.
Properly classified parts ensure:
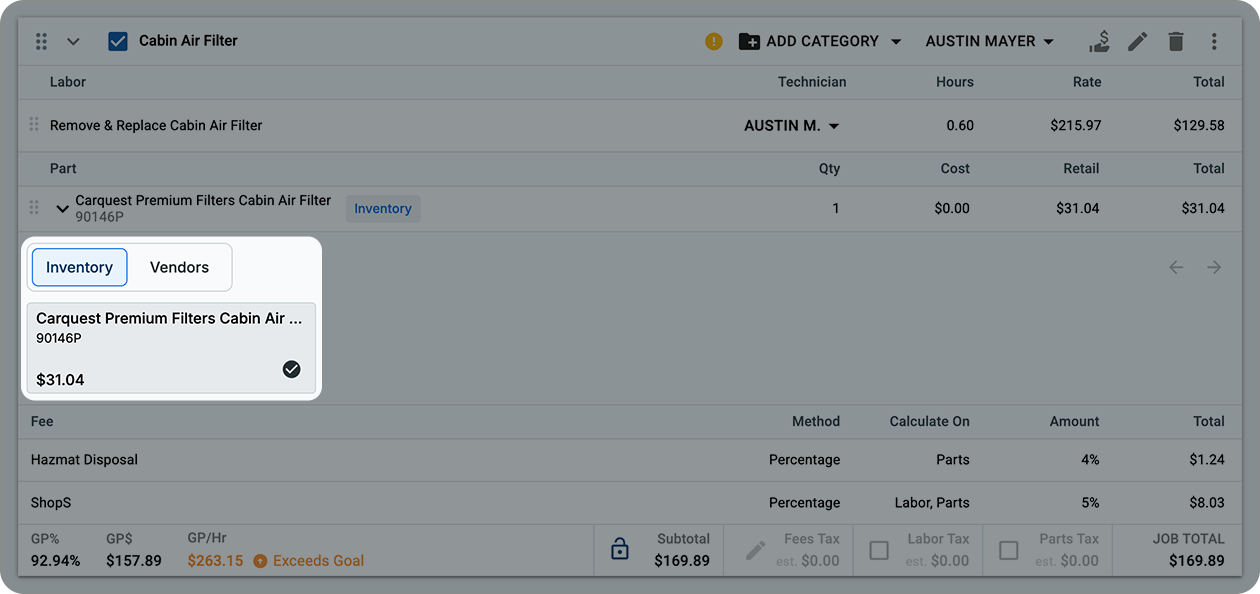
Zero "Invisible" Inventory: Ensure your parts are actually selectable when building an estimate. If it isn't classified, your team can't find it.
Faster Estimates: Service Advisors don't have to hunt. The right parts find the right jobs automatically based on their "identity."
Reduced Errors: Prevents "generic parts" from being added to ROs, ensuring you charge the correct price for every install.
Cleaner Data: Your end-of-month reports will give you a true picture of your high-margin vs. low-margin services.
Example: If your 0W-20 Full Synthetic is classified as Engine Oil, it populates the estimate instantly. Without that classification, it won't show up in the search at all, forcing your advisor to manually look up the part or create a one-off entry.
Where to Find it
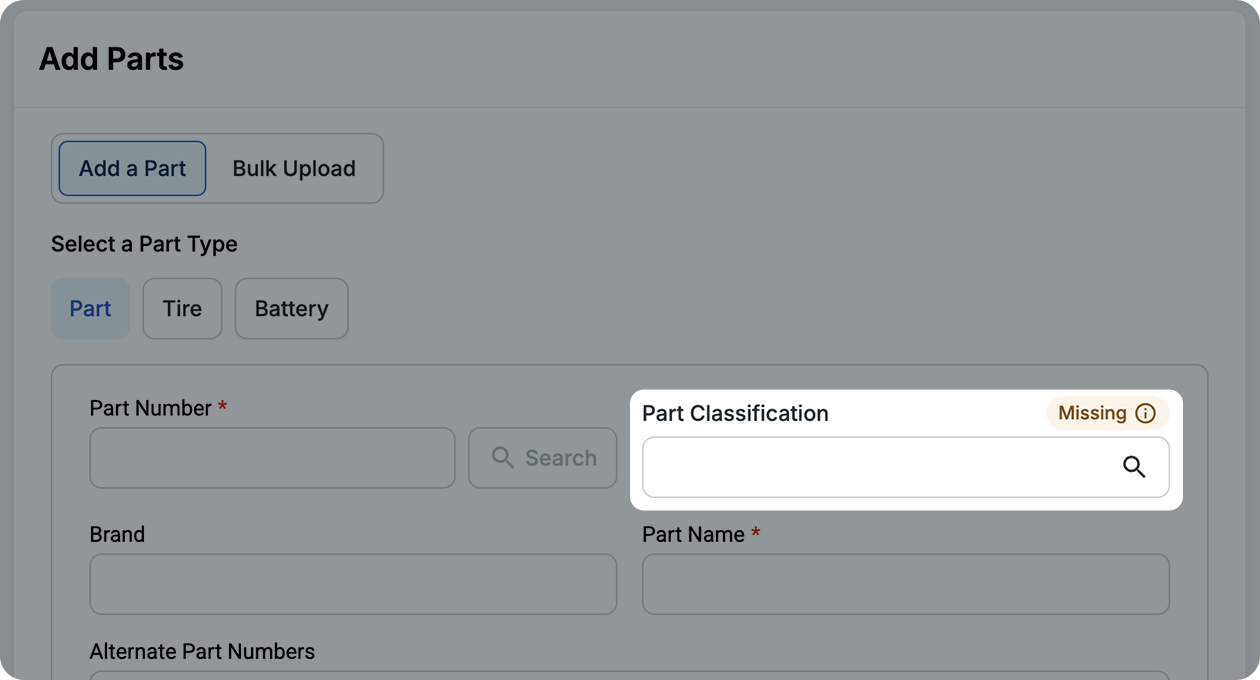
Part Classification is located on the Add Part and Edit Part forms in your inventory. If a part doesn't have a classification set, a "Missing" indicator will appear next to the field label.
Know the Difference: Part Type vs. Part Classification
It is easy to mix these up, but they handle different jobs:
Part Type: The "Big Bucket." This tells the system if the item is a standard Part, a Tire, or a Battery. This changes which data fields (like DOT numbers) are available.
Part Classification: The "Identity." This tells the system exactly what the part is (e.g., Brake Pad or Alternator) so it can automatically jump onto the right job on an estimate.
Setting a Part Classification
Step 1: Go to Inventory and open the part you want to update.
Step 2: Ensure your Part Type (Part, Tire, or Battery) is correct.
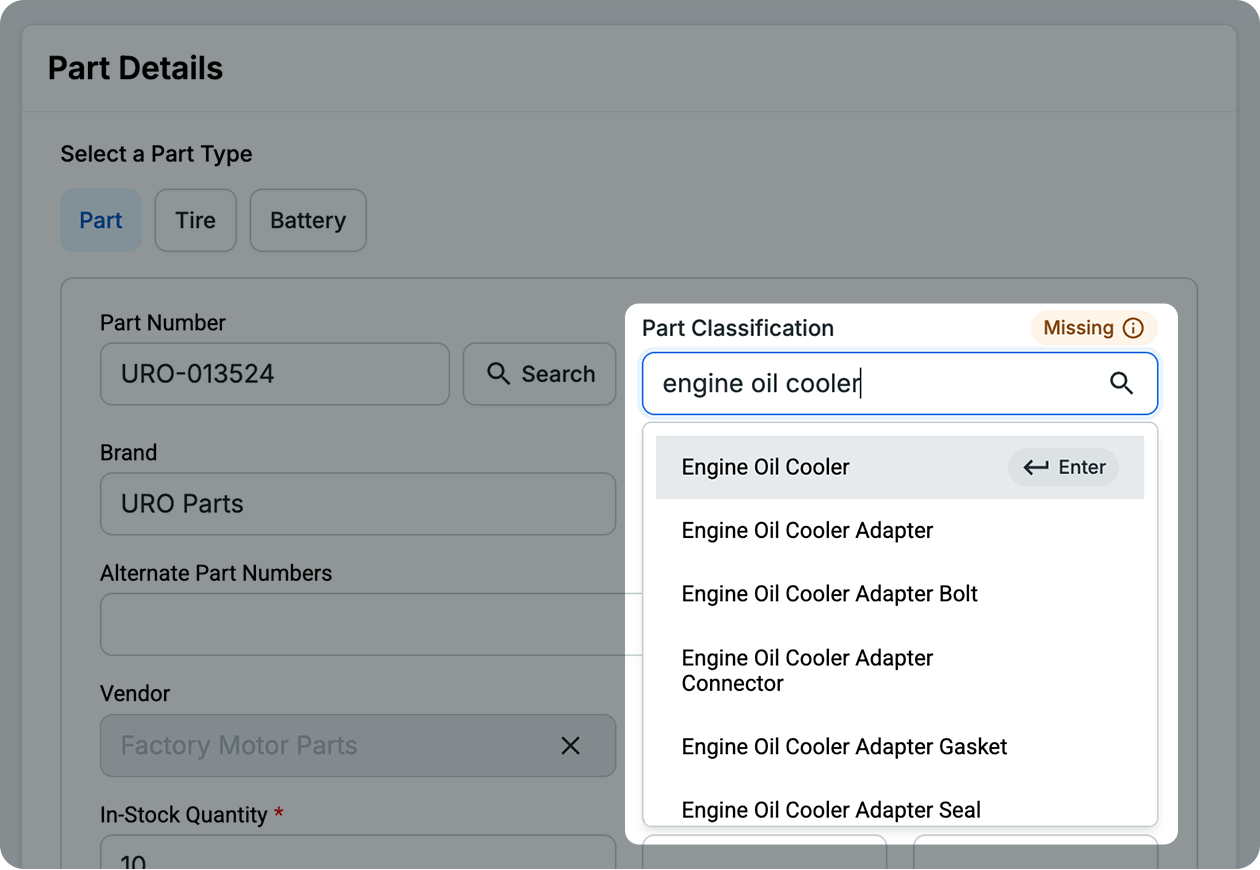
Step 3: Select the Part Classification field and type a keyword to search.
Step 4: Select the classification that best describes the part and click Save.
Step 5 (Verification): Open a relevant Repair Order and add the job; your part should now appear automatically under the Inventory tab.
Tips for Finding the Right Classification
Classification names are standardized and may differ from what the part is commonly called. If a search doesn't return the expected result, try a broader or different keyword.
For example, searching "Starter" returns results that begin with that word — but the correct classification is "Starter Motor." Searching "Motor" or "Starter M" will surface it.
Note: The search dropdown shows a maximum of 50 results. If you don’t see the specific classification you need, keep typing to narrow the list down rather than scrolling.
| If you're looking for... |
Try searching... |
Why? |
| Starter |
Starter Motor |
The system uses formal mechanical names. |
| Oil filter |
Engine Oil Filter |
"Oil" is too broad; "Engine" narrows it down. |
| Brake Line |
Brake Hydraulic Line |
Specificity helps the system map to the right job. |
| Wiper Blade |
Windshield Wiper Blade |
Standardized naming includes the full name. |
Already see a Classification on your Part?
Some inventory parts may already have a classification set. Tekmetric automatically classified as many existing parts as possible based on part name and part number. Review these to confirm they're correct. If a classification doesn't look right, choose a different one.