Refund and part return processes within Tekmetric involve precise workflows based on the situation. Below, we outline the key steps to handle these scenarios efficiently.
How to Manage the Return Orders Area
The Return Orders area in Tekmetric is designed to track and manage parts or cores that are being sent back to your vendors for a credit or refund. For our guide on returning and managing cores specifically, click here to view an in-depth guide.
Here is a comprehensive guide explaining each section of the Return Orders workflow and how they function:
Click on the Orders main menu tab in Tekmetric, then click on the Return Orders tab at the top of the page.
- You can use the filters and white search bar near the top to find the order you're looking (i.e. search by part number, part name, vendor name, etc.)
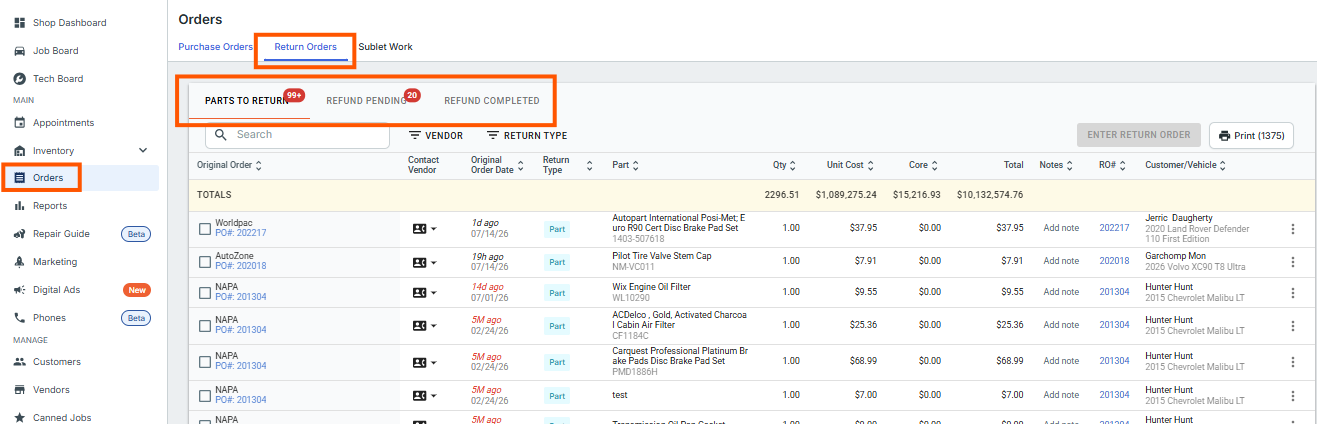
1. "Parts to Return" Tab
This is the initial staging area for any part or core that has been previously flagged for return from a repair order or inventory.
How it works: When a service writer or inventory manager removes a part from a job or marks it to be returned, it appears here first. Inside this screen, you can filter your returns by vendor or part type.
Next Steps: You must click the checkboxes on the far left to select all the parts that belong to a single vendor, and then click the blue Enter Return Order button in the corner.
-
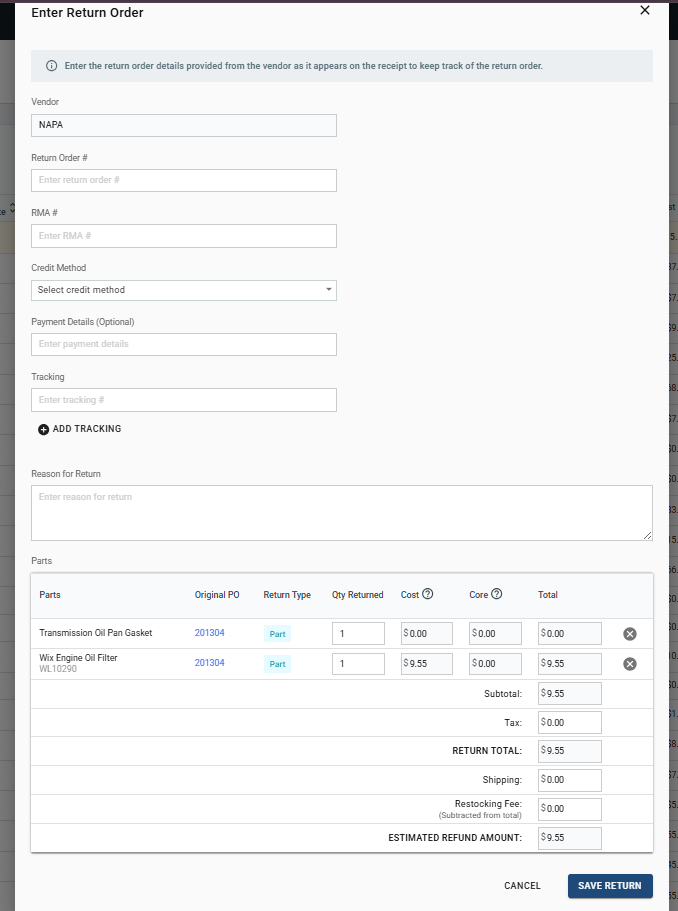
A window will appear prompting you to enter the final return order details, where you can account for specific adjustments:
Action Item: Click Save Return to move the items to the next phase.
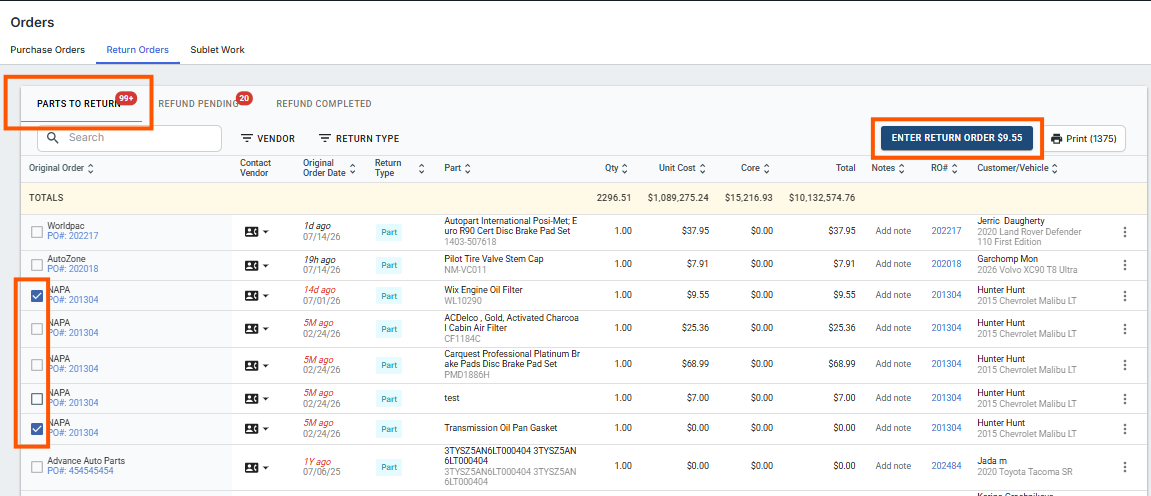
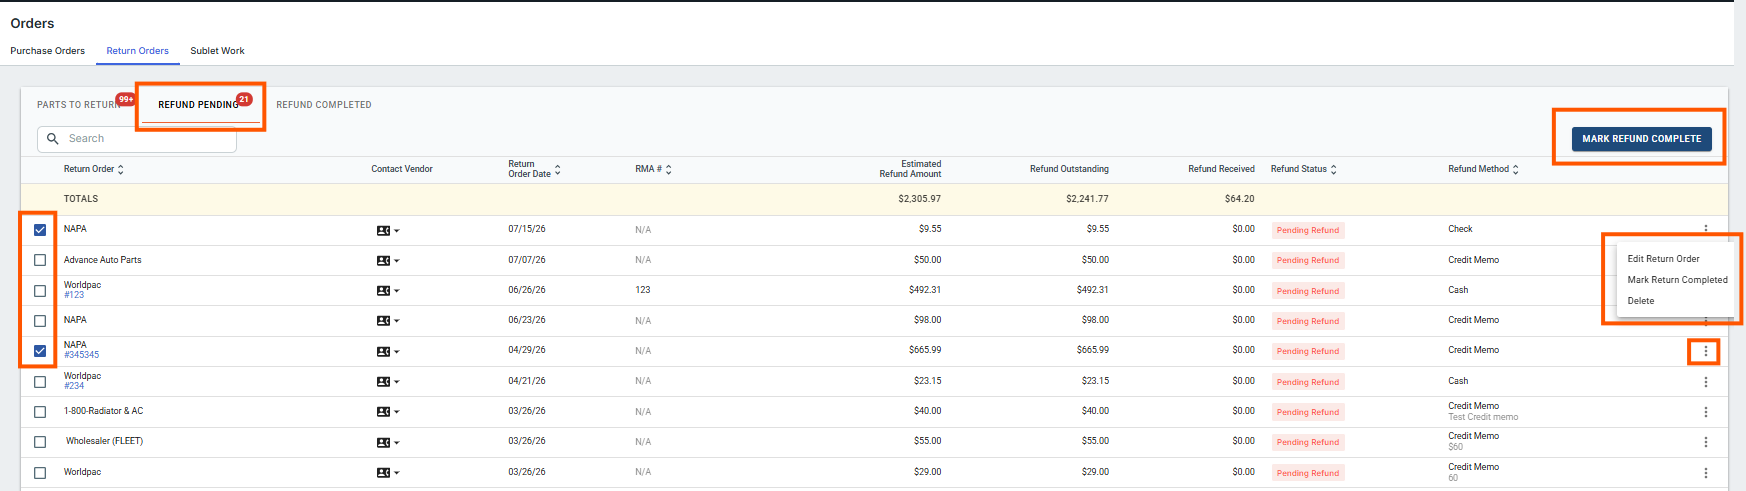
2. "Refund Pending" Tab
This section acts as your shop's "accounts receivable" tracking system for vendor credits.
How it works: Saved return orders remain in Refund Pending while parts are in transit or while you await a vendor credit memo. This creates a clear "accounts receivable" log for credits owed to your shop.
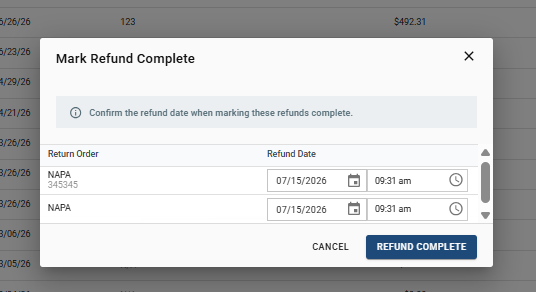
Next Steps: Once you receive the vendor's credit memo or refund invoice, locate the order in this tab, select it, and click Mark Refund Complete.
3. "Refund Completed" Tab
This is the final historical log for your finalized return transactions.
How it works: Clicking Mark Refund Complete moves the transaction out of your active ledger and into Refund Complete, closing out the cycle. Parts stay here permanently for future reference.
Key Concept (Back Office/Accounting Link Integration): Marking a refund complete is the financial trigger in Tekmetric. If your shop utilizes the QuickBooks integration via the Accounting Link, completing the refund automatically pushes the transaction total (as a negative mapping to reduce costs) over to your accounting software using the exact date tied to the refund in Tekmetric.
Customer Refunds and Part Returns
Tekmetric allows handling refund scenarios through specific processes. However, returning a part alongside issuing a refund often requires reopening the repair order.
Refund Without Returning Parts
If the refund requires no part return, you can simply issue a refund invoice. A refund invoice is exclusively for refunding the customer, and it cannot accommodate part returns by itself. Key Points:
- Refund invoices are suitable when only the refunded amount needs adjustment.
- There’s no need to reopen the repair order for this process.
Refund and Return Process
When both a refund and part return are required, the repair order must be reopened. Here’s how you handle this scenario:
- Reopen the repair order in Tekmetric.
- Navigate to PartsHub
- View received parts and select "return part"
- Enter the quantity you wish to return and select "save"
Key Takeaways
- Use refund invoices for straightforward monetary refunds without involving part returns.
- Always reopen repair orders for refunds that also involve part returns, ensuring proper inventory adjustments.
- Non-integrated payment refunds can be voided and reissued without duplicating refunds, offering flexibility in invoice management.
- For more information on Refund Invoices, visit this article here!
FAQs
Why are there multiple tabs that each part return needs to go through?
Think of the returns area as a natural progression, where the part starts in the far left tab under "Parts to Return" and gradually moves to the right, going through each tab as part of its lifecycle depending on its live status.
Is there a way to bulk delete the return orders showing under the "Parts to Return" tab?
Not at this time. If you would like to clear out old returns that were not processed correctly, you will have to delete each return part line item in grouped sections by supplier or one-by-one.